Kenwood DDX7018BT Instruction Manual - Page 50
Installing the unit, Installing the unit using the mounting, bracket removed from the car,
 |
View all Kenwood DDX7018BT manuals
Add to My Manuals
Save this manual to your list of manuals |
Page 50 highlights
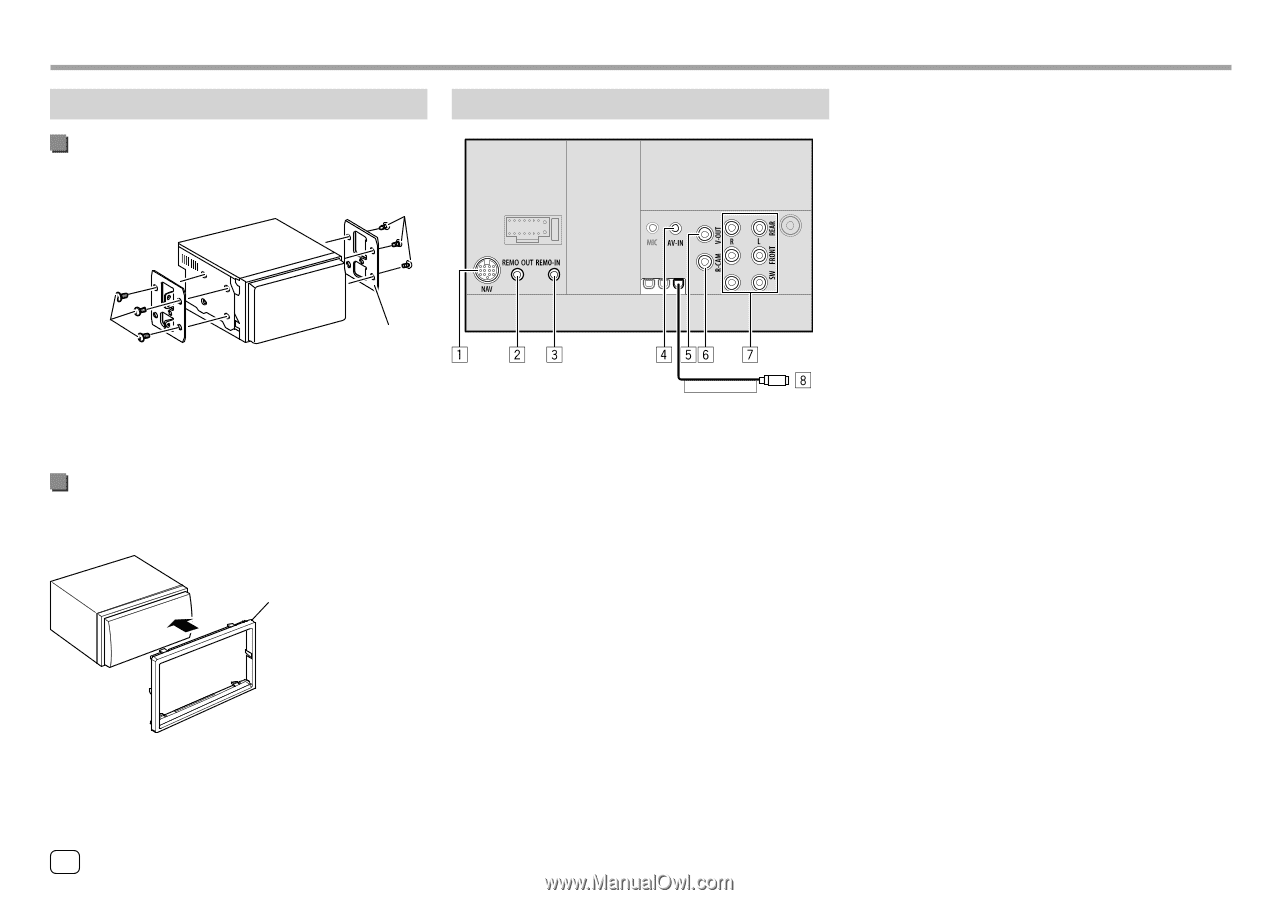
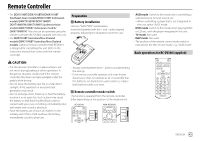
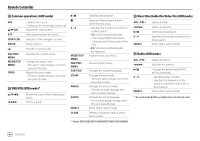
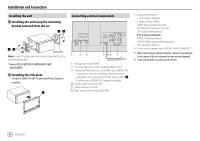
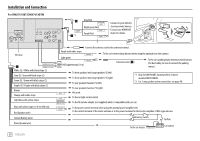
Installation and Connection Installing the unit Installing the unit using the mounting bracket removed from the car π /"* π /"* Car bracket Note: Select the appropriate screws (supplied) for the mounting bracket. * Only for DDX7018BT/DDX7018BTM/DMX7018BT/ DMX7018BTM. Installing the trim plate (Only for DMX7018BT Australian/New Zealand models) ] Connecting external components FRONT VIEW CAMERA 1 Navigation input (NAV) 2 TV tuner remote control output (REMO OUT) 3 Steering wheel remote controller input (REMO-IN) • Connect to the car's steering remote harness using the steering wheel remote input cable ([). Contact your KENWOOD dealer for details. 4 Audio video input (AV-IN) 5 Video output (V-OUT) 6 Rear view camera input (R-CAM) 7 Output terminals*1 • Left output (White) • Right output (Red) REAR: Rear speaker preouts FRONT: Front speaker preouts SW: Subwoofer preouts For 3-way crossover: REAR: Tweeter preouts FRONT: Mid range speaker preouts SW: Woofer preouts 8 Front view camera input (FRONT VIEW CAMERA)*2 *1 When connecting an external amplifier, connect its ground wire to the chassis of the car; otherwise the unit may be damaged. *2 Cable position differs according to the models. 48 ENGLISH
-
 1
1 -
2
-
3
-
4
-
5
-
6
-
7
-
8
-
9
-
10
-
11
-
12
-
13
-
14
-
15
-
16
-
17
-
18
-
19
-
20
-
21
-
22
-
23
-
24
-
25
-
26
-
27
-
28
-
29
-
30
-
31
-
32
-
33
-
34
-
35
-
36
-
37
-
38
-
39
-
40
-
41
-
42
-
43
-
44
-
 45
45 -
 46
46 -
 47
47 -
 48
48 -
 49
49 -
 50
50 -
 51
51 -
 52
52 -
 53
53 -
 54
54 -
 55
55 -
56
-
57
-
58
-
59
-
60
-
61
-
62
-
63
-
64
-
65
-
66
-
67
-
68
 |
 |