Konica Minolta C83hc High Chroma SD-513 User Manual - Page 191
Cleaning the conveyance belt of the bundle exit tray
 |
View all Konica Minolta C83hc High Chroma manuals
Add to My Manuals
Save this manual to your list of manuals |
Page 191 highlights
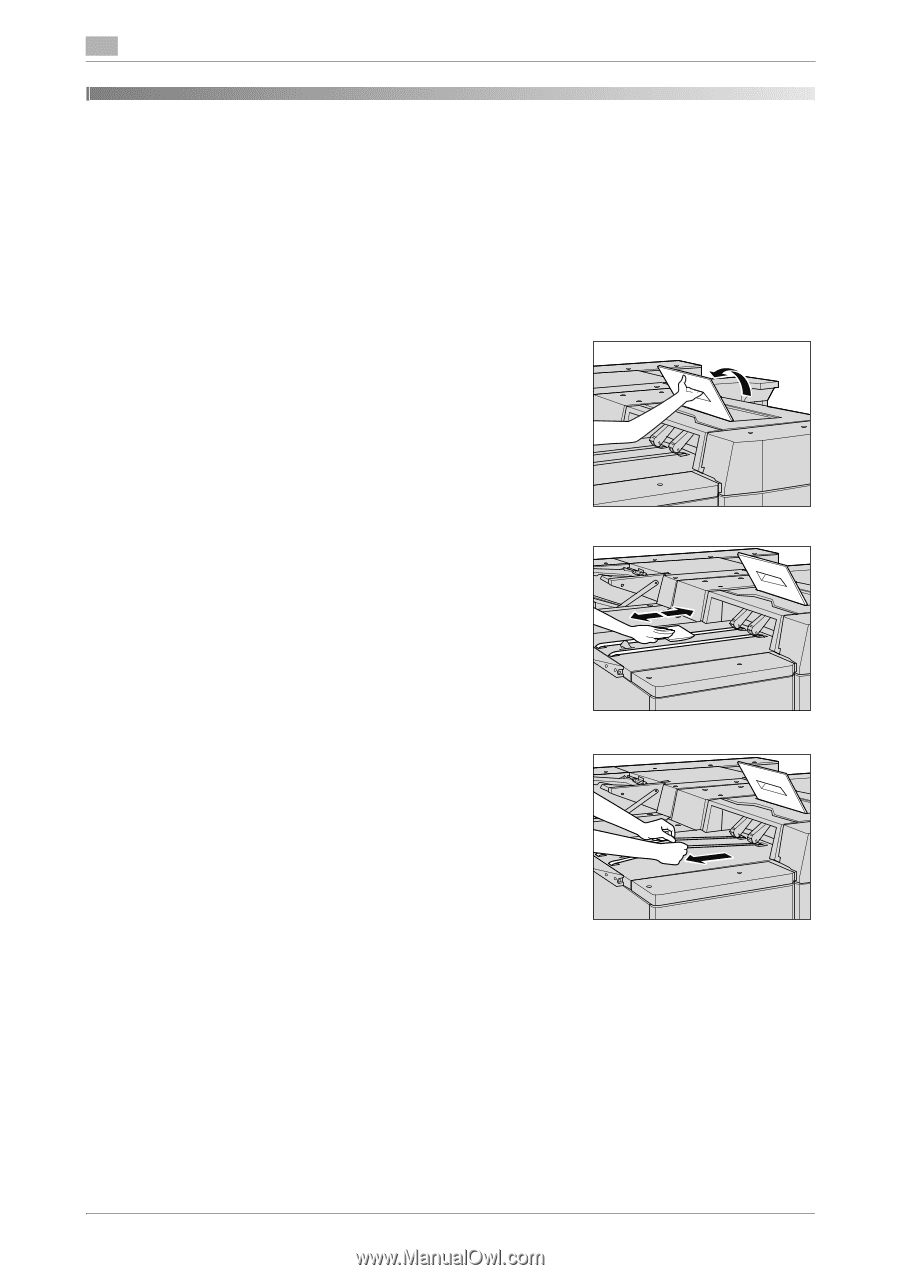
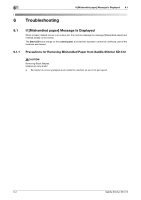
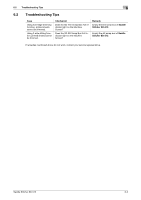
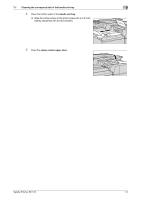
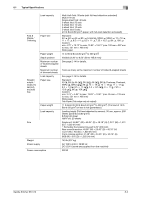
7 Cleaning the conveyance belt of the bundle exit tray 7.1 7 Cleaning 7.1 Cleaning the conveyance belt of the bundle exit tray The conveyance belt of bundle exit tray should be kept clean, otherwise soil marks may be printed. Follow the procedure below to clean the conveyance belt of bundle exit tray. In order to maintain optimum print quality, we recommend to clean it every time before using the tray. If any soil marks are found on the conveyance belt while printing, perform this cleaning procedure immediately. 1 Open the clamp section upper door. % The clamp section upper door cannot be opened while the saddle stitcher is in the initializing state. Open the clamp section upper door when the saddle stitcher exits the initializing state. 2 Clean the surface of the two conveyance belts with a soft cloth dampened slightly with alcohol (cleaner). 3 Move the conveyance belt to clean the whole length of the conveyance belt. % Raise the two conveyance belts lightly, then pull them both leftward at the same time in order to show the hidden parts. % Clean the conveyance belt using a soft cloth dampened with alcohol (cleaner). % Repeat steps 2 and 3 (about three times) to clean the whole round of the belts. NOTICE Do not pull the conveyance belt while the saddle stitcher is in the idle state. Pulling the belts with force may cause unexpected machine trouble. When pulling the conveyance belt, be sure to check that the saddle stitcher exits the idle state, then open the clamp section upper door. NOTICE Do not raise the conveyance belt higher than necessary. Or, never fail to pull the two belts at the same time. Otherwise, machine trouble may be caused. 7-2 Saddle Stitcher SD-513
-
 1
1 -
2
-
3
-
4
-
5
-
6
-
7
-
8
-
9
-
10
-
11
-
12
-
13
-
14
-
15
-
16
-
17
-
18
-
19
-
20
-
21
-
22
-
23
-
24
-
25
-
26
-
27
-
28
-
29
-
30
-
31
-
32
-
33
-
34
-
35
-
36
-
37
-
38
-
39
-
40
-
41
-
42
-
43
-
44
-
45
-
46
-
47
-
48
-
49
-
50
-
51
-
52
-
53
-
54
-
55
-
56
-
57
-
58
-
59
-
60
-
61
-
62
-
63
-
64
-
65
-
66
-
67
-
68
-
69
-
70
-
71
-
72
-
73
-
74
-
75
-
76
-
77
-
78
-
79
-
80
-
81
-
82
-
83
-
84
-
85
-
86
-
87
-
88
-
89
-
90
-
91
-
92
-
93
-
94
-
95
-
96
-
97
-
98
-
99
-
100
-
101
-
102
-
103
-
104
-
105
-
106
-
107
-
108
-
109
-
110
-
111
-
112
-
113
-
114
-
115
-
116
-
117
-
118
-
119
-
120
-
121
-
122
-
123
-
124
-
125
-
126
-
127
-
128
-
129
-
130
-
131
-
132
-
133
-
134
-
135
-
136
-
137
-
138
-
139
-
140
-
141
-
142
-
143
-
144
-
145
-
146
-
147
-
148
-
149
-
150
-
151
-
152
-
153
-
154
-
155
-
156
-
157
-
158
-
159
-
160
-
161
-
162
-
163
-
164
-
165
-
166
-
167
-
168
-
169
-
170
-
171
-
172
-
173
-
174
-
175
-
176
-
177
-
178
-
179
-
180
-
181
-
182
-
183
-
184
-
185
-
 186
186 -
 187
187 -
 188
188 -
 189
189 -
 190
190 -
 191
191 -
 192
192 -
 193
193 -
 194
194 -
 195
195 -
 196
196 -
197
-
198
-
199
-
200
-
201
-
202
 |
 |