Kyocera ECOSYS P5021cdw Kyocera Command Center RX User Guide Rev-8.2016.3 - Page 51
i-FAX Settings, POP before SMTP Timeout
 |
View all Kyocera ECOSYS P5021cdw manuals
Add to My Manuals
Save this manual to your list of manuals |
Page 51 highlights
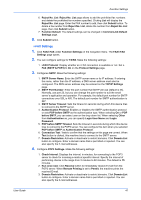
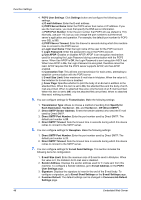
Function Settings 6. Reject No. List: Reject No. List page allows to add the prohibited fax numbers and delete the prohibited fax numbers specified. Clicking List will display the Reject No. List page. Enter the FAX number to add, then click Submit button. To delete a fax number from Reject No. List, delete the number from Reject No. List page, then click Submit button. 7. Function Default: The default settings can be changed in Common/Job Default Settings page. 8. Click Submit button. i-FAX Settings 1. Click FAX/i-FAX under Function Settings on the navigation menu. The FAX/i-FAX Settings page opens. 2. You can configure settings for TX/RX. Make the following settings: 1. i-FAX Protocol: Display whether an i-FAX connection is available or not. Set iFAX (SMTP & POP3) to On on the Protocol Settings page. 3. Configures SMTP. Make the following settings: 1. SMTP Server Name: Enter the SMTP server name or its IP address. If entering the name, rather than the IP address, a DNS server address must also be configured. The DNS server address may be entered on the TCP/IP Settings page. 2. SMTP Port Number: Enter the port number that SMTP will use (default is 25). Normally, use port 25, but you can change the port number to suit the email server's application and operation. For example, the default port number for SMTP connections over SSL is 465. The default port number for SMTP authentication is 587. 3. SMTP Server Timeout: Sets the timeout in seconds during which this device tries to connect to the SMTP server. 4. Authentication Protocol: Enables or disables the SMTP authentication protocol or sets POP before SMTP as the authentication type. When selecting On or POP before SMTP, you can select user on the drop-down list. When selecting Other from Authentication as, you can specify Login User Name and Login Password. 5. POP before SMTP Timeout: Sets the timeout in seconds during which this device tries to connect to the POP3 server. You can configure this item when you selected POP before SMTP as Authentication Protocol. 6. Connection Test: Tests to confirm that the settings on this page are correct. When Test button is clicked, this machine tries to connect to the SMTP server. 7. Domain Restriction: Activate or deactivate to restrict domains. Click Domain List button to configure. Enter a domain name that is permitted or rejected. You can also specify the E-mail addresses. 4. Configure POP3 Settings. Make the following settings: 1. Check Interval: Displays the interval, in minutes, for connecting to the POP3 server to check for incoming e-mails at specific interval. Specify the interval of performing checks in the range from 3 minutes to 60 minutes. The default is 15 minutes. 2. Run once now: Click Receive button to immediately receive E-mail from the POP3 server. When Remote Printing is set to Permit, the machine prints the received E-mail. 3. Domain Restriction: Activate or deactivate to restrict domains. Click Domain List button to configure. Enter a domain name that is permitted or rejected. You can also specify the E-mail addresses. User Guide 47
-
 1
1 -
2
-
3
-
4
-
5
-
6
-
7
-
8
-
9
-
10
-
11
-
12
-
13
-
14
-
15
-
16
-
17
-
18
-
19
-
20
-
21
-
22
-
23
-
24
-
25
-
26
-
27
-
28
-
29
-
30
-
31
-
32
-
33
-
34
-
35
-
36
-
37
-
38
-
39
-
40
-
41
-
42
-
43
-
44
-
45
-
 46
46 -
 47
47 -
 48
48 -
 49
49 -
 50
50 -
 51
51 -
 52
52 -
 53
53 -
 54
54 -
 55
55 -
 56
56 -
57
-
58
-
59
-
60
-
61
-
62
-
63
-
64
-
65
-
66
-
67
-
68
-
69
-
70
-
71
-
72
-
73
-
74
-
75
-
76
-
77
-
78
-
79
-
80
-
81
-
82
-
83
-
84
-
85
-
86
-
87
-
88
-
89
-
90
-
91
-
92
-
93
-
94
-
95
-
96
-
97
-
98
-
99
-
100
-
101
-
102
-
103
-
104
-
105
-
106
-
107
-
108
-
109
-
110
-
111
-
112
-
113
-
114
 |
 |
