LG LMCN185HV Installation Instructions - Page 27
Wiring Connection, How to Fix, Conduit connection - parts
 |
View all LG LMCN185HV manuals
Add to My Manuals
Save this manual to your list of manuals |
Page 27 highlights
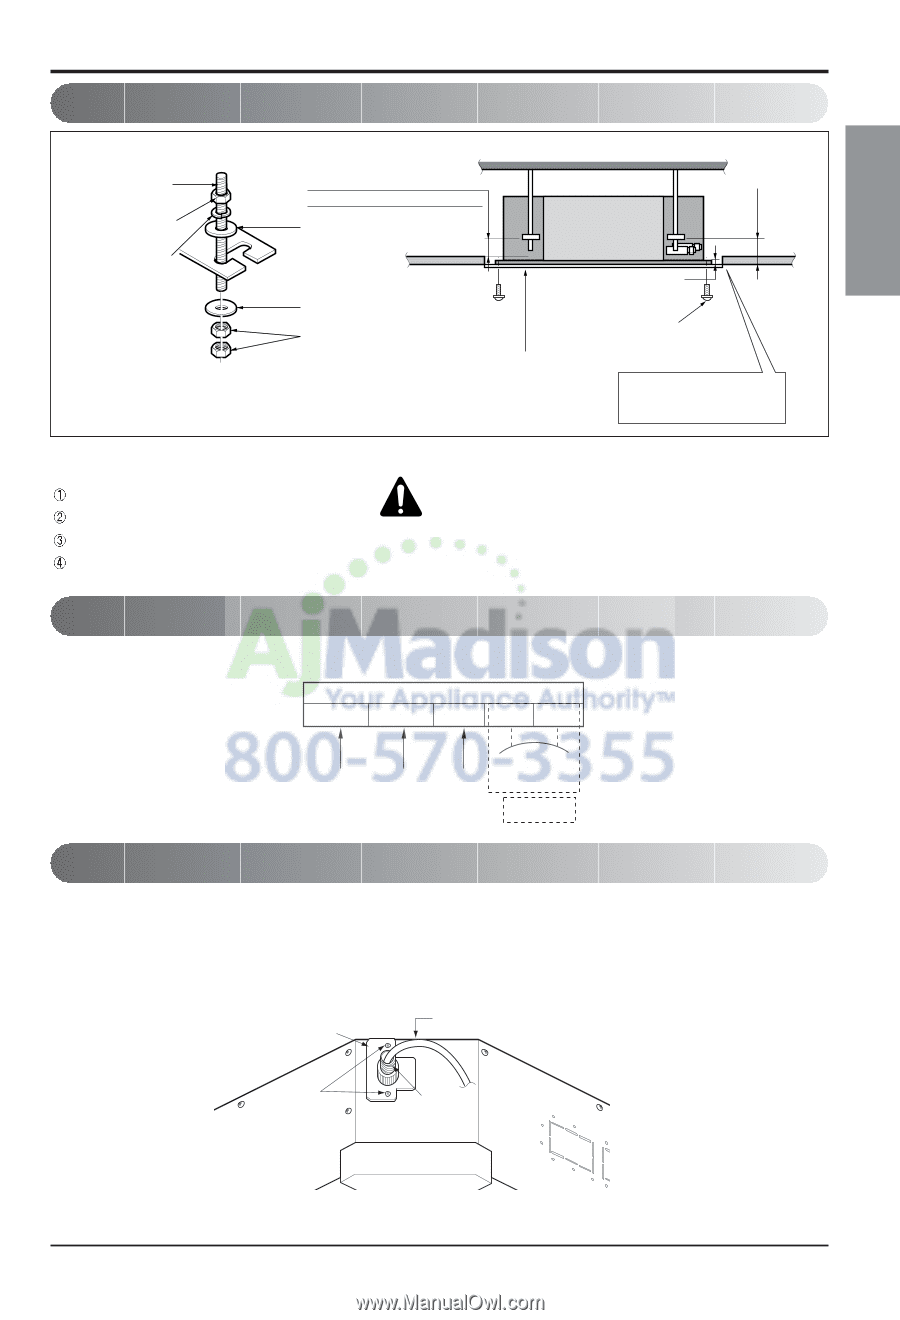
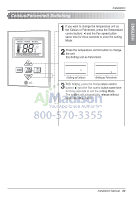
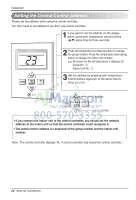
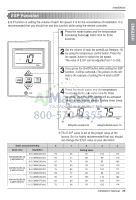
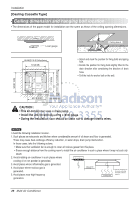
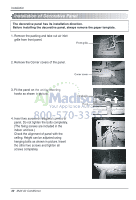
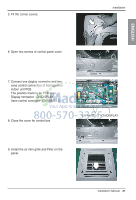
ENGLISH How to Fix Hanging bolt (W3/8 or M10) Nut (W3/8 or M10) Spring washer (M10) Installation Ceiling 150mm (5-7/8 inch) Keep the length of the bolt from the bracket to 40mm(1-1/2 inch) Flat washer for M10 (accessory) Ceiling board Air Conditioner body Ceiling board Flat washer for M10 (accessory) Nut (W3/8 or M10) Keep the length of 15~18mm(5/8~3/4 inch) between the air conditioner bottom surface and the ceiling surface Paper model for installation Set screw of paper model (4 pieces) Open the ceiling board along the outer edge of the paper model • The following parts are local purchasing. Hanging Bolt - W 3/8 or M10 Nut - W 3/8 or M10 Spring Washer - M10 Plate Washer - M10 CAUTION : Tighten the nut and bolt to prevent unit from falling off. Wiring Connection • Open the control box cover and connect the remote control cord and indoor power wires. TQ/TR series Terminal Block of Indoor Unit 1(L1) 2(L2) 3 4 5 Connected to outdoor unit TO AIR FRESH KIT OPTION Conduit connection • Remove the busing rubber product attached on the indoor unit. • Join the conduit and the conduit bracket together using nut. • Set the connecting cable into the terminal block of indoor unit, and tighten set screw to lock the conduit bracket to the indoor unit. Conduit bracket Connecting Cable Screw Conduit Installation Manual 27
-
 1
1 -
2
-
3
-
4
-
5
-
6
-
7
-
8
-
9
-
10
-
11
-
12
-
13
-
14
-
15
-
16
-
17
-
18
-
19
-
20
-
21
-
 22
22 -
 23
23 -
 24
24 -
 25
25 -
 26
26 -
 27
27 -
 28
28 -
 29
29 -
 30
30 -
 31
31 -
 32
32 -
33
-
34
-
35
-
36
-
37
-
38
-
39
-
40
-
41
-
42
-
43
-
44
-
45
-
46
-
47
-
48
-
49
-
50
-
51
-
52
-
53
-
54
-
55
-
56
-
57
-
58
-
59
-
60
-
61
-
62
-
63
-
64
-
65
-
66
-
67
-
68
-
69
-
70
-
71
-
72
-
73
-
74
-
75
-
76
-
77
-
78
-
79
-
80
-
81
-
82
-
83
-
84
-
85
-
86
-
87
-
88
-
89
-
90
-
91
-
92
-
93
-
94
-
95
-
96
-
97
-
98
-
99
-
100
-
101
-
102
-
103
-
104
-
105
-
106
-
107
-
108
-
109
-
110
-
111
-
112
-
113
-
114
-
115
-
116
-
117
-
118
-
119
-
120
-
121
-
122
-
123
-
124
-
125
-
126
-
127
-
128
-
129
-
130
-
131
-
132
-
133
-
134
-
135
-
136
-
137
 |
 |