Lenovo ThinkCentre M72z (English) User guide - Page 45
Notes, until it clicks into place.
 |
View all Lenovo ThinkCentre M72z manuals
Add to My Manuals
Save this manual to your list of manuals |
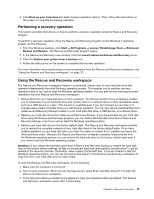
Page 45 highlights
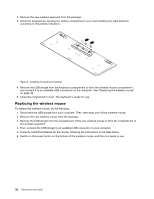
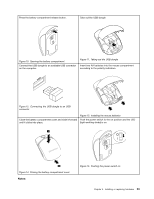
Press the battery compartment release button. Take out the USB dongle Figure 10. Opening the battery compartment Connect the USB dongle to an available USB connector on the computer. Figure 11. Taking out the USB dongle Insert two AA batteries into the mouse compartment according to the polarity indicators. Figure 12. Connecting the USB dongle to an USB connector Close the battery compartment cover and slide it forward until it clicks into place. Figure 13. Installing the mouse batteries Push the power switch to the on position and the LED (light-emitting diode) is on. Figure 14. Closing the battery compartment cover Notes: Figure 15. Pushing the power switch on Chapter 5. Installing or replacing hardware 33
-
 1
1 -
2
-
3
-
4
-
5
-
6
-
7
-
8
-
9
-
10
-
11
-
12
-
13
-
14
-
15
-
16
-
17
-
18
-
19
-
20
-
21
-
22
-
23
-
24
-
25
-
26
-
27
-
28
-
29
-
30
-
31
-
32
-
33
-
34
-
35
-
36
-
37
-
38
-
39
-
 40
40 -
 41
41 -
 42
42 -
 43
43 -
 44
44 -
 45
45 -
 46
46 -
 47
47 -
 48
48 -
 49
49 -
 50
50 -
51
-
52
-
53
-
54
-
55
-
56
-
57
-
58
-
59
-
60
-
61
-
62
-
63
-
64
-
65
-
66
-
67
-
68
-
69
-
70
-
71
-
72
-
73
-
74
-
75
-
76
-
77
-
78
-
79
-
80
-
81
-
82
-
83
-
84
-
85
-
86
-
87
-
88
-
89
-
90
-
91
-
92
-
93
-
94
-
95
-
96
-
97
-
98
-
99
-
100
-
101
-
102
-
103
-
104
-
105
-
106
-
107
-
108
-
109
-
110
-
111
-
112
-
113
-
114
 |
 |
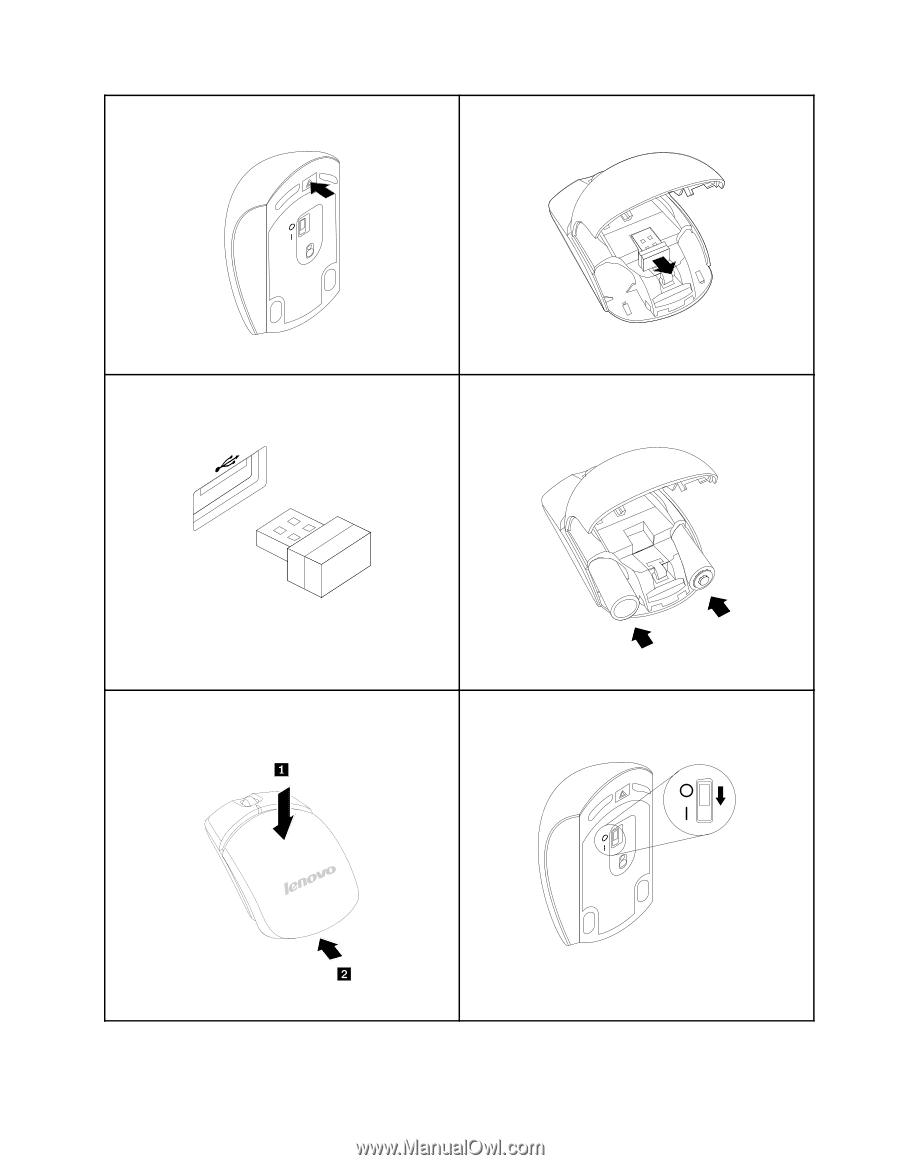
Press the battery compartment release button.
Figure 10. Opening the battery compartment
Take out the USB dongle
Figure 11. Taking out the USB dongle
Connect the USB dongle to an available USB connector
on the computer.
Figure 12. Connecting the USB dongle to an USB
connector
Insert two AA batteries into the mouse compartment
according to the polarity indicators.
Figure 13. Installing the mouse batteries
Close the battery compartment cover and slide it forward
until it clicks into place.
Figure 14. Closing the battery compartment cover
Push the power switch to the on position and the LED
(light-emitting diode) is on.
Figure 15. Pushing the power switch on
Notes:
Chapter 5
.
Installing or replacing hardware
33