Lenovo ThinkPad T431s Hardware Maintenance Manual - Page 63
Base cover
 |
View all Lenovo ThinkPad T431s manuals
Add to My Manuals
Save this manual to your list of manuals |
Page 63 highlights
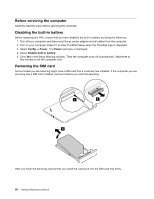
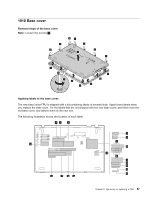
1010 Base cover Removal steps of the base cover Note: Loosen the screws 1 . 2 2 2 2 2 2 3 2 2 2 1 2 2 2 2 2 Applying labels to the base cover: The new base cover FRU is shipped with a kit containing labels of several kinds. Apply those labels when you replace the base cover. For the labels that are not shipped with the new base cover, peel them from the old base cover, and adhere them to the new one. The following illustration shows the location of each label. 12 3 19 18 17 16 15 4 5 7 6 14 8 9 10 11 12 13 Chapter 9. Removing or replacing a FRU 57
-
 1
1 -
2
-
3
-
4
-
5
-
6
-
7
-
8
-
9
-
10
-
11
-
12
-
13
-
14
-
15
-
16
-
17
-
18
-
19
-
20
-
21
-
22
-
23
-
24
-
25
-
26
-
27
-
28
-
29
-
30
-
31
-
32
-
33
-
34
-
35
-
36
-
37
-
38
-
39
-
40
-
41
-
42
-
43
-
44
-
45
-
46
-
47
-
48
-
49
-
50
-
51
-
52
-
53
-
54
-
55
-
56
-
57
-
 58
58 -
 59
59 -
 60
60 -
 61
61 -
 62
62 -
 63
63 -
 64
64 -
 65
65 -
 66
66 -
 67
67 -
 68
68 -
69
-
70
-
71
-
72
-
73
-
74
-
75
-
76
-
77
-
78
-
79
-
80
-
81
-
82
-
83
-
84
-
85
-
86
-
87
-
88
-
89
-
90
-
91
-
92
-
93
-
94
-
95
-
96
-
97
-
98
-
99
-
100
-
101
-
102
 |
 |
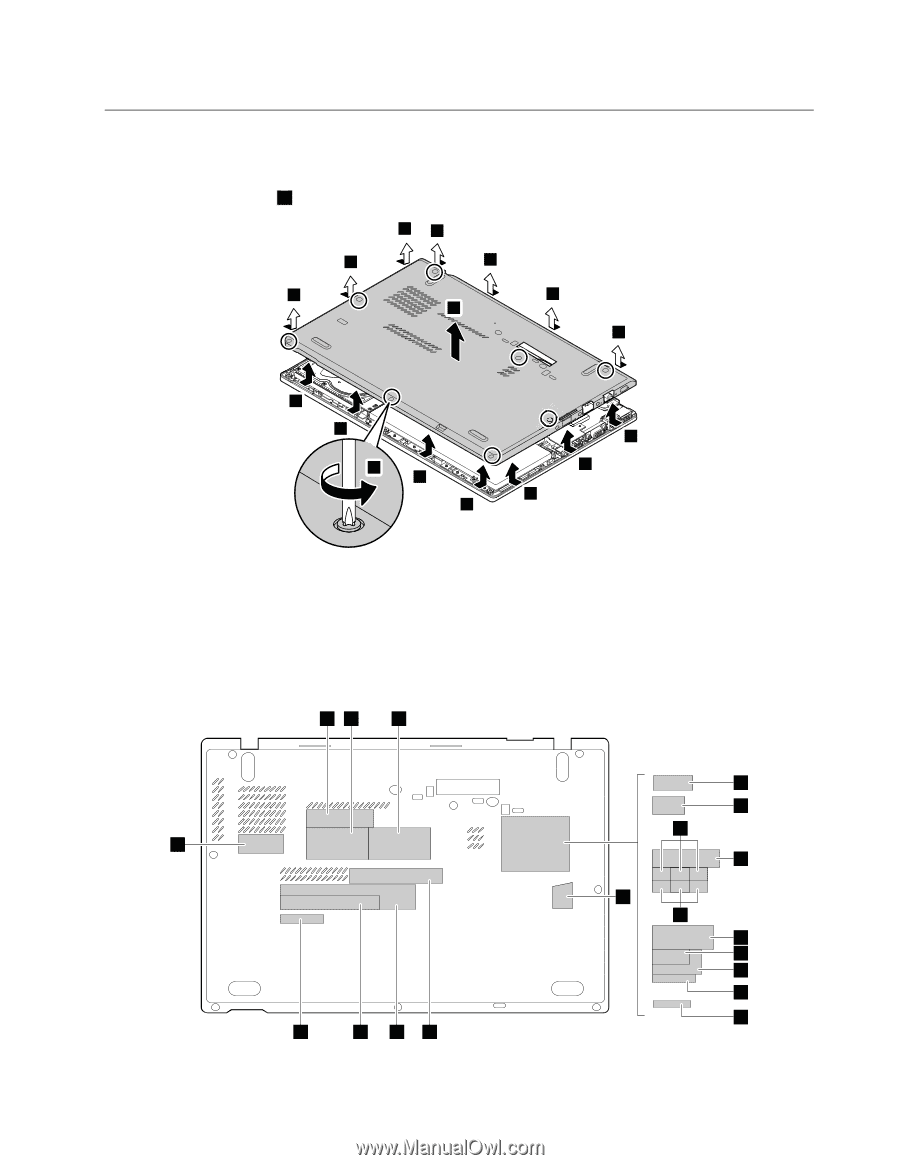
1010 Base cover
Removal steps of the base cover
Note:
Loosen the screws
1
.
2
2
2
2
2
2
2
2
2
2
2
2
2
2
1
3
Applying labels to the base cover:
The new base cover FRU is shipped with a kit containing labels of several kinds. Apply those labels when
you replace the base cover. For the labels that are not shipped with the new base cover, peel them from the
old base cover, and adhere them to the new one.
The following illustration shows the location of each label.
1
2
3
4
5
6
9
14
10
11
12
13
7
8
15
16
17
18
19
Chapter 9
.
Removing or replacing a FRU
57