Lenovo ThinkPad T431s Hardware Maintenance Manual - Page 74
Thermal fan assembly
 |
View all Lenovo ThinkPad T431s manuals
Add to My Manuals
Save this manual to your list of manuals |
Page 74 highlights
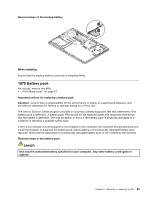
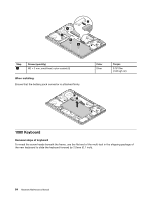
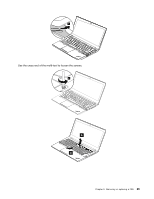
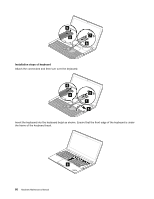
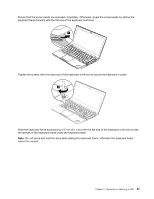
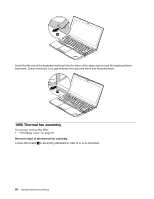
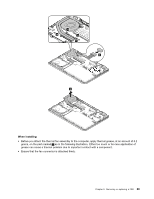
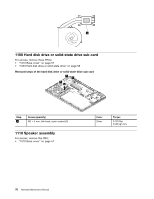
9 Insert the flat end of the keyboard multi-tool into the sides of the space bar to push the keyboard frame backward. Ensure that there is no gap between the keyboard frame and keyboard bezel. 10 1090 Thermal fan assembly For access, remove this FRU: • "1010 Base cover" on page 57 Removal steps of the thermal fan assembly Loosen the screws 1 in ascending alphabetical order (a to d) as illustrated. 68 Hardware Maintenance Manual
-
 1
1 -
2
-
3
-
4
-
5
-
6
-
7
-
8
-
9
-
10
-
11
-
12
-
13
-
14
-
15
-
16
-
17
-
18
-
19
-
20
-
21
-
22
-
23
-
24
-
25
-
26
-
27
-
28
-
29
-
30
-
31
-
32
-
33
-
34
-
35
-
36
-
37
-
38
-
39
-
40
-
41
-
42
-
43
-
44
-
45
-
46
-
47
-
48
-
49
-
50
-
51
-
52
-
53
-
54
-
55
-
56
-
57
-
58
-
59
-
60
-
61
-
62
-
63
-
64
-
65
-
66
-
67
-
68
-
 69
69 -
 70
70 -
 71
71 -
 72
72 -
 73
73 -
 74
74 -
 75
75 -
 76
76 -
 77
77 -
 78
78 -
 79
79 -
80
-
81
-
82
-
83
-
84
-
85
-
86
-
87
-
88
-
89
-
90
-
91
-
92
-
93
-
94
-
95
-
96
-
97
-
98
-
99
-
100
-
101
-
102
 |
 |
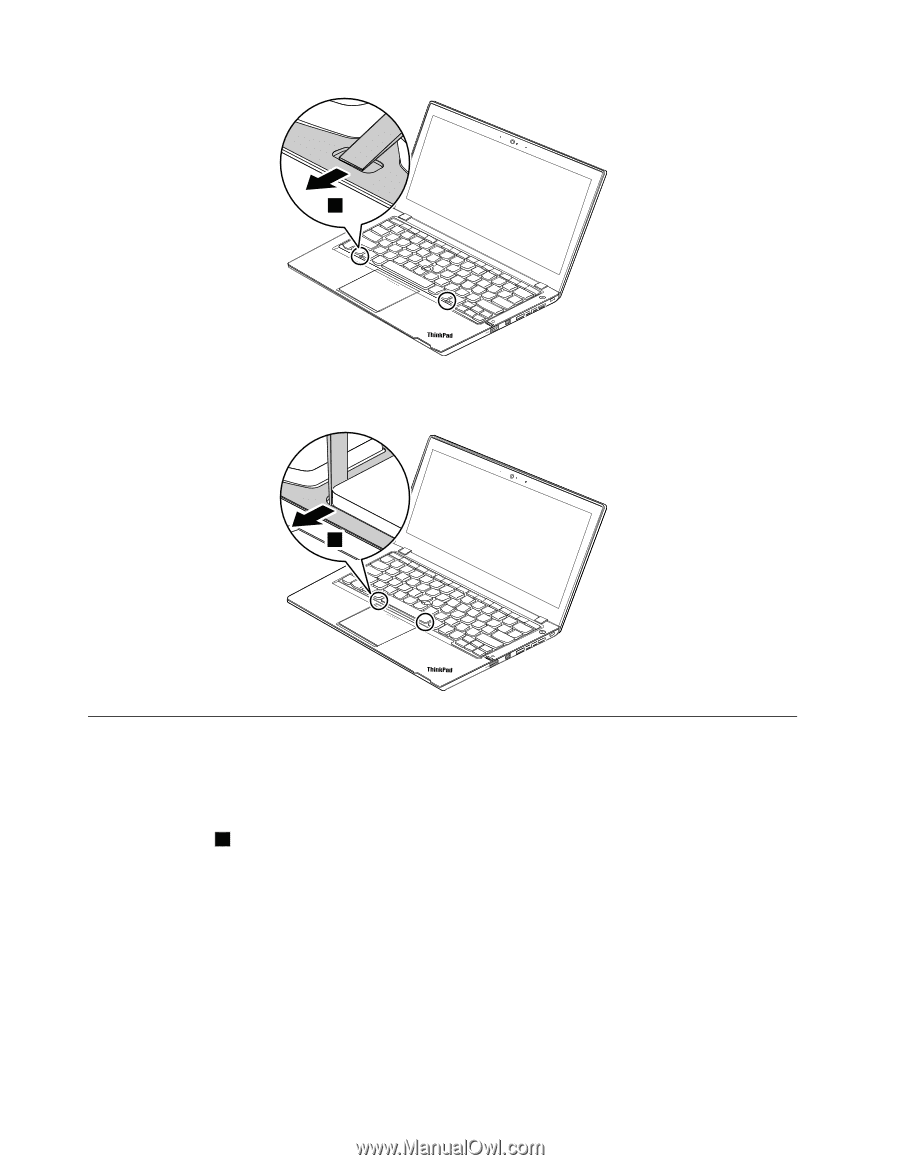
9
Insert the flat end of the keyboard multi-tool into the sides of the space bar to push the keyboard frame
backward. Ensure that there is no gap between the keyboard frame and keyboard bezel.
10
1090 Thermal fan assembly
For access, remove this FRU:
•
“1010 Base cover” on page 57
Removal steps of the thermal fan assembly
Loosen the screws
1
in ascending alphabetical order (a to d) as illustrated.
68
Hardware Maintenance Manual