Lexmark 3350 Service Manual - Page 55
Print engine removal, Press down and disconnect the small exit roller B.
 |
View all Lexmark 3350 manuals
Add to My Manuals
Save this manual to your list of manuals |
Page 55 highlights
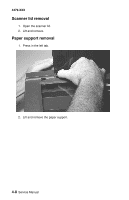
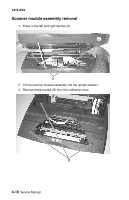
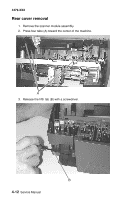
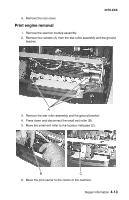
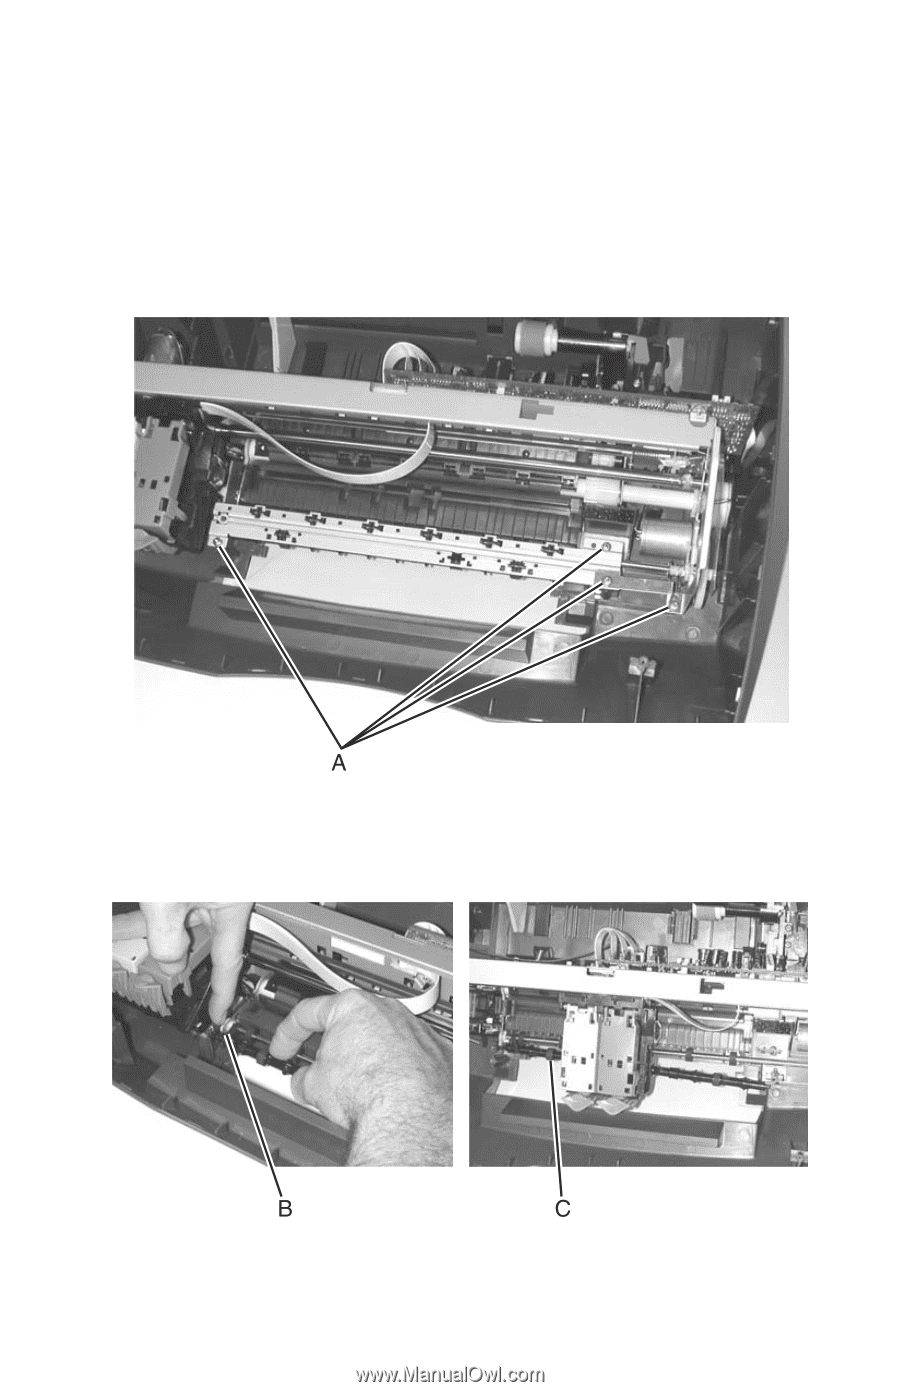
4479-XXX 4. Remove the rear cover. Print engine removal 1. Remove the scanner module assembly. 2. Remove four screws (A) from the star roller assembly and the ground bracket. 3. Remove the star roller assembly and the ground bracket. 4. Press down and disconnect the small exit roller (B). 5. Move the small exit roller to the location indicated (C). 6. Move the print carrier to the center of the machine. Repair information 4-13
-
 1
1 -
2
-
3
-
4
-
5
-
6
-
7
-
8
-
9
-
10
-
11
-
12
-
13
-
14
-
15
-
16
-
17
-
18
-
19
-
20
-
21
-
22
-
23
-
24
-
25
-
26
-
27
-
28
-
29
-
30
-
31
-
32
-
33
-
34
-
35
-
36
-
37
-
38
-
39
-
40
-
41
-
42
-
43
-
44
-
45
-
46
-
47
-
48
-
49
-
 50
50 -
 51
51 -
 52
52 -
 53
53 -
 54
54 -
 55
55 -
 56
56 -
 57
57 -
 58
58 -
 59
59 -
 60
60 -
61
-
62
-
63
-
64
-
65
-
66
-
67
-
68
-
69
-
70
-
71
-
72
-
73
-
74
-
75
-
76
 |
 |
4479-XXX
Repair information
4-13
4.
Remove the rear cover.
Print engine removal
1.
Remove the scanner module assembly.
2.
Remove four screws (A) from the star roller assembly and the ground
bracket.
3.
Remove the star roller assembly and the ground bracket.
4.
Press down and disconnect the small exit roller (B).
5.
Move the small exit roller to the location indicated (C).
6.
Move the print carrier to the center of the machine.