Lexmark MX321 Card for IPDS: IPDS Printer and Host Setup Guide 9th ed. - Page 21
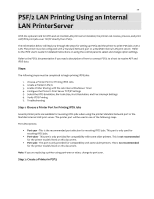
PSF/2 LAN Printing Using an Internal, LAN PrinterServer
 |
View all Lexmark MX321 manuals
Add to My Manuals
Save this manual to your list of manuals |
Page 21 highlights
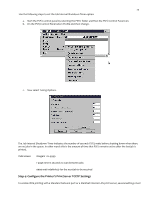
20 PSF/2 LAN Printing Using an Internal LAN PrinterServer With the optional Card for IPDS and an internal LAN print server installed, the printer can receive, process, and print AFP/IPDS print jobs over TCP/IP directly from PSF/2. The information below will lead you through the steps for setting up PSF/2 and the printer to print IPDS jobs over a LAN. The printer must be configured with a Standard Network port or a MarkNet internal LAN print server. Refer to the IPDS User's Guide for detailed instructions on using the control panel to select and change option settings. Refer to the PSF/2 documentation if you need a description of how to connect PSF/2 to a host to receive AFP and IPDS data. Steps: The following steps must be completed to begin printing IPDS jobs. 1. Choose a Printer Port for Printing IPDS Jobs 2. Create a Printer in PSF/2 3. Enable Printer Sharing with the Job Interval Shutdown Timer 4. Configure the Printer's Print Server TCP/IP Settings 5. Select the IPDS Emulation, Bar Code Size, Host Resolution, and Fax Interrupt Settings 6. Verify IPDS Printing 7. Troubleshooting Step 1: Choose a Printer Port for Printing IPDS Jobs Several printer ports are available for receiving IPDS jobs when using the printer Standard Network port or the MarkNet internal LAN print server. The printer port will be used in one of the following steps. Port descriptions: • Port 5001 - This is the recommended port selection for receiving IPDS jobs. This port is only used for receiving IPDS jobs. • Port 9600 - This port is only provided for compatibility with some older printers. This is not recommended for the printer models listed on this document. • Port 9100 - This port is only provided for compatibility with some older printers. This is not recommended for the printer models listed on this document. Note: If you are replacing a printer using port 9100 or 9600, change to port 5001. Step 2: Create a Printer in PSF/2
-
 1
1 -
2
-
3
-
4
-
5
-
6
-
7
-
8
-
9
-
10
-
11
-
12
-
13
-
14
-
15
-
 16
16 -
 17
17 -
 18
18 -
 19
19 -
 20
20 -
 21
21 -
 22
22 -
 23
23 -
 24
24 -
 25
25 -
 26
26 -
27
-
28
-
29
-
30
-
31
-
32
-
33
-
34
-
35
 |
 |