Lexmark MX617 User Guide - Page 129
Using the ScanBack Utility, Understanding the scan options, FTP, File Name
 |
View all Lexmark MX617 manuals
Add to My Manuals
Save this manual to your list of manuals |
Page 129 highlights
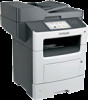
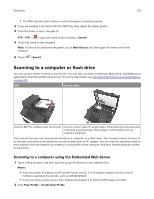
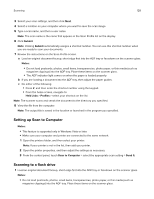
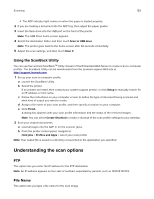
Scanning 129 • The ADF indicator light comes on when the paper is loaded properly. 2 If you are loading a document into the ADF tray, then adjust the paper guides. 3 Insert the flash drive into the USB port on the front of the printer. Note: The USB Drive home screen appears. 4 Select the destination folder, and then touch Scan to USB drive. Note: The printer goes back to the home screen after 30 seconds of inactivity. 5 Adjust the scan settings, and then touch Scan It. Using the ScanBack Utility You can use the Lexmark ScanBackTM Utility instead of the Embedded Web Server to create scan‑to‑computer profiles. The ScanBack Utility can be downloaded from the Lexmark support Web site at http://support.lexmark.com. 1 Set up your scan‑to‑computer profile: a Launch the ScanBack Utility. b Select the printer. If no printers are listed, then contact your system support person, or click Setup to manually search for an IP address or host name. c Follow the instructions on your computer screen to define the type of document being scanned and what kind of output you want to create. d Assign a file name of your scan profile, and then specify a location on your computer. e Click Finish. A dialog box appears with your scan profile information and the status of the received images. Note: You can select Create Shortcut to create a shortcut of the scan profile settings to your desktop. 2 Scan your original documents: a Load all pages into the ADF or on the scanner glass. b From the printer control panel, navigate to: Held jobs > Profiles and Apps > select your scan profile Note: Your output file is saved in a directory or launched in the application you specified. Understanding the scan options FTP This option lets you enter the IP address for the FTP destination. Note: An IP address appears as four sets of numbers separated by periods, such as 123.123.123.123. File Name This option lets you type a file name for the scan image.
-
 1
1 -
2
-
3
-
4
-
5
-
6
-
7
-
8
-
9
-
10
-
11
-
12
-
13
-
14
-
15
-
16
-
17
-
18
-
19
-
20
-
21
-
22
-
23
-
24
-
25
-
26
-
27
-
28
-
29
-
30
-
31
-
32
-
33
-
34
-
35
-
36
-
37
-
38
-
39
-
40
-
41
-
42
-
43
-
44
-
45
-
46
-
47
-
48
-
49
-
50
-
51
-
52
-
53
-
54
-
55
-
56
-
57
-
58
-
59
-
60
-
61
-
62
-
63
-
64
-
65
-
66
-
67
-
68
-
69
-
70
-
71
-
72
-
73
-
74
-
75
-
76
-
77
-
78
-
79
-
80
-
81
-
82
-
83
-
84
-
85
-
86
-
87
-
88
-
89
-
90
-
91
-
92
-
93
-
94
-
95
-
96
-
97
-
98
-
99
-
100
-
101
-
102
-
103
-
104
-
105
-
106
-
107
-
108
-
109
-
110
-
111
-
112
-
113
-
114
-
115
-
116
-
117
-
118
-
119
-
120
-
121
-
122
-
123
-
 124
124 -
 125
125 -
 126
126 -
 127
127 -
 128
128 -
 129
129 -
 130
130 -
 131
131 -
 132
132 -
 133
133 -
 134
134 -
135
-
136
-
137
-
138
-
139
-
140
-
141
-
142
-
143
-
144
-
145
-
146
-
147
-
148
-
149
-
150
-
151
-
152
-
153
-
154
-
155
-
156
-
157
-
158
-
159
-
160
-
161
-
162
-
163
-
164
-
165
-
166
-
167
-
168
-
169
-
170
-
171
-
172
-
173
-
174
-
175
-
176
-
177
-
178
-
179
-
180
-
181
-
182
-
183
-
184
-
185
-
186
-
187
-
188
-
189
-
190
-
191
-
192
-
193
-
194
-
195
-
196
-
197
-
198
-
199
-
200
-
201
-
202
-
203
-
204
-
205
-
206
-
207
-
208
-
209
-
210
-
211
-
212
-
213
-
214
-
215
-
216
-
217
-
218
-
219
-
220
-
221
-
222
-
223
-
224
-
225
-
226
-
227
-
228
-
229
-
230
-
231
-
232
-
233
-
234
-
235
-
236
-
237
-
238
-
239
-
240
-
241
-
242
-
243
-
244
-
245
-
246
-
247
-
248
-
249
-
250
-
251
-
252
-
253
-
254
-
255
-
256
-
257
-
258
-
259
-
260
-
261
-
262
-
263
-
264
-
265
-
266
-
267
-
268
-
269
-
270
-
271
-
272
-
273
-
274
-
275
-
276
-
277
-
278
-
279
-
280
-
281
-
282
-
283
-
284
-
285
-
286
-
287
-
288
-
289
-
290
-
291
-
292
-
293
-
294
-
295
-
296
-
297
-
298
-
299
-
300
-
301
-
302
-
303
-
304
-
305
-
306
-
307
-
308
-
309
-
310
-
311
-
312
-
313
-
314
-
315
-
316
-
317
-
318
-
319
-
320
-
321
-
322
-
323
-
324
-
325
-
326
-
327
-
328
-
329
-
330
-
331
-
332
-
333
-
334
-
335
-
336
-
337
-
338
-
339
-
340
-
341
-
342
-
343
-
344
-
345
 |
 |
