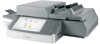
Lexmark MX6500e 6500e Multi Send Administrator's Guide - Page 7
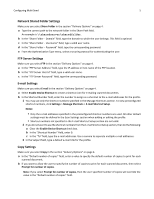
Editing or deleting a profile
 |
View all Lexmark MX6500e 6500e manuals
Add to My Manuals
Save this manual to your list of manuals |
Page 7 highlights
Configuring Multi Send 7 • Scan Contrast-Specify a setting to increase or decrease the level of contrast for the scanned document. • Scan File Format-Specify the output format (TIF, JPG, or PDF) of the scanned document. Notes: - The JPG file format does not support saving multiple pages into one file. If you want to allow users to save multiple scanned pages into one file, then use either TIFF or PDF as the scan file format. - For scanners running version 2.0 or later of the Embedded Solutions Framework, Secure PDF and XPS are also available. However, the Secure PDF option does not work with Copy and Remote Copy destinations. - For scanners running version 1.2 of the Embedded Solutions Framework, the Fax destination works only with the TIFF option. - To view the complete list of supported scanners for each version of the Embedded Web Server, see the Readme file. Confirmation Page • Select Display Confirmation Page to view the confirmation page on the scanner control panel. • Select Print Confirmation Page to print the confirmation page. • Select E-mail Confirmation Page to send the confirmation page to a valid e-mail address. • In the "E-mail To" field, type the e-mail address where the confirmation page will be sent. Use a comma to separate multiple e-mail addresses. Notes: • You can select one or more types of confirmation. • A confirmation page displays the status of the Send tasks after each scan job. 3 Save or discard your changes. Editing or deleting a profile 1 Access the application configuration settings from the Embedded Web Server. 2 From the Profiles section, select a profile, and then do either of the following: • To edit the profile, click Edit. a Make the necessary changes to the profile. b Click Apply to save your settings. • To delete the profile, click Delete > Remove.
-
 1
1 -
 2
2 -
 3
3 -
 4
4 -
 5
5 -
 6
6 -
 7
7 -
 8
8 -
 9
9 -
 10
10 -
 11
11 -
 12
12 -
13
-
14
-
15
 |
 |