Lexmark MX6500e 6500e Multi Send Administrator's Guide - Page 8
Scanning documents using Multi Send
 |
View all Lexmark MX6500e 6500e manuals
Add to My Manuals
Save this manual to your list of manuals |
Page 8 highlights
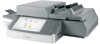
Using Multi Send 8 Using Multi Send Scanning documents using Multi Send 1 Load the document into the scanner. Note: Documents may be loaded into the scanner in multiple ways. For more information, see the User's Guide that came with the scanner. 2 From the home screen, touch the profile icon containing the destination or destinations where you want to send the scanned document. 3 Depending on how the profile has been configured, some additional job options may be available when scanning a document. Follow the instructions on the home screen to customize the options or enter the necessary information. Note: These job options are configured when your system support person creates the profile. For more information on the existing profiles, contact your system support person. 4 Depending on how the profile has been configured, you may be prompted to adjust the scan options. Change the settings if necessary, and then touch Send It. 5 To scan additional documents, load the next document into the scanner, and then touch Accept and Continue. Otherwise, touch Finish the Job. Note: For the copy job options, you can select any paper size available in all the trays under "Copy To." If "Prompt for number of copies" is enabled in the application configuration settings, then you can specify the number of copies.
-
 1
1 -
2
-
 3
3 -
 4
4 -
 5
5 -
 6
6 -
 7
7 -
 8
8 -
 9
9 -
 10
10 -
 11
11 -
 12
12 -
 13
13 -
14
-
15
 |
 |