Lexmark P350 User's Guide - Page 12
Using the control panel buttons, Use the, Press
 |
View all Lexmark P350 manuals
Add to My Manuals
Save this manual to your list of manuals |
Page 12 highlights
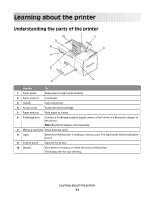
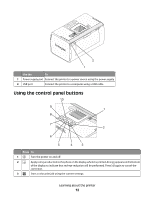
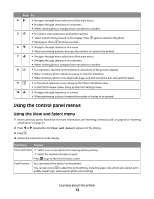
Use the To 1 Power supply port Connect the printer to a power source using the power supply. 2 USB port Connect the printer to a computer using a USB cable. Using the control panel buttons Press To 1 Turn the printer on and off. 2 Apply red-eye reduction to the photo on the display when it is printed. An icon appears on the bottom of the display to indicate that red-eye reduction will be performed. Press again to cancel the correction. 3 Start a color print job using the current settings. Learning about the printer 12
-
 1
1 -
2
-
3
-
4
-
5
-
6
-
 7
7 -
 8
8 -
 9
9 -
 10
10 -
 11
11 -
 12
12 -
 13
13 -
 14
14 -
 15
15 -
 16
16 -
 17
17 -
18
-
19
-
20
-
21
-
22
-
23
-
24
-
25
-
26
-
27
-
28
-
29
-
30
-
31
-
32
-
33
-
34
-
35
-
36
-
37
-
38
-
39
-
40
-
41
-
42
-
43
-
44
-
45
-
46
-
47
-
48
-
49
-
50
-
51
-
52
-
53
-
54
-
55
-
56
-
57
-
58
-
59
-
60
-
61
-
62
 |
 |
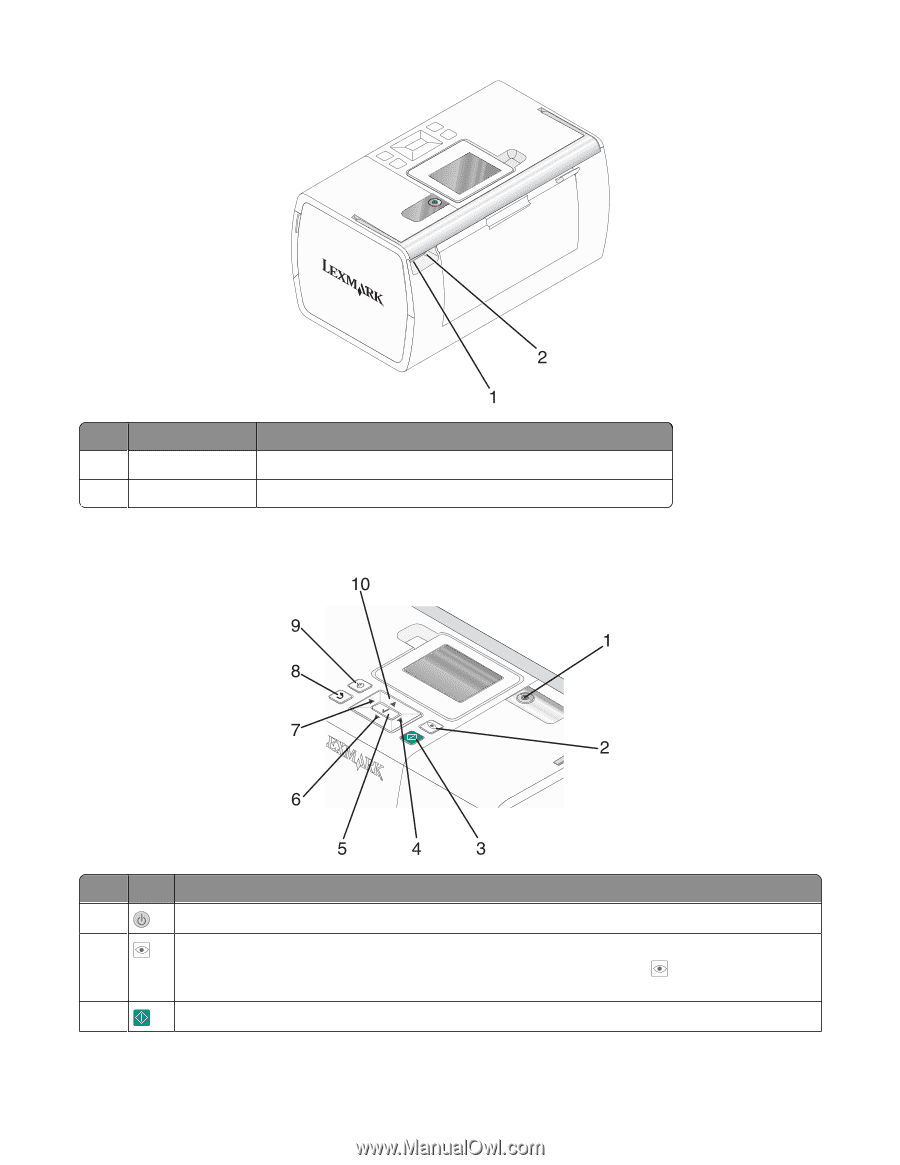
Use the
To
1
Power supply port
Connect the printer to a power source using the power supply.
2
USB port
Connect the printer to a computer using a USB cable.
Using the control panel buttons
Press
To
1
Turn the printer on and off.
2
Apply red-eye reduction to the photo on the display when it is printed. An icon appears on the bottom
of the display to indicate that red-eye reduction will be performed. Press
again to cancel the
correction.
3
Start a color print job using the current settings.
Learning about the printer
12