Lexmark P350 User's Guide - Page 42
Viewing the ink level, Printing a test Preserving the print cartridge, Ordering supplies - ink cartridges no 45
 |
View all Lexmark P350 manuals
Add to My Manuals
Save this manual to your list of manuals |
Page 42 highlights
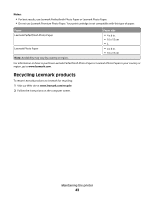
6 Let the nozzles and contacts dry completely. 7 Reinsert the print cartridge. 8 Print the photo again. 9 If print quality does not improve, clean the print nozzles. For more information, see "Cleaning the print cartridge nozzles" on page 41. 10 Repeat "Cleaning the print cartridge nozzles" on page 41 up to two more times. 11 If print quality is still not satisfactory, replace the print cartridge. Viewing the ink level 1 Press or repeatedly until Tools appears on the display. 2 Press . 3 Press or repeatedly until Maintenance appears. 4 Press . 5 Press again to select View Ink Level. Printing a test page 1 Load photo paper, with the glossy or printable side facing you. (If you are not sure which side is the printable side, see the instructions that came with the paper.) For more information, see "Loading paper" on page 19. 2 Press or repeatedly until Tools appears on the display. 3 Press . 4 Press or repeatedly until Maintenance appears. 5 Press . 6 Press or repeatedly until Print Test Page appears. 7 Press . Preserving the print cartridge • Keep a new print cartridge in its packaging until you are ready to install it. • Do not remove a cartridge from the printer except to replace, clean, or store it in an airtight container. The cartridge does not print correctly if left exposed for an extended period of time. Ordering supplies To order supplies or to locate a dealer near you, visit the Lexmark Web site at www.lexmark.com. Item Color cartridge USB cable Part number 45 1021294 Maintaining the printer 42
-
 1
1 -
2
-
3
-
4
-
5
-
6
-
7
-
8
-
9
-
10
-
11
-
12
-
13
-
14
-
15
-
16
-
17
-
18
-
19
-
20
-
21
-
22
-
23
-
24
-
25
-
26
-
27
-
28
-
29
-
30
-
31
-
32
-
33
-
34
-
35
-
36
-
 37
37 -
 38
38 -
 39
39 -
 40
40 -
 41
41 -
 42
42 -
 43
43 -
 44
44 -
 45
45 -
 46
46 -
 47
47 -
48
-
49
-
50
-
51
-
52
-
53
-
54
-
55
-
56
-
57
-
58
-
59
-
60
-
61
-
62
 |
 |
