Lexmark X852 User's Guide - Page 31
Placing an overlay message on each Creating a custom job (job build), Date/Time Stamp, Copy
 |
View all Lexmark X852 manuals
Add to My Manuals
Save this manual to your list of manuals |
Page 31 highlights
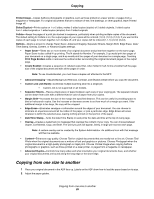
Copying 5 Touch Date/Time Stamp. 6 Touch On. 7 Touch Done. 8 Touch Copy It. Placing an overlay message on each page An overlay message can be placed on each page. The message choices are Urgent, Confidential, Copy, or Draft. To place a message on the copies: 1 Place your original document in the ADF face up. Labels on the ADF show how to load the paper based on its size. 2 Adjust the paper guides. 3 Touch Copy on the home screen. 4 Touch Options. 5 Touch the button containing the overlay you want to use. 6 Touch Done. 7 Touch Copy It. Creating a custom job (job build) The custom job or job build is used to combine one or more sets of original documents into a single copy job. Each set may be scanned using different job parameters. When a copy job is submitted and Custom Job is enabled, the scanner will scan the first set of original documents using the supplied parameters, then scan the next set with the same or different parameters. The definition of a set depends on the Scan Source: • From the flatbed, a set consists of one page. • From the ADF, a set consists of all scanned pages until the ADF becomes empty. • When one page is sent through the ADF, a set consists of one page. For example: 1 Place your original document in the ADF face up. Labels on the ADF show how to load the paper based on its size. 2 Adjust the paper guides. 3 Touch Copy on the home screen. 4 Touch Options. 5 Touch Custom Job. 6 Touch On. 7 Touch Done. 8 Touch Copy It. When the end of a set is reached, the "Scan the next page" screen appears. Touch Scan the next page or touch Done. For more information on the Custom job or the job build setting, see the Menus and Messages Guide on the Software and Documentation CD. Placing an overlay message on each page 31
-
 1
1 -
2
-
3
-
4
-
5
-
6
-
7
-
8
-
9
-
10
-
11
-
12
-
13
-
14
-
15
-
16
-
17
-
18
-
19
-
20
-
21
-
22
-
23
-
24
-
25
-
 26
26 -
 27
27 -
 28
28 -
 29
29 -
 30
30 -
 31
31 -
 32
32 -
 33
33 -
 34
34 -
 35
35 -
 36
36 -
37
-
38
-
39
-
40
-
41
-
42
-
43
-
44
-
45
-
46
-
47
-
48
-
49
-
50
-
51
-
52
-
53
-
54
-
55
-
56
-
57
-
58
-
59
-
60
-
61
-
62
-
63
-
64
-
65
-
66
-
67
-
68
-
69
-
70
-
71
-
72
-
73
-
74
-
75
-
76
-
77
-
78
-
79
-
80
-
81
-
82
-
83
-
84
-
85
-
86
-
87
-
88
-
89
-
90
-
91
-
92
-
93
-
94
-
95
-
96
-
97
-
98
-
99
-
100
-
101
-
102
-
103
-
104
-
105
-
106
-
107
-
108
-
109
-
110
-
111
-
112
-
113
-
114
-
115
-
116
-
117
-
118
-
119
-
120
-
121
-
122
-
123
-
124
-
125
-
126
-
127
-
128
-
129
-
130
-
131
-
132
-
133
-
134
-
135
-
136
-
137
-
138
-
139
-
140
-
141
-
142
-
143
-
144
-
145
-
146
-
147
-
148
-
149
-
150
-
151
-
152
-
153
-
154
-
155
-
156
-
157
-
158
-
159
-
160
-
161
-
162
 |
 |