LiftMaster MJ MJ5011E Installation-2008 Manual - Page 5
Carton Inventory, Preparation - opener
 |
View all LiftMaster MJ manuals
Add to My Manuals
Save this manual to your list of manuals |
Page 5 highlights
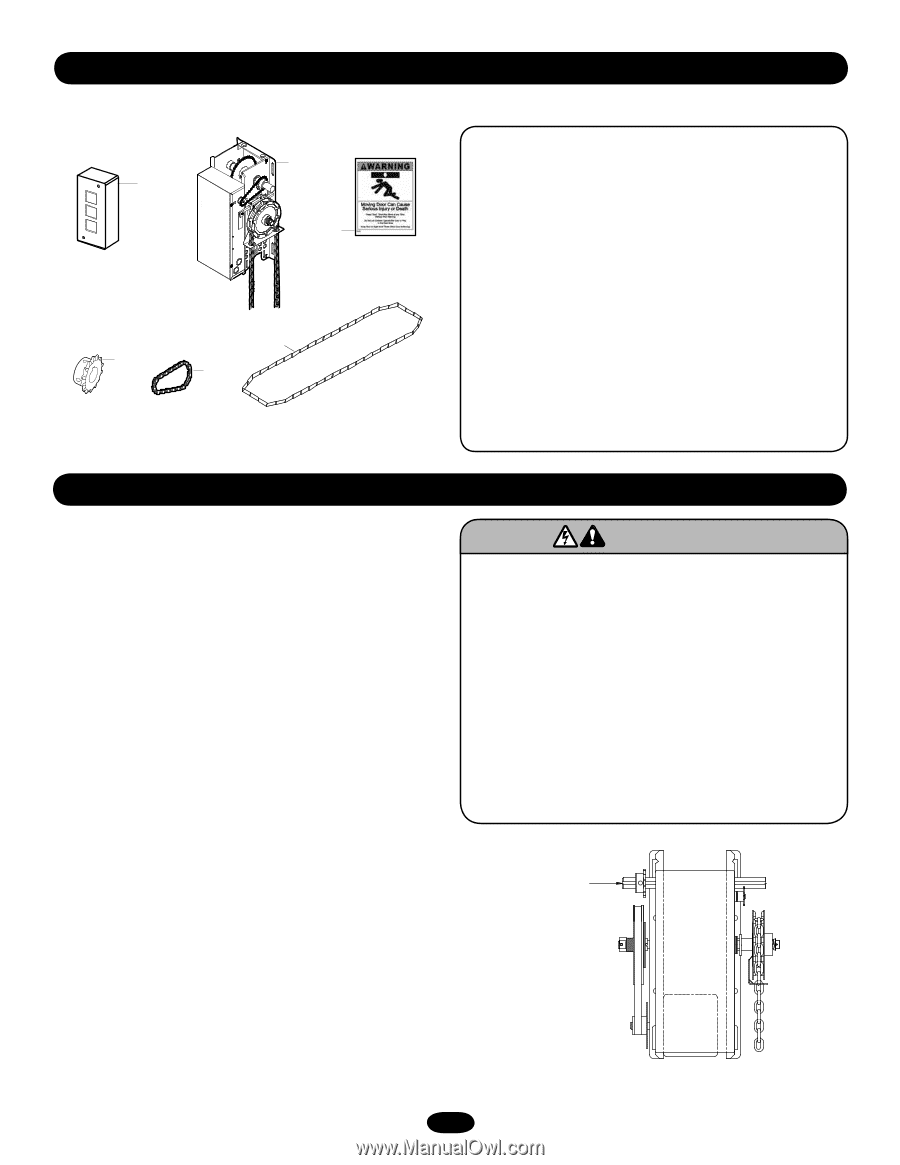
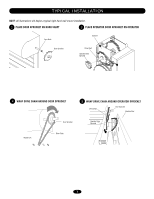
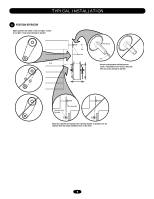
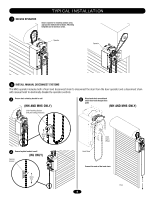
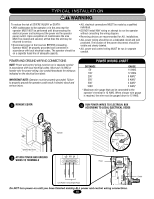
CARTON INVENTORY Before beginning your installation check that all components were provided. 3 ^OPEN ^CLOSE O STOP 1 2 ITEM 1 2 3 4 5 6 DESCRIPTION QTY Operator 1 Warning labels 2 3-Button station 1 Hoist hand chain (models MH and MHS only) 1 Door/Operator chain 1 Door sprocket 1 4 6 5 NOT SHOWN Installation Manual 1 Quickstart Guide 1 User's Guide 1 Caution Label 1 Installation Hardware Box 1 Complete with: Master links (2), wall bracket (1), Fastener Bag (1) WARNING PREPARATION WARNING PREPCARAINUG TYOIUORNDOOR The manufacturer recommends 3' (91.4 cm) of clearance in front of operator for serviceability. Before you begin: • Disable locks. • Remove any ropes connected to door. • Before the operator is installed, be sure the door has been properly aligned and is working smoothly. Although each installation will vary due to particular building characteristics, refer to the following general procedures to install the operator. AVERTISSEMENT HAANDTINTGEIDNENTTIIFOICNATION For MH and HMS models with manual hoist hand chain systems, the handing of the operator must be determined at the time of order. The handing is indicated by last letter of the model name (R or L). (Illustration shows right handed operator. Left handed operator will have hoist chain on the left side.) The hand chain wheel can not be switched on site. If your installation causes the hand chain to hang in the door opening, hook the chain off to the side near the top of the door jamb. WARNING To prevent possible SERIOUS INJURY or DEATH: • DO NOT connect electric power until instructed to do so. • If the door lock needs to remain functional, install an interlock switch. • ALWAYS call a trained professional door serviceman if door binds, sticks or is out of balance. An unbalanced door may not reverse when required. • NEVER try to loosen, move or adjust doors, door springs, cables, pulleys, brackets or their hardware, ALL of which are under EXTREME tension and can cause SERIOUS personal INJURY. AVERTISSEMENT • Disable ALL locks and remove ALL ropes connected to door BEFORE installing and operating door operator to avoid entanglement. AVERTISSEMENT Output Shaft Right Handed Operator ADVERTENCIA 5 ADVERTENCIA
-
 1
1 -
 2
2 -
 3
3 -
 4
4 -
 5
5 -
 6
6 -
 7
7 -
 8
8 -
 9
9 -
 10
10 -
 11
11 -
12
-
13
-
14
-
15
-
16
-
17
-
18
-
19
-
20
-
21
-
22
-
23
-
24
-
25
-
26
-
27
-
28
-
29
-
30
-
31
-
32
 |
 |