Linksys NMH300 User Guide - Page 7
Top Panel, Install a Second Hard Disk, Replace a Hard Disk - as
 |
UPC - 745883586646
View all Linksys NMH300 manuals
Add to My Manuals
Save this manual to your list of manuals |
Page 7 highlights
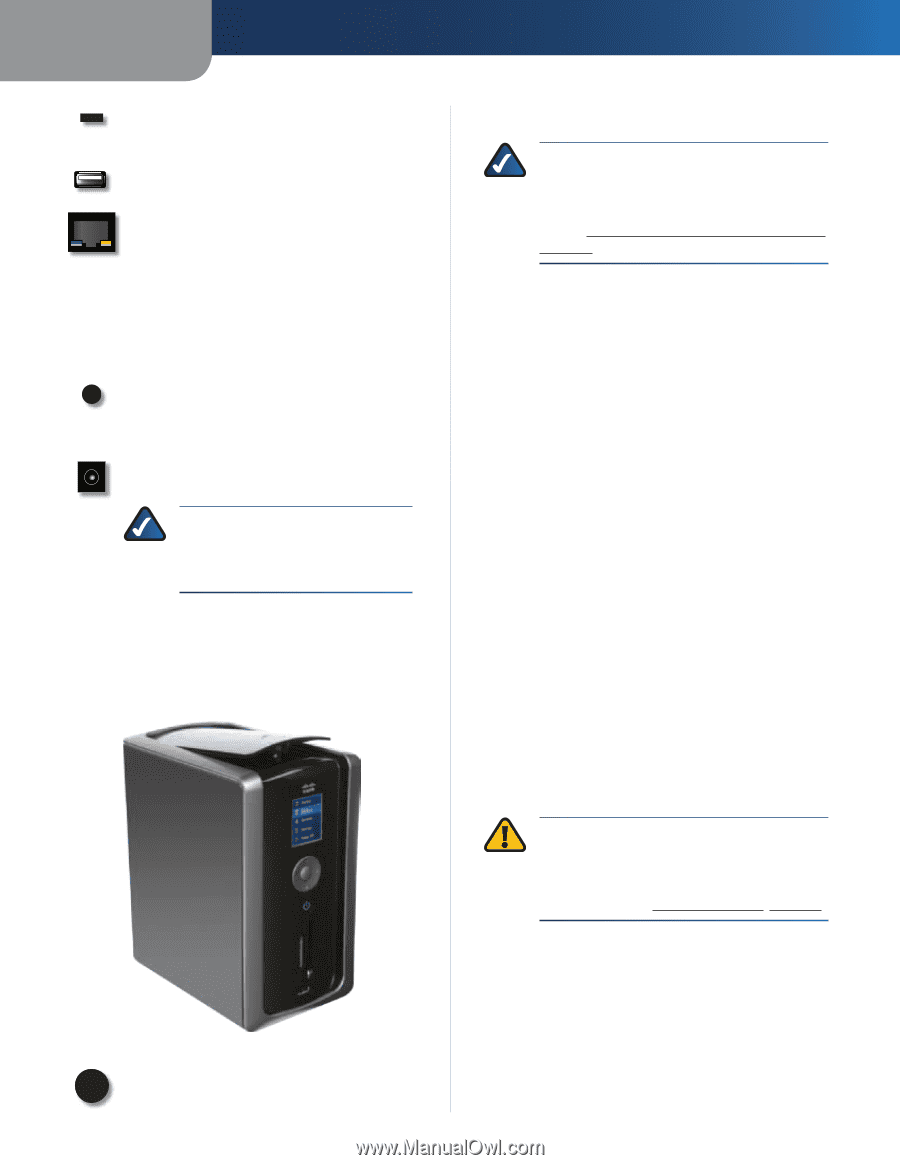
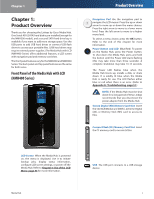
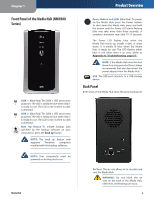
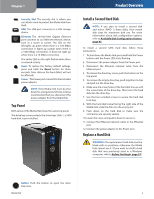
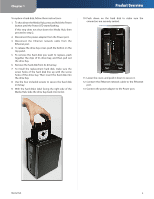
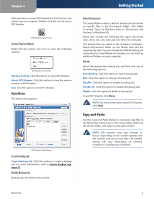
Chapter 1 Security Slot The security slot is where you can attach a lock to protect the Media Hub from theft. USB The USB port connects to a USB storage device. Ethernet The 10/100/1000 Gigabit Ethernet port connects to an Ethernet network device, such as a router or switch. The LED on the left lights up green when there is a 100 Mbps connection. It lights up orange when there is a 1000 Mbps connection. It does not light up when there is a 10 Mbps connection. The amber LED on the right flashes when there is network activity. Reset To restore the factory default settings, press and hold the Reset button for three seconds. (User data on the hard disk(s) will not be affected.) Power The Power port connects to the included power adapter. NOTE: If the Media Hub must be shut down for a long period of time, Linksys recommends that you disconnect the power adapter from the Media Hub. Top Panel Both series of the Media Hub share the same top panel. The drive bay cover protects the drive bays. Disk 1, a SATA hard disk, is pre-installed. Product Overview Install a Second Hard Disk NOTE: If you plan to install a second disk and mirror (RAID 1) these disks, then match disk sizes for maximum disk use. For more information about disk configuration options, refer to Available Disk Configuration Actions, page 45. To install a second SATA hard disk, follow these instructions: 1. To shut down the Media Hub, press and hold the Power button until the Power LED starts flashing. 2. Disconnect the power adapter from the Power port. 3. Disconnect the Ethernet network cable from the Ethernet port. 4. To release the drive bay cover, push the button on the top panel. 5. To remove the empty drive bay, push together its clips and pull out the drive bay. 6. Make sure the screw holes of the hard disk line up with the screw holes of the drive bay. Then insert the hard disk into the drive bay. 7. Use the four included screws to secure the hard disk in its bay. 8. With the hard disk's label facing the right side of the Media Hub, slide the disk into the empty slot. 9. Push down on the hard disk to make sure the connectors are securely seated. 10. Lower the cover, and push it down to secure it. 11. Connect the Ethernet network cable to the Ethernet port. 12. Connect the power adapter to the Power port. Replace a Hard Disk WARNING: The replacement hard disk must be blank with no partitions; otherwise, the Media Hub cannot use it. (If you want to install a hard disk that was previously used in a Windows computer, refer to Before You Begin, page 53.) Button Push the button to open the drive bay cover. Media Hub 3
-
 1
1 -
 2
2 -
 3
3 -
 4
4 -
 5
5 -
 6
6 -
 7
7 -
 8
8 -
 9
9 -
 10
10 -
 11
11 -
 12
12 -
13
-
14
-
15
-
16
-
17
-
18
-
19
-
20
-
21
-
22
-
23
-
24
-
25
-
26
-
27
-
28
-
29
-
30
-
31
-
32
-
33
-
34
-
35
-
36
-
37
-
38
-
39
-
40
-
41
-
42
-
43
-
44
-
45
-
46
-
47
-
48
-
49
-
50
-
51
-
52
-
53
-
54
-
55
-
56
-
57
-
58
-
59
-
60
-
61
-
62
-
63
-
64
-
65
-
66
-
67
-
68
-
69
-
70
-
71
-
72
-
73
-
74
-
75
-
76
-
77
-
78
-
79
-
80
-
81
 |
 |