Linksys WPS11 User Guide - Page 18
Convert LF to CR+LF - configuration problems
 |
UPC - 745883551804
View all Linksys WPS11 manuals
Add to My Manuals
Save this manual to your list of manuals |
Page 18 highlights
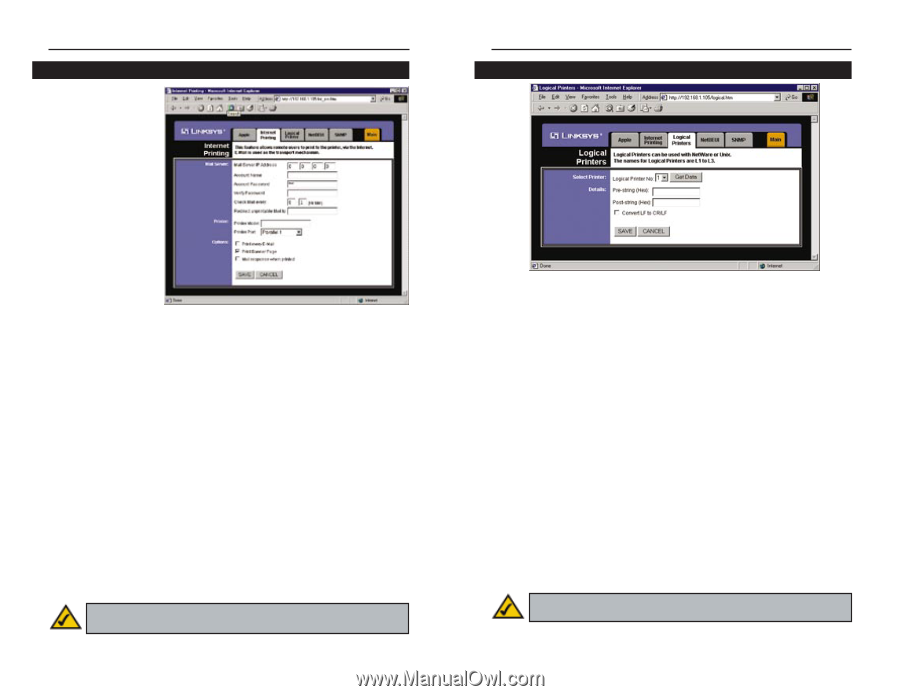
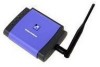
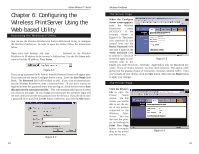
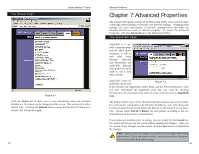
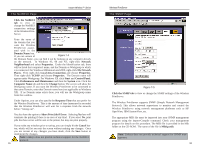
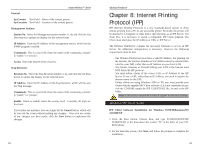
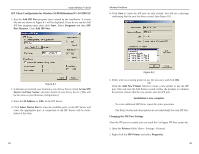
Instant Wireless™ Series The Internet Printing Page Click the Internet Printing tab to view or change the Internet Printing values of the Wireless PrintServer. Internet Printing allows you to automatically print any e-mails that are sent to a specific email account on your network. This is especially useful for printing information when you are not connected to the network. You can print from anywhere that you can access email. Figure 7-2 The Mail Server IP Address is where you will enter the address of your mail server. (This value must be a fixed IP address.) The Account Name and Account Password must be entered next. Enter the password again to Verify Password. Then, enter the time interval for the Wireless PrintServer to check for e-mail to be printed, in hours and minutes in the Check Mail every: box. You may even specify an e-mail address where mails that cannot be printed are routed, which is useful for both graphic-intensive e-mails and for troubleshooting purposes. Enter this e-mail address in the Redirect unprintable Mail to: box. Under the Printer settings, enter the Printer Model in the box provided. You can find this in the Device Manager. Then choose the Printer Port from the drop down box. Then, choose from the Options by placing a check mark next to your preferences. You can Print every E-Mail, choose to Print Banner Pages (default), or Mail response when printed. If you make any mistakes prior to saving, you can simply hit the Cancel button, which will let you exit the screen without making any changes. Once you are certain of any changes you have made, click the Save button to implement the changes. Note: Linksys does not provide any technical support for problems with e-mail printing. 29 Wireless PrintServer The Logical Printers Page Figure 7-3 Click the Logical Printers tab to view or change the logical printer settings of the Wireless PrintServer. For each Logical Printer, the following fields are available: Logical Printer (Port) - Select the Logical Printer Port you wish to configure. (L1 to L3). Click the Get Data button to update the display with the current data for the selected logical printer. Pre-string - The printer control string (in hex) to be sent to the printer before each print job. This string cannot exceed 30 characters. Post String - The printer control string (in hex) to be sent to the printer after each print job. This string cannot exceed 30 characters. Convert LF to CR+LF - If checked, LF (line feed) characters are changed to CR+LF (carriage return + line feed). If you make any mistakes, you can simply hit the Cancel button, which will let you exit the screen without making any changes. Once you are certain of any changes you have made, click the Save button to implement the changes. Note: Linksys does not provide any technical support for logical printers configuration. 30
-
 1
1 -
2
-
3
-
4
-
5
-
6
-
7
-
8
-
9
-
10
-
11
-
12
-
 13
13 -
 14
14 -
 15
15 -
 16
16 -
 17
17 -
 18
18 -
 19
19 -
 20
20 -
 21
21 -
 22
22 -
 23
23 -
24
-
25
-
26
-
27
-
28
-
29
-
30
-
31
 |
 |