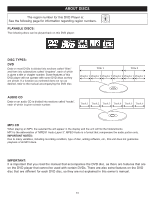
Memorex MVUC821 Manual - Page 19
Radio Operation Continued
 |
UPC - 749720012732
View all Memorex MVUC821 manuals
Add to My Manuals
Save this manual to your list of manuals |
Page 19 highlights
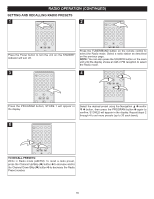
RADIO OPERATION (CONTINUED) SETTING AND RECALLING RADIO PRESETS 1 2 Press the Power button to turn the unit on; the STANDBY indicator will turn off. Press the TUNER/BAND button on the remote control to select the Radio mode. Select a radio station as described on the previous page. NOTE: You can also press the SOURCE button on the main unit until the display shows an AM or FM reception to select the Radio mode. 3 4 1 3 2 Press the PROGRAM button; STORE 1 will appear in the display. Select the desired preset using the Navigation π 1 and/or † 2 button, then press the PROGRAM button 3 again to confirm; STORED will appear in the display. Repeat steps 2 through 4 to set more presets (up to 20 each band). 5 1 2 TO RECALL PRESETS: While in Radio mode (AM/FM): To recall a radio preset, press the Channel Up/Skip (n) button 1 to increase and/or the Channel Down/Skip (o) button 2 to decrease the Radio Preset number. 18
-
 1
1 -
2
-
3
-
4
-
5
-
6
-
7
-
8
-
9
-
10
-
11
-
12
-
13
-
 14
14 -
 15
15 -
 16
16 -
 17
17 -
 18
18 -
 19
19 -
 20
20 -
 21
21 -
 22
22 -
 23
23 -
 24
24 -
25
-
26
-
27
-
28
-
29
-
30
-
31
-
32
-
33
-
34
-
35
-
36
-
37
-
38
-
39
-
40
-
41
-
42
-
43
-
44
-
45
-
46
-
47
-
48
-
49
-
50
-
51
-
52
-
53
-
54
-
55
-
56
-
57
-
58
-
59
 |
 |
