Motorola 56566 User Guide - Page 19
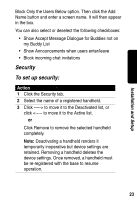
Location of your Base, Unit's ID, USB Connector, Base Unit, rear view, Cable, Action
 |
UPC - 723755565661
View all Motorola 56566 manuals
Add to My Manuals
Save this manual to your list of manuals |
Page 19 highlights
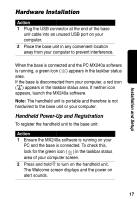
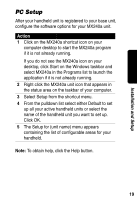
Action 3 If you are prompted to enter the base ID, skip this step and proceed to step 4. If you are not prompted to enter the base ID, press Menu. When the Menu screen appears, press the option key below Regstr to register the base. 4 Enter your base ID and press Send. The ID is a 6-character code located on the bottom of the base unit (see page 18). 5 When the Registration screen opens on your computer, enter a name for your handheld unit and click Accept. Note: If you are registering a handheld that was last registered to a different base, after step 1 press Menu, then select the Regstr option. BASE ID: XXXXXX Location of your Base Unit's ID USB Cable Installation and Setup Base Unit (rear view) 18 USB Connector
-
 1
1 -
2
-
3
-
4
-
5
-
6
-
7
-
8
-
9
-
10
-
11
-
12
-
13
-
 14
14 -
 15
15 -
 16
16 -
 17
17 -
 18
18 -
 19
19 -
 20
20 -
 21
21 -
 22
22 -
 23
23 -
 24
24 -
25
-
26
-
27
-
28
-
29
-
30
-
31
-
32
-
33
-
34
-
35
-
36
-
37
-
38
-
39
-
40
-
41
-
42
-
43
-
44
-
45
-
46
-
47
-
48
-
49
-
50
-
51
-
52
 |
 |

18
Installation and Setup
Note:
If you are registering a handheld that was last
registered to a different base, after step 1 press Menu
,
then select the Regstr option.
3
If you are prompted to enter the base ID, skip this
step and proceed to step 4.
If you are not prompted to enter the base ID,
press Menu
.
When the Menu screen appears,
press the option key below Regstr to register the
base.
4
Enter your base ID and press Send. The ID is a
6-character code located on the bottom of the
base unit (see page 18).
5
When the Registration screen opens on your
computer, enter a name for your handheld unit
and click Accept.
Action
BASE ID: XXXXXX
Location of your Base
Unit’s ID
USB Connector
Base Unit
(rear view)
USB
Cable