Motorola Moto G5S Plus User Guide - Page 5
Start
 |
View all Motorola Moto G5S Plus manuals
Add to My Manuals
Save this manual to your list of manuals |
Page 5 highlights
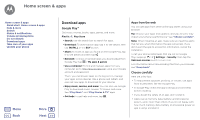
Start let's get up and running Start Sign in Battery life Menu Back More Next Sign in After you power on, just follow the screen prompts to get started. If you use Gmail™, you already have a Google™ account-if not, you can create an account during setup. Signing into your Google account lets you access, sync, and backup your stuff. See your Google apps, contacts, calendar, photos, and more. Tips & tricks • Wi-Fi network: For faster Internet access or to conserve mobile data use, swipe the status bar down with two fingers, then tap > Wi-Fi. There's more in "Wi-Fi networks". • Accounts: To add, edit, or delete accounts, swipe up > Settings > Accounts. To set up email accounts, see "Email". For help with your Google account, visit www.google.com/accounts. Note: This phone supports apps and services that may use a lot of data, so make sure your data plan meets your needs. Contact your service provider for details. Battery life Your phone processes tons of information. Depending on what you use, that can take a lot of power. When your phone is stationary, not charging, or not in use for a period of time, unnecessary background processes are shut down to optimize battery life. To see what's using up battery power, swipe up > Settings > Battery. To help improve battery life, swipe up > Battery > Battery saver, and turn it on. Settings > Tip: To quickly open Settings, swipe down on the status bar with two fingers and tap . Tips & tricks To save even more battery life between charges, you could reduce: • Bluetooth® use: Swipe up > Settings > Bluetooth and turn it off when you don't need it. • GPS use: Swipe up > Settings > Location > Mode > Battery saving to turn off GPS tracking. • Display brightness: Swipe up > Settings > Display > Brightness level and drag the brightness slider left. Make sure Adaptive brightness is also turned on. • Display timeout delay: Swipe up > Display > Sleep > (shorter setting). Settings >
-
 1
1 -
 2
2 -
 3
3 -
 4
4 -
 5
5 -
 6
6 -
 7
7 -
 8
8 -
 9
9 -
 10
10 -
 11
11 -
12
-
13
-
14
-
15
-
16
-
17
-
18
-
19
-
20
-
21
-
22
-
23
-
24
-
25
-
26
-
27
-
28
-
29
-
30
-
31
-
32
-
33
-
34
-
35
-
36
-
37
-
38
-
39
-
40
-
41
-
42
-
43
-
44
-
45
-
46
-
47
-
48
-
49
-
50
-
51
-
52
-
53
-
54
-
55
-
56
 |
 |