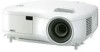
NEC LT280 LT280/LT38 UM - Page 33
Connecting the Supplied Power Cable, Doing so can cause damage to the projector or PC card
 |
UPC - 050927250569
View all NEC LT280 manuals
Add to My Manuals
Save this manual to your list of manuals |
Page 33 highlights
2. Installation and Connections Connecting the Supplied Power Cable Connect the supplied power cable to the projector. First connect the supplied power cable's two-pin plug to the AC IN of the projector, and then connect the other plug of the supplied power cable in the wall outlet. To wall outlet SELECT 3D REFORM AUTO ADJUST SOURCE PC CARD USB COMPONENT IN S-VIDEO Y IN VIDEO Cb/Pb IN Cr/Pr L/MONAOUDIO IN R LAN AUDIO IN AUDIO OUT COMPUTER COMPUTER 1 IN 3 IN MONITOR OUT ON/STAND BY POWSETRATLUASMPPC CARD COMPUTER 2 IN PC CONTROL AC IN Make sure that the prongs are fully inserted into both the AC IN and the wall outlet. CAUTION: Do not unplug the power cable from the wall outlet under any one of the following circumstances. Doing so can cause damage to the projector or PC card: • While the projector's lamp is lighted. • While the cooling fans are running. The cooling fans continue to work for 30 seconds after the projector is turned off. • While the PC CARD Access Indicator lights. Doing so can damage your PC memory card. 23
-
 1
1 -
2
-
3
-
4
-
5
-
6
-
7
-
8
-
9
-
10
-
11
-
12
-
13
-
14
-
15
-
16
-
17
-
18
-
19
-
20
-
21
-
22
-
23
-
24
-
25
-
26
-
27
-
 28
28 -
 29
29 -
 30
30 -
 31
31 -
 32
32 -
 33
33 -
 34
34 -
 35
35 -
 36
36 -
 37
37 -
 38
38 -
39
-
40
-
41
-
42
-
43
-
44
-
45
-
46
-
47
-
48
-
49
-
50
-
51
-
52
-
53
-
54
-
55
-
56
-
57
-
58
-
59
-
60
-
61
-
62
-
63
-
64
-
65
-
66
-
67
-
68
-
69
-
70
-
71
-
72
-
73
-
74
-
75
-
76
-
77
-
78
-
79
-
80
-
81
-
82
-
83
-
84
-
85
-
86
-
87
-
88
-
89
-
90
-
91
-
92
-
93
-
94
-
95
-
96
-
97
-
98
-
99
-
100
-
101
-
102
-
103
-
104
-
105
-
106
-
107
-
108
-
109
-
110
-
111
-
112
-
113
-
114
-
115
-
116
-
117
-
118
-
119
-
120
-
121
-
122
-
123
-
124
-
125
-
126
-
127
-
128
-
129
-
130
-
131
-
132
-
133
 |
 |
