Netgear DGN2200v1 DGN2200 User Manual - Page 152
Step 2: Con Gateway B (the Modem Router at the Regional Office), toGW_A
 |
View all Netgear DGN2200v1 manuals
Add to My Manuals
Save this manual to your list of manuals |
Page 152 highlights
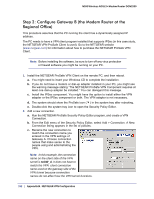
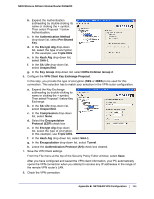
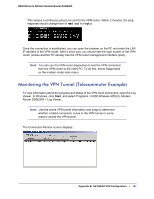
N300 Wireless ADSL2+ Modem Router DGN2200 Step 2: Configure Gateway B (the Modem Router at the Regional Office) This procedure assumes that the PC running the client has a dynamically assigned IP address. The PC needs to have a VPN client program installed that supports IPSec (in this case study, the NETGEAR VPN ProSafe Client is used). Go to the NETGEAR website (www.netgear.com) for information about how to purchase the NETGEAR ProSafe VPN Client. Note: Before installing the software, be sure to turn off any virus protection or firewall software you might be running on your PC. 1. Install the NETGEAR ProSafe VPN Client on the remote PC, and then reboot. a. You might need to insert your Windows CD to complete the installation. b. If you do not have a modem or dial-up adapter installed in your PC, you might see the warning message stating "The NETGEAR ProSafe VPN Component requires at least one dial-up adapter be installed." You can disregard this message. c. Install the IPSec component. You might have the option to install either the VPN adapter or the IPSec component or both. The VPN adapter is not necessary. d. The system should show the ProSafe icon ( ) in the system tray after rebooting. e. Double-click the system tray icon to open the Security Policy Editor. 2. Add a new connection. a. Run the NETGEAR ProSafe Security Policy Editor program, and create a VPN Connection. b. From the Edit menu of the Security Policy Editor, select Add > Connection. A New Connection listing appears in the list of policies. c. Rename the new connection to match the connection name you entered in the VPN settings of Gateway A. Choose connection names that make sense to the people using and administrating the VPN. Note: In this example, the connection name on the client side of the VPN tunnel is toGW_A. It does not have to match the VPN_client connection name used on the gateway side of the VPN tunnel because connection names do not affect how the VPN tunnel functions. 152 | Appendix B. NETGEAR VPN Configuration
-
 1
1 -
2
-
3
-
4
-
5
-
6
-
7
-
8
-
9
-
10
-
11
-
12
-
13
-
14
-
15
-
16
-
17
-
18
-
19
-
20
-
21
-
22
-
23
-
24
-
25
-
26
-
27
-
28
-
29
-
30
-
31
-
32
-
33
-
34
-
35
-
36
-
37
-
38
-
39
-
40
-
41
-
42
-
43
-
44
-
45
-
46
-
47
-
48
-
49
-
50
-
51
-
52
-
53
-
54
-
55
-
56
-
57
-
58
-
59
-
60
-
61
-
62
-
63
-
64
-
65
-
66
-
67
-
68
-
69
-
70
-
71
-
72
-
73
-
74
-
75
-
76
-
77
-
78
-
79
-
80
-
81
-
82
-
83
-
84
-
85
-
86
-
87
-
88
-
89
-
90
-
91
-
92
-
93
-
94
-
95
-
96
-
97
-
98
-
99
-
100
-
101
-
102
-
103
-
104
-
105
-
106
-
107
-
108
-
109
-
110
-
111
-
112
-
113
-
114
-
115
-
116
-
117
-
118
-
119
-
120
-
121
-
122
-
123
-
124
-
125
-
126
-
127
-
128
-
129
-
130
-
131
-
132
-
133
-
134
-
135
-
136
-
137
-
138
-
139
-
140
-
141
-
142
-
143
-
144
-
145
-
146
-
 147
147 -
 148
148 -
 149
149 -
 150
150 -
 151
151 -
 152
152 -
 153
153 -
 154
154 -
 155
155 -
 156
156 -
 157
157 -
158
-
159
-
160
-
161
-
162
-
163
-
164
-
165
-
166
-
167
 |
 |
