Netgear GS305EPP User Manual - Page 17
Set up a fixed IP address for the switch by connecting directly to the switch off-network, IP Address
 |
View all Netgear GS305EPP manuals
Add to My Manuals
Save this manual to your list of manuals |
Page 17 highlights
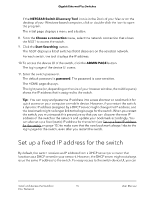
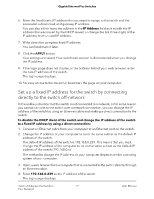
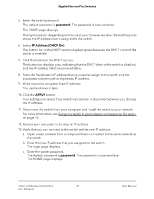
Gigabit Ethernet Plus Switches 6. Enter the fixed (static) IP address that you want to assign to the switch and the associated subnet mask and gateway IP address. You can also either leave the address in the IP Address field as it is (with the IP address that was issued by the DHCP server) or change the last three digits of the IP address to an unused IP address. 7. Write down the complete fixed IP address. You can bookmark it later. 8. Click the APPLY button. Your settings are saved. Your switch web session is disconnected when you change the IP address. 9. If the login page does not display, in the address field of your web browser, enter the new IP address of the switch. The login page displays. 10. For easy access to the device UI, bookmark the page on your computer. Set up a fixed IP address for the switch by connecting directly to the switch off-network In the unlikely situation that the switch is not connected to a network, or for some reason you cannot connect to the switch over a network connection, you can change the IP address of the switch by using an Ethernet cable and making a direct connection to the switch. To disable the DHCP client of the switch and change the IP address of the switch to a fixed IP address by using a direct connection: 1. Connect an Ethernet cable from your computer to an Ethernet port on the switch. 2. Change the IP address of your computer to be in the same subnet as the default IP address of the switch. The default IP address of the switch is 192.168.0.239. This means that you must change the IP address of the computer to be on the same subnet as the default IP address of the switch (192.168.0.x). The method to change the IP address on your computer depends on the operating system of your computer. 3. Open a web browser from a computer that is connected to the switch directly through an Ethernet cable. 4. Enter 192.168.0.239 as the IP address of the switch. The login page displays. Install and Access the Switch in 17 Your Network User Manual
-
 1
1 -
2
-
3
-
4
-
5
-
6
-
7
-
8
-
9
-
10
-
11
-
 12
12 -
 13
13 -
 14
14 -
 15
15 -
 16
16 -
 17
17 -
 18
18 -
 19
19 -
 20
20 -
 21
21 -
 22
22 -
23
-
24
-
25
-
26
-
27
-
28
-
29
-
30
-
31
-
32
-
33
-
34
-
35
-
36
-
37
-
38
-
39
-
40
-
41
-
42
-
43
-
44
-
45
-
46
-
47
-
48
-
49
-
50
-
51
-
52
-
53
-
54
-
55
-
56
-
57
-
58
-
59
-
60
-
61
-
62
-
63
-
64
-
65
-
66
-
67
-
68
-
69
-
70
-
71
-
72
-
73
-
74
-
75
-
76
-
77
-
78
-
79
-
80
-
81
-
82
-
83
-
84
-
85
-
86
-
87
-
88
-
89
-
90
-
91
-
92
-
93
-
94
 |
 |
