Netgear GS305EPP User Manual - Page 27
Set the priority for a port, To set rate limits for incoming and outgoing traffic on a port, Priority
 |
View all Netgear GS305EPP manuals
Add to My Manuals
Save this manual to your list of manuals |
Page 27 highlights
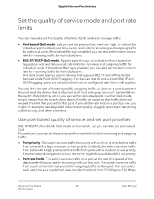
Gigabit Ethernet Plus Switches set the rate limit on a port too low, you might, for example, see degraded video stream quality, sluggish response times during online activity, and other problems. You also can set port rate limits (the same feature) as part of the Quality of Service configuration on the switch (see Set the quality of service mode and port rate limits on page 22). To set rate limits for incoming and outgoing traffic on a port: 1. Open a web browser from a computer that is connected to the same network as the switch, or connected directly to the switch through an Ethernet cable. 2. Enter the IP address that is assigned to the switch. A login window opens. 3. Enter the device management password. The password is the one that you specified the first time that you logged in. The user name and password are case-sensitive. The HOME page displays. The PORT STATUS pane displays on the right or the bottom of the HOME page, depending on the size of your browser window. A port that is in use shows as UP. A port that is not in use shows as AVAILABLE. 4. Select the port. The pane displays detailed information about the port. 5. Click the EDIT button. The EDIT PORT page displays for the selected port. If the QoS mode on the switch is Port-based (the default setting), the Priority menu displays on the page. If the QoS mode is 802.1P/DSCP, the Priority menu does not display. 6. From the In Rate Limit menu, Out Rate Limit menu, or both, select the rate in Kbps or Mbps. The default selection is No Limit. 7. Click the APPLY button. Your settings are saved. Set the priority for a port If the QoS mode on the switch is Port-based (the default setting), you can set the priority for a port. Optimize the Switch 27 Performance User Manual
-
 1
1 -
2
-
3
-
4
-
5
-
6
-
7
-
8
-
9
-
10
-
11
-
12
-
13
-
14
-
15
-
16
-
17
-
18
-
19
-
20
-
21
-
 22
22 -
 23
23 -
 24
24 -
 25
25 -
 26
26 -
 27
27 -
 28
28 -
 29
29 -
 30
30 -
 31
31 -
 32
32 -
33
-
34
-
35
-
36
-
37
-
38
-
39
-
40
-
41
-
42
-
43
-
44
-
45
-
46
-
47
-
48
-
49
-
50
-
51
-
52
-
53
-
54
-
55
-
56
-
57
-
58
-
59
-
60
-
61
-
62
-
63
-
64
-
65
-
66
-
67
-
68
-
69
-
70
-
71
-
72
-
73
-
74
-
75
-
76
-
77
-
78
-
79
-
80
-
81
-
82
-
83
-
84
-
85
-
86
-
87
-
88
-
89
-
90
-
91
-
92
-
93
-
94
 |
 |
