Netgear GSM7328S-200NAS User Guide - Page 17
Step 7: Connecting to the Console Port to Manage the Switch initial configuration
 |
View all Netgear GSM7328S-200NAS manuals
Add to My Manuals
Save this manual to your list of manuals |
Page 17 highlights
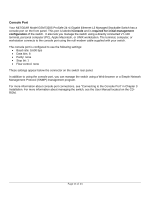
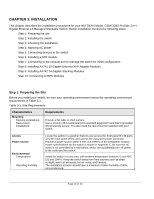
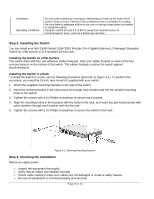
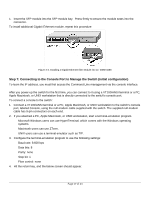
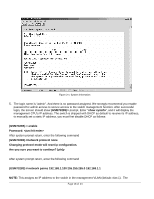
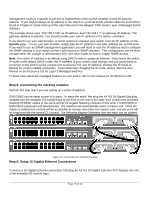
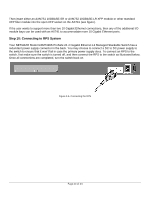
1. Insert the SFP module into the SFP module bay. Press firmly to ensure the module seats into the connector. To install additional Gigabit Ethernet module, repeat this procedure Figure 3-3. Installing a Gigabit Ethernet fiber Module into an GSM7328S Step 7: Connecting to the Console Port to Manage the Switch (initial configuration) To learn the IP address, you must first access the Command Line management via the console interface. After you power-up the switch for the first time, you can connect to it using a VT100/ANSI terminal or a PC, Apple Macintosh, or UNIX workstation that is directly connected to the switch's console port. To connect a console to the switch: 1. Connect a VT100/ANSI terminal or a PC, Apple Macintosh, or UNIX workstation to the switch's console port, labeled Console, using the null-modem cable supplied with the switch. The supplied null-modem cable has 9-pin connectors on each end. 2. If you attached a PC, Apple Macintosh, or UNIX workstation, start a terminal-emulation program. Microsoft Windows users can use HyperTerminal, which comes with the Windows operating systems. Macintosh users can use ZTerm. UNIX users can use a terminal emulator such as TIP. 3. Configure the terminal-emulation program to use the following settings: Baud rate: 9,600 bps Data bits: 8 Parity: none Stop bit: 1 Flow control: none 4. Hit the return key, and the below screen should appear. Page 17 of 24
-
 1
1 -
2
-
3
-
4
-
5
-
6
-
7
-
8
-
9
-
10
-
11
-
 12
12 -
 13
13 -
 14
14 -
 15
15 -
 16
16 -
 17
17 -
 18
18 -
 19
19 -
 20
20 -
 21
21 -
 22
22 -
23
-
24
-
25
-
26
 |
 |
