Nikon COOLPIX 5200 User Manual - Page 53
To select the flash mode
 |
UPC - 018208255160
View all Nikon COOLPIX 5200 manuals
Add to My Manuals
Save this manual to your list of manuals |
Page 53 highlights
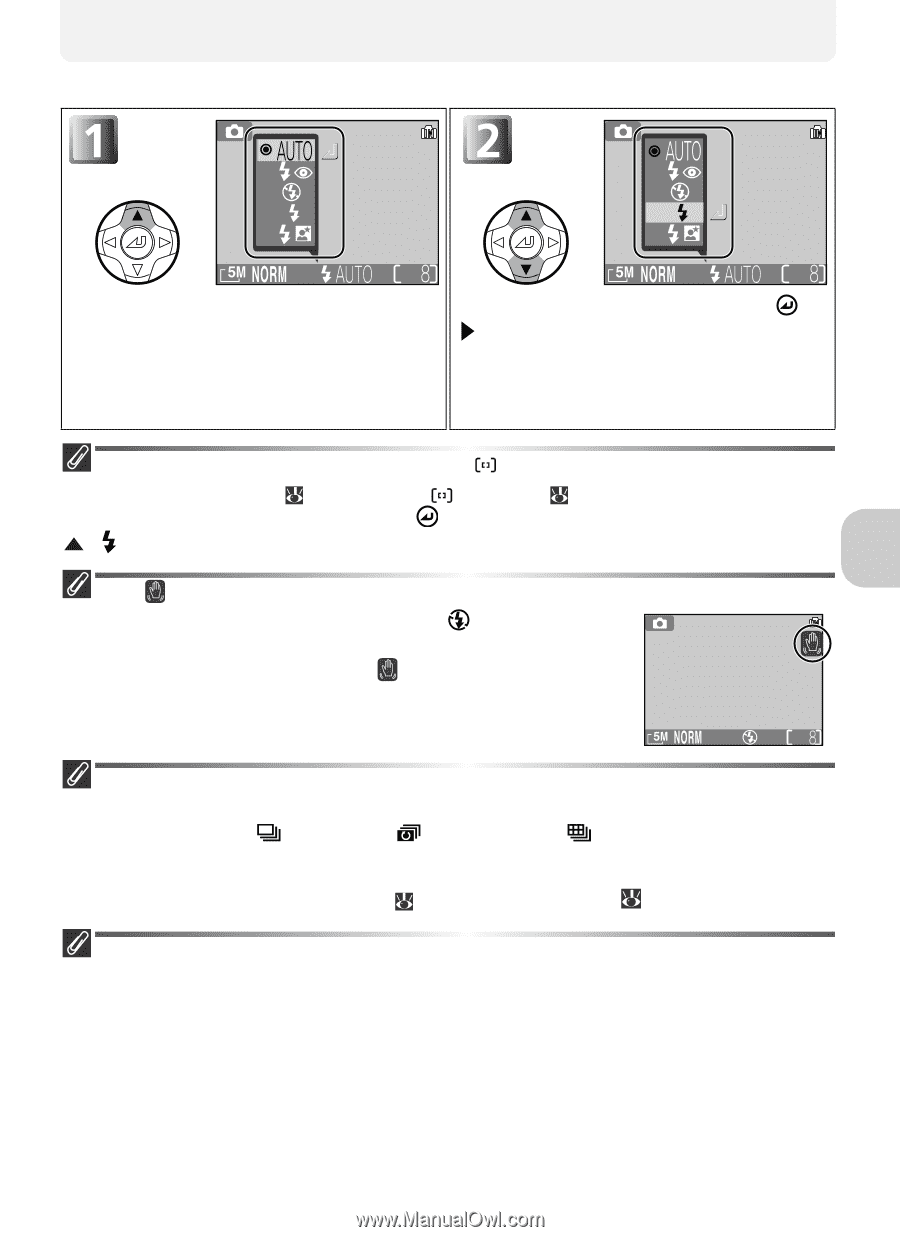
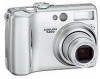
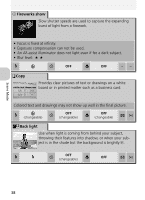
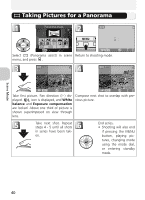
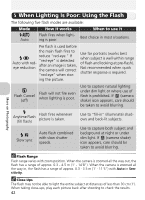
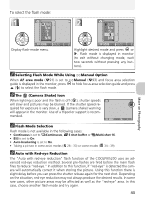
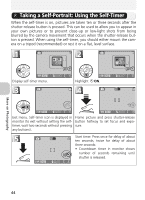
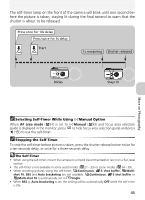
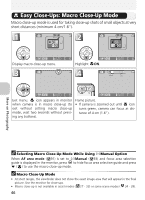
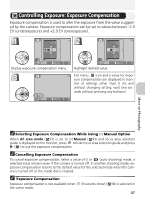
To select the flash mode: More on Photography Display flash-mode menu. Highlight desired mode and press or . Flash mode is displayed in monitor (to exit without changing mode, wait two seconds without pressing any buttons). Selecting Flash Mode While Using Manual Option When AF area mode ( 91) is set to Manual ( 93) and focus area selection guide is displayed in the monitor, press to hide focus area selection guide and press ( ) to select the flash mode. The (Camera Shake) Icon When lighting is poor and the flash is off ( ), shutter speeds will slow and pictures may be blurred. If the shutter speed required for exposure is very slow, a (camera shake) warning will appear in the monitor. Use of a tripod or support is recommended. Flash Mode Selection Flash mode is not available in the following cases: • Continuous is set to Continuous, 5 shot buffer or Multi-shot 16. • BSS is set to On. • Auto bracketing is set to On. • Taking a picture in some assist modes ( 28 - 33) or scene modes ( 34 - 39). Auto with Red-eye Reduction The "Auto with red-eye reduction" flash function of the COOLPIX5200 uses an advanced red-eye reduction method. Several pre-flashes are fired before the main flash fires to reduce "red-eye." In addition to this function, if "red-eye" is detected the camera will automatically correct it when storing the picture. Using this function there is slight delay before you can press the shutter release again for the next shot. Depending on the situation, red-eye reduction may not always produce the desired results. In some rare cases, other picture areas may be affected as well as the "red-eye" area. In this case, choose another flash mode and try again. 43
-
 1
1 -
2
-
3
-
4
-
5
-
6
-
7
-
8
-
9
-
10
-
11
-
12
-
13
-
14
-
15
-
16
-
17
-
18
-
19
-
20
-
21
-
22
-
23
-
24
-
25
-
26
-
27
-
28
-
29
-
30
-
31
-
32
-
33
-
34
-
35
-
36
-
37
-
38
-
39
-
40
-
41
-
42
-
43
-
44
-
45
-
46
-
47
-
 48
48 -
 49
49 -
 50
50 -
 51
51 -
 52
52 -
 53
53 -
 54
54 -
 55
55 -
 56
56 -
 57
57 -
 58
58 -
59
-
60
-
61
-
62
-
63
-
64
-
65
-
66
-
67
-
68
-
69
-
70
-
71
-
72
-
73
-
74
-
75
-
76
-
77
-
78
-
79
-
80
-
81
-
82
-
83
-
84
-
85
-
86
-
87
-
88
-
89
-
90
-
91
-
92
-
93
-
94
-
95
-
96
-
97
-
98
-
99
-
100
-
101
-
102
-
103
-
104
-
105
-
106
-
107
-
108
-
109
-
110
-
111
-
112
-
113
-
114
-
115
-
116
-
117
-
118
-
119
-
120
-
121
-
122
-
123
-
124
-
125
-
126
-
127
-
128
-
129
-
130
-
131
-
132
-
133
-
134
-
135
-
136
-
137
-
138
-
139
-
140
-
141
-
142
-
143
-
144
-
145
-
146
-
147
-
148
-
149
-
150
-
151
-
152
 |
 |