Nikon COOLPIX S6500 Reference Manual
Nikon COOLPIX S6500 Manual
 |
View all Nikon COOLPIX S6500 manuals
Add to My Manuals
Save this manual to your list of manuals |
Nikon COOLPIX S6500 manual content summary:
- Nikon COOLPIX S6500 | Reference Manual - Page 1
DIGITAL CAMERA Reference Manual En - Nikon COOLPIX S6500 | Reference Manual - Page 2
COOLPIX S6500 Image editing effects that are fun and easy to apply while shooting p Quick effects A30, 39 Create images with effects in three easy steps, simply by shooting to remotely zoom the camera in or out on the subject. You can also transfer saved images from the camera to the smart device. - Nikon COOLPIX S6500 | Reference Manual - Page 3
Introduction Parts of the Camera The Basics of Shooting and Playback Shooting Features Playback Features Recording and Playing Back Movies General Camera Setup Using the Wi-Fi (Wireless LAN) Feature Reference Section Technical Notes and Index i - Nikon COOLPIX S6500 | Reference Manual - Page 4
First Thank you for purchasing the Nikon COOLPIX S6500 digital camera. Before using the camera, please read the information in "For Your Safety" (Aviii-x) and familiarize yourself with the information provided in this manual. After reading, please keep this manual handy and refer to it to enhance - Nikon COOLPIX S6500 | Reference Manual - Page 5
Introduction About This Manual If you want to start using the camera right away, see "The Basics of Shooting and Playback" (A13). To learn about the parts of the camera and information that is displayed in the monitor, see "Parts of the Camera" (A1). iii - Nikon COOLPIX S6500 | Reference Manual - Page 6
"Technical Notes and Index." • SD and SDHC/SDXC memory cards are referred to as "memory cards" in this manual. • The setting at the time of purchase is referred to as the "default setting." • The names of menu items displayed in the camera monitor, and the names of buttons or messages displayed on - Nikon COOLPIX S6500 | Reference Manual - Page 7
Accessories Nikon COOLPIX cameras are designed to the highest standards and include complex electronic circuitry. Only Nikon brand electronic accessories (including battery chargers, batteries, Charging AC adapters, and AC adapters) certified by Nikon specifically for use with this Nikon digital - Nikon COOLPIX S6500 | Reference Manual - Page 8
errors or omissions to the attention of the Nikon representative in your area (address provided separately). Notice Concerning Prohibition of Copying or Reproduction Note that simply being in possession of material that was digitally copied or reproduced by means of a scanner, digital camera cards - Nikon COOLPIX S6500 | Reference Manual - Page 9
Introduction Disposing of Data Storage Devices Please note that deleting images or formatting data storage devices such as memory cards or built-in camera memory does not completely erase the original image data. Deleted files can sometimes be recovered from discarded storage devices using - Nikon COOLPIX S6500 | Reference Manual - Page 10
as the result of a fall or other accident, take the product to a Nikon-authorized service viii representative for inspection, after unplugging the product and/or removing the battery. Do not use the camera or Charging AC Adapter in the presence of flammable gas Do not use electronic equipment in - Nikon COOLPIX S6500 | Reference Manual - Page 11
replacing the battery, turn the product off. If you are using the Charging AC Adapter/AC adapter, be sure it is unplugged. • Use only a Rechargeable Li-ion Battery EN-EL19 (included). Charge the battery by using a camera that supports battery charging or by using a Battery Charger MH-66 (available - Nikon COOLPIX S6500 | Reference Manual - Page 12
off when using inside an airplane or the hospital Turn the power off while inside the airplane during take off or landing. Follow the instructions of the hospital when using while in a hospital. The electromagnetic waves given out by this camera may disrupt the electronic systems of the airplane or - Nikon COOLPIX S6500 | Reference Manual - Page 13
THESE INSTRUCTIONS For connection to a supply not in the U.S.A., use an attachment plug adapter of the limits for a Class B digital device, pursuant to Part 15 television reception, which can be determined by turning the equipment off and on, the user is Nikon Corporation may void the user - Nikon COOLPIX S6500 | Reference Manual - Page 14
rique de la classe B est conforme à la norme NMB-003 du Canada. Notices for customers in Europe CAUTIONS RISK OF EXPLOSION IF BATTERY IS REPLACED BY AN INCORRECT TYPE. DISPOSE OF USED BATTERIES ACCORDING TO THE INSTRUCTIONS. This symbol indicates that this product is to be collected separately. The - Nikon COOLPIX S6500 | Reference Manual - Page 15
sale should consult with their local Nikon service center or Nikon-authorized service and Industry Canada licence- problems are associated with using low power wireless devices. There is no proof, however, that these low power wireless devices are absolutely safe. Low power wireless devices emit low - Nikon COOLPIX S6500 | Reference Manual - Page 16
website. Declaration of Conformity Hereby, Nikon Corporation, declares that COOLPIX S6500 is in compliance with the essential requirements and other relevant provisions of Directive 1999/5/EC. The declaration of conformity may be consulted at http://imaging.nikon.com/support/pdf/DoC_S6500.pdf. xiv - Nikon COOLPIX S6500 | Reference Manual - Page 17
by turning off the power, etc. 3. If you have further questions, contact a Nikon service center or Nikon authorized service representative. loss of content that is not attributable to Nikon. • Before discarding this product or transferring it to another owner, perform Reset all in the setup menu ( - Nikon COOLPIX S6500 | Reference Manual - Page 18
Battery 14 Preparation 2 Charge the Battery 16 Preparation 3 Insert a Memory Card.......... 18 Internal Memory and Memory Cards......... 19 Preparation 4 Setting the Display Language, Date, and Time 20 Step 1 Turn the Camera On 24 Turning the Camera 56 Using the Flash (Flash Modes 57 Using the - Nikon COOLPIX S6500 | Reference Manual - Page 19
) Feature 107 Installing the Software on the Smart Device 108 Connecting the Smart Device to the Camera 109 Reference Section E1 Using Easy Panorama (Shooting and Playback E2 Shooting with Easy Panorama E2 Viewing Images Captured with Easy Panorama E5 Favorite Pictures Mode E6 Adding Images - Nikon COOLPIX S6500 | Reference Manual - Page 20
Menu E57 Skin Softening E57 Smile Timer E58 Blink Proof E59 The Playback Menu E60 Print Order (Creating a DPOF Print Order E60 Slide Show E64 Protect E65 Rotate Image E68 Voice Memo E69 Copy (Copy Between Internal Memory and Memory Card E71 Sequence Display Options E73 Choose Key - Nikon COOLPIX S6500 | Reference Manual - Page 21
E113 Error Messages E114 Technical Notes and Index F1 Maximizing Camera Life and Performance F2 The Camera F2 The Battery F3 Charging AC Adapter F4 Memory Cards F5 Cleaning and Storage F6 Cleaning F6 Storage F6 Troubleshooting F7 Specifications F17 Approved Memory Cards F22 Supported - Nikon COOLPIX S6500 | Reference Manual - Page 22
xx - Nikon COOLPIX S6500 | Reference Manual - Page 23
chapter describes the parts of the camera and explains information that is displayed in the monitor. The Camera Body 2 Attaching the Camera Strap 5 Using Menus (the d Button 6 The Monitor 8 Shooting Mode...8 Playback Mode ...10 If you want to start using the camera right away, see "The Basics of - Nikon COOLPIX S6500 | Reference Manual - Page 24
Parts of the Camera The Camera Body 1 23 4 5 6 13 12 11 10 7 8 9 Lens cover closed 2 - Nikon COOLPIX S6500 | Reference Manual - Page 25
Power switch/power-on lamp 24 4 Self-timer lamp 60 AF-assist illuminator 104 5 Flash 57 6 Microphone (stereo 84, 96 7 Lens 8 Lens cover 9 Speaker 84, 100 10 Eyelet for camera strap 5 11 Connector cover 16, 86 12 HDMI micro connector (Type D 86 13 USB/audio/video output connector - Nikon COOLPIX S6500 | Reference Manual - Page 26
Parts of the Camera 15 14 4 1 2 3 4 5 6 7 8 9 13 12 11 10 - Nikon COOLPIX S6500 | Reference Manual - Page 27
1 Charge lamp 17, E101 Flash lamp 57 2 b (e movie-record) button 96 3 A (shooting mode) button 26 4 c (playback) button 32, 82 5 Multi selector 6 6 k (apply selection) button 6 7 l (delete) button 34, E70 8 d (menu) button.......... 6, 67, 84, 99, 104 9 Battery-chamber/ memory card - Nikon COOLPIX S6500 | Reference Manual - Page 28
Parts of the Camera Using Menus (the d Button) Use the multi selector and k button to navigate the menus. 1 Press the d button. • The menu is displayed. 25m 0s 850 2 Press the multi selector J. • The current menu icon is displayed in yellow. Shooting menu Image mode White balance Continuous ISO - Nikon COOLPIX S6500 | Reference Manual - Page 29
using the menu, press the d button. On Off C Notes About Setting Menu Options • Certain menu options cannot be set depending on the current shooting mode or the state of the camera. Unavailable options are displayed in gray and cannot be selected. • When a menu is displayed, you can switch to - Nikon COOLPIX S6500 | Reference Manual - Page 30
's settings and state of use. By default, information is displayed when the camera is first turned on and when you operate the camera, and turns off after a few seconds (when Photo info is set to Auto info in Monitor settings (A104)). Shooting Mode 41 40 39 10 2 38 2 45 37 13 6 36 35 10 - Nikon COOLPIX S6500 | Reference Manual - Page 31
Camera 1 Shooting mode 26, 27 2 Macro mode 62 3 Zoom indicator 29, 62 4 Focus indicator 30 5 AE/AF-L indicator 49 6 Quick effects icon 69 7 Flash mode 57 8 Battery 69 34 White balance mode 68 35 Continuous shooting mode 68 36 Blink proof icon 69 37 Hand-held/tripod 42, - Nikon COOLPIX S6500 | Reference Manual - Page 32
Playback Mode 4 56 1 23 15/05/2013 15:30 7 27 9999. JPG 8 26 25 24 9 10 11 23 22 12 21 13 999 / 999 14 20 17 15 19 18 a 999 / 999 9999 / 9999 b 29m 0s 29m 0s 16 Parts of the Camera 10 - Nikon COOLPIX S6500 | Reference Manual - Page 33
/ 16 total number of images 32 (b) Movie length 100 17 Internal memory indicator 32 Easy panorama playback guide 18 47, E5 Sequence playback guide 33 Movie playback guide 100 19 Quick effects guide 33 20 Volume indicator 84, 100, E69 21 Quick retouch icon 84, E20 22 D-Lighting icon - Nikon COOLPIX S6500 | Reference Manual - Page 34
12 - Nikon COOLPIX S6500 | Reference Manual - Page 35
and Playback Preparation Preparation 1 Insert the Battery 14 Preparation 2 Charge the Battery 16 Preparation 3 Insert a Memory Card 18 Preparation 4 Setting the Display Language, Date, and Time 20 Shooting Step 1 Turn the Camera On 24 Step 2 Select a Shooting Mode 26 Step 3 Frame a Picture - Nikon COOLPIX S6500 | Reference Manual - Page 36
or backwards could damage the camera. Be sure to check that the battery is in the correct orientation. 3 Close the battery-chamber/memory card slot cover. • Charge the battery before the first use or when the battery is running low. See "Preparation 2 Charge the Battery" (A16) for more information - Nikon COOLPIX S6500 | Reference Manual - Page 37
Removing the Battery Turn the camera off and be sure that the power-on lamp and the monitor have turned off before opening the battery-chamber/ memory card slot cover. To eject the battery, open the battery-chamber/memory card slot cover and slide the orange battery latch up in the direction - Nikon COOLPIX S6500 | Reference Manual - Page 38
outlet The Basics of Shooting and Playback USB cable (included) • The charge lamp slowly flashes green to indicate that the battery is charging. • About 3 hours are required to charge a fully exhausted battery. • When the battery has been completely charged, the charge lamp turns off. • See "The - Nikon COOLPIX S6500 | Reference Manual - Page 39
charge lamp stops flashing green and turns off. Flashes quickly (green) • The ambient temperature is not suited to charging. Charge the battery indoors with an ambient temperature of 5°C to 35°C (41°F to 95°F). • The USB cable or Charging AC Adapter is not properly connected, or there is a problem - Nikon COOLPIX S6500 | Reference Manual - Page 40
Be sure to turn off the camera before opening the cover. 2 Insert the memory card. Memory card slot • Slide the memory card in until it clicks into place. BInserting the Memory Card Correctly Inserting the memory card upside down or backwards could damage the camera and the memory card. Be sure - Nikon COOLPIX S6500 | Reference Manual - Page 41
Notes About Memory Cards See "Memory Cards" (F5) and the documentation included with your memory card for more information. Removing Memory Cards Turn the camera off and be sure that the power-on lamp and the monitor have turned off before opening the battery-chamber/ memory card slot cover. Gently - Nikon COOLPIX S6500 | Reference Manual - Page 42
and time setting screen for the camera clock are displayed. 1 Press the power switch to turn on the camera. • When the camera is turned on, the power-on lamp (green) will light and then the monitor will turn on (the power-on lamp turns off when the monitor turns on). 2 Press the multi selector H or - Nikon COOLPIX S6500 | Reference Manual - Page 43
saving time function is enabled, W is displayed above the map. To turn off the daylight saving time function, press I. 5 Press H or I Yes and press the k button. • When settings are finished, the lens extends and the camera switches to shooting mode. Date and time D M Y 01 01 2013 00 00 - Nikon COOLPIX S6500 | Reference Manual - Page 44
is inserted into the camera or when the camera is connected to an optional AC adapter, and it can run the clock for several days after about ten hours of charging. • If the camera's backup battery becomes exhausted, the date and time setting screen is displayed when the camera is turned on. Set the - Nikon COOLPIX S6500 | Reference Manual - Page 45
23 - Nikon COOLPIX S6500 | Reference Manual - Page 46
is low. Prepare to charge or replace the battery. The camera cannot take images. Recharge or replace with a fully charged battery. 25m 0s 850 Number of exposures remaining Number of Exposures Remaining The number of images that can be taken is displayed. • C is displayed when no memory card is - Nikon COOLPIX S6500 | Reference Manual - Page 47
the camera is turned on, the power-on lamp (green) will light and then the monitor will turn on (the power-on lamp turns off when the monitor turns on). • To turn off the camera, press the power switch. When the camera turns off, the power-on lamp and the display turn off. • To turn the camera on - Nikon COOLPIX S6500 | Reference Manual - Page 48
menu, which allows you to select the desired shooting mode, is displayed. 2 Press the multi selector H or I to select a shooting mode and press the k button. • A (auto) mode is used in this example. • The shooting mode setting is saved even after the camera is turned off. Auto mode The Basics of - Nikon COOLPIX S6500 | Reference Manual - Page 49
to smooth the skin tones of human faces. The Basics of Shooting and Playback C Changing the Shooting Settings • See "Features That Can Be Set Using the Multi Selector" (A56) for more information. - See "Using the Flash (Flash Modes)" (A57) for more information. - See "Using the Self-timer" (A60 - Nikon COOLPIX S6500 | Reference Manual - Page 50
, and speaker. • When taking images in portrait ("tall") orientation, turn the camera so that the flash is above the lens. The Basics of Shooting and Playback 2 Frame the picture. • Aim the camera at the desired subject. • When the camera detects the main subject, the focus area is displayed - Nikon COOLPIX S6500 | Reference Manual - Page 51
tripod to stabilize the camera in the following situations. - When shooting in dim lighting or when the flash mode (A58) is turn the camera on, the zoom moves to the maximum wide-angle position. • A zoom indicator is displayed at the top of the monitor when the zoom control is rotated. • Digital - Nikon COOLPIX S6500 | Reference Manual - Page 52
are using digital zoom, the camera focuses on the subject in the center of the frame and the focus area is not displayed. When the camera has focused, the focus indicator (A9) glows green. • While the shutter-release button is pressed halfway, the focus area or focus indicator may flash red. This - Nikon COOLPIX S6500 | Reference Manual - Page 53
and aperture value), press the shutter-release button lightly until you feel a slight resistance. Focus battery-chamber/memory card slot cover or remove the battery or memory card while an indicator is flashing. Doing this could result in loss of data, or in damage to the camera or the memory card - Nikon COOLPIX S6500 | Reference Manual - Page 54
the subsequent image: I or K c (playback) button Display the previous image Display the next image • Remove the memory card from the camera to play back images saved in the camera's internal memory. C is displayed near the current image number/total number of images display. • To return to - Nikon COOLPIX S6500 | Reference Manual - Page 55
C Viewing Images • Images may be displayed briefly at low resolution immediately after switching to the next or previous image. • When images in which the face of a person (A73) or a pet (A48) was detected at the time of shooting are displayed in full-frame playback mode, depending upon the - Nikon COOLPIX S6500 | Reference Manual - Page 56
The Basics of Shooting and Playback Step 6 Delete Images 1 Press the l button to delete the image currently displayed in the monitor. 2 Press the multi selector H or I to select the - Nikon COOLPIX S6500 | Reference Manual - Page 57
dialog is displayed. Follow the instructions displayed in the monitor. The Basics of Shooting and Playback B Notes About Deletion • Deleted images cannot be recovered. Copy important images to a computer or other media before deleting them from the camera - Nikon COOLPIX S6500 | Reference Manual - Page 58
36 - Nikon COOLPIX S6500 | Reference Manual - Page 59
Suited to Scenes 40 Special Effects Mode (Applying Effects When Shooting 51 Smart Portrait Mode (Capturing Images of Smiling Faces 53 Features That Can Be Set Using the Multi Selector........ 56 Using the Flash (Flash Modes 57 Using the Self-timer...60 Using Macro Mode...62 Adjusting Brightness - Nikon COOLPIX S6500 | Reference Manual - Page 60
can be set using the multi selector (A56): Flash mode (A57), self-timer (A60), macro mode (A62), and exposure compensation (A64) • Features that can be set by pressing the d button (A67): Options available in the auto shooting menu (A68) C Camera Settings That Cannot Be Used Simultaneously 38 Some - Nikon COOLPIX S6500 | Reference Manual - Page 61
operations are performed for about five seconds, the monitor display returns to the shooting screen. • To not display the screen shown on the right, set (E18) for information about the effect types. Super vivid Painting Toy camera Toy camera effect 1 effect 2 3 Select Yes and press the k button. - Nikon COOLPIX S6500 | Reference Manual - Page 62
following scenes is selected, camera settings are automatically optimized for the selected scene. Enter shooting mode M A (shooting mode) button M x (A48) d Sports (A42) z Snow (A43) k Close-up (A44) n Black and white copy (A46) s 3D photography (A49) Changing Scene Mode Settings • Depending on - Nikon COOLPIX S6500 | Reference Manual - Page 63
on the composition of the image. When the camera detects a human face, it focuses on that face (A73). • When the camera selects h (night portrait), flash mode is fixed at fill flash with slow sync and red-eye reduction (when U (auto) is selected) and the camera captures one image at a slower shutter - Nikon COOLPIX S6500 | Reference Manual - Page 64
• Focus, exposure, and hue are fixed at the values determined with the first image in each series. • The frame rate for continuous shooting may vary depending upon the current image mode setting, the memory card used, or shooting condition. e Night portrait • When the camera detects a human face, it - Nikon COOLPIX S6500 | Reference Manual - Page 65
in the center of the frame. h Sunset O • The camera focuses on the area in the center of the frame. i Dusk/dawn O • The focus area or focus indicator (A9) always glows green when the shutter-release button is pressed halfway. Shooting Features O: Use of a tripod is recommended when using - Nikon COOLPIX S6500 | Reference Manual - Page 66
lights in green, press the shutter-release button all the way to capture a series of images which will be combined into a single image and saved. - Once the shutter-release button is pressed all the way, hold the camera still until a still image is displayed. After taking an image, do not turn - Nikon COOLPIX S6500 | Reference Manual - Page 67
is automatically selected and saved (BSS (Best Shot Selector)). • The flash does not fire. m Fireworks show O • Camera focuses at infinity. • The focus indicator (A9) always glows green when the shutter-release button is pressed halfway. • The shutter speed is fixed at about four seconds. O: Use - Nikon COOLPIX S6500 | Reference Manual - Page 68
displayed. After taking an image, do not turn the camera off before the monitor switches to the shooting screen. - The angle of view (i.e., the area visible in the frame) seen in the saved image will be narrower than that seen in the monitor at the time of shooting. - Digital zoom cannot be used. 46 - Nikon COOLPIX S6500 | Reference Manual - Page 69
all the way down, remove your finger from the button, and then slowly pan the camera horizontally. Shooting automatically ends when the camera captures the specified shooting range. • The zoom position is fixed at wide-angle. • If you press the k button when an image captured using easy panorama - Nikon COOLPIX S6500 | Reference Manual - Page 70
Internal memory or the memory card is full. To resume shooting with Pet portrait auto release, press the multi selector J (n) to turn it on again. B Focus Area • When the camera detects a face, a yellow double border (focus area) is displayed around the face, and the double border turns green when - Nikon COOLPIX S6500 | Reference Manual - Page 71
button is pressed or the subject is not aligned with the guide within approximately ten seconds. • If the camera does not take the second image and cancels the shooting even when you align the guide with the subject, try shooting with the shutter-release button. • Movies cannot be recorded in 3D - Nikon COOLPIX S6500 | Reference Manual - Page 72
Shooting Features B Playing Back 3D Images • 3D images cannot be played back in 3D on the camera monitor. Only the left eye image of a 3D image is displayed during playback. • To view 3D images in 3D, a 3D-compatible TV or monitor is required. Use a 3D-compatible HDMI cable to connect the camera - Nikon COOLPIX S6500 | Reference Manual - Page 73
Shooting) Shooting Features Effects can be applied to images during shooting. Enter shooting mode M A (shooting Low key Gives the entire image a dark tone. I Selective color Creates a black and camera effect 1 Gives the entire image a yellowish hue and darkens the image periphery. n Toy camera - Nikon COOLPIX S6500 | Reference Manual - Page 74
The camera focuses button to cancel color selection, then change the settings as desired. - Flash mode (A57) Save - Self-timer (A60) - Macro mode ( Settings • Features that can be set using the multi selector (A56): Flash mode (A57), self-timer (A60), macro mode (A62), and exposure compensation - Nikon COOLPIX S6500 | Reference Manual - Page 75
faces. Enter shooting mode M A (shooting mode) button M F Smart portrait mode M k button 1 Frame the image. • Point the camera at a shooting mode. - Turn the camera off. Shooting Features B Notes About Smart Portrait Mode • Digital zoom cannot be used. • Under some shooting conditions, the camera - Nikon COOLPIX S6500 | Reference Manual - Page 76
, but cannot detect a smile. C When the Self-timer Lamp Flashes When using smile timer, the self-timer lamp flashes when the camera detects a face and flashes quickly immediately after the shutter is released. C Releasing the Shutter Manually The shutter can also be released by pressing the shutter - Nikon COOLPIX S6500 | Reference Manual - Page 77
Features Using Skin Softening When the shutter is released while using one of the shooting modes listed below, the camera detects up to three human faces and processes the image to soften facial skin tones. • Scene auto selector (A41), Portrait (A41), or Night portrait (A42) - Nikon COOLPIX S6500 | Reference Manual - Page 78
) p (macro mode) Available Features The features that are available vary with the shooting mode, as shown below. • See "Default Settings" (A65) for information about each mode's default settings. X Flash mode (A57) Self-timer (A60) n Pet portrait auto release (A48) A (auto) w w - Scene - Nikon COOLPIX S6500 | Reference Manual - Page 79
all the way down. - Flashing: The flash is charging. The camera cannot take images. - Off: The flash will not fire when an image is taken. • If the battery is low, the monitor will turn off in order to save power while the flash is charging. C Effective Range of the Flash When ISO sensitivity is set - Nikon COOLPIX S6500 | Reference Manual - Page 80
X Y Auto The flash fires automatically when lighting is dim. Auto with red-eye reduction Reduce red-eye in portraits caused by the flash (A59). Off The flash will not fire. We recommend using a tripod to stabilize the camera when shooting in dark surroundings. Fill flash The flash fires whenever an - Nikon COOLPIX S6500 | Reference Manual - Page 81
Shooting Features C Red-eye Reduction This camera uses Advanced Red-Eye Reduction (In-Camera Red-Eye Fix). If the camera detects red eye while saving an image, the affected area will be processed to reduce red-eye before the image is saved. Note the following when shooting: • More time than usual - Nikon COOLPIX S6500 | Reference Manual - Page 82
is recommended. Set Vibration reduction to Off in the setup menu (A104) when using a tripod to stabilize the camera during shooting. 1 Press the multi selector J (n self-timer). Shooting Features 2 Press H or I to select n 10s or n 2s and press the k button. Self-timer • n 10s (ten seconds): Use - Nikon COOLPIX S6500 | Reference Manual - Page 83
is released, the lamp stops flashing and glows steadily. • When the shutter is released, the self-timer will be set to OFF. • To stop the timer before an image is taken, press the shutter-release button again. 9 1/250 F3.1 Shooting Features C Camera Settings That Cannot Be Used Simultaneously - Nikon COOLPIX S6500 | Reference Manual - Page 84
the zoom ratio to a position where F and the zoom indicator glow green. • How close you can be to the subject when shooting depends on the zoom ratio. When the zoom ratio is set to a position where F and the zoom indicator glow green, the camera can focus on subjects as close as approximately 30 cm - Nikon COOLPIX S6500 | Reference Manual - Page 85
" (A65) for more information. • Some settings cannot be used with other functions (A70). • The macro mode setting applied in A (auto) mode is saved in the camera's memory even after the camera is turned off, and reapplied the next time A (auto) mode is selected. 63 - Nikon COOLPIX S6500 | Reference Manual - Page 86
in the +0.3 monitor. 25m 0s 850 4 Press the shutter-release button to take an image. • To turn off exposure compensation, return to step 1 and revert the value to 0.0. Shooting Features C Exposure Compensation Value The exposure compensation value applied in A (auto) mode is saved in the - Nikon COOLPIX S6500 | Reference Manual - Page 87
Settings Default settings for each shooting mode are described below. A (auto) D (special effects) F (smart portrait) Scene x (A41) b (A41) c (A42) d (A42) e (A42) f (A43) Z (A43) z (A43) h (A43) i (A43) j (A44) k (A44) u (A45) l (A45) m (A45) n (A46) o (A46) p (A47) Flash (A57) U W U1 U4 V W3 W3 - Nikon COOLPIX S6500 | Reference Manual - Page 88
7 Slow sync with red-eye reduction flash mode may be used. 8 Flash is fixed at X (fill flash) when HDR is set to Off, and is fixed at W (off) when HDR is set to On. 9 Self-timer cannot be used. Pet portrait auto release can be turned on or off (A48). Shooting Features B Camera Settings That Cannot - Nikon COOLPIX S6500 | Reference Manual - Page 89
AF area mode w - - - Autofocus mode w - - - Quick effects w - - - Skin softening - - - w Smile timer - - - w Blink proof - - - w 1 The setting is also applied to other shooting modes. 2 Additional settings are available for some scene modes. See "Characteristics of Each - Nikon COOLPIX S6500 | Reference Manual - Page 90
16. E45 Allows you to control the camera's sensitivity to light. You can set sensitivity to Auto (default setting) or Fixed range shooting. The available settings are Standard color (default E50 setting), Vivid color, Black-and-white, Sepia, and Cyanotype. Allows you to determine how the camera - Nikon COOLPIX S6500 | Reference Manual - Page 91
flash cannot be used. If Blink proof is set to On, the smile timer setting changes to On (single). E58 When On is selected, the camera eyes are open is saved. The flash cannot be used. The default setting is Off. E59 Shooting Features C Camera Settings That Cannot Be Used Simultaneously Some - Nikon COOLPIX S6500 | Reference Manual - Page 92
. Restricted function Option Continuous (A68) Flash mode Blink proof (A69) Smile timer (A69) 16: L (image size: 2560 × 1920 pixels) When using Black-and-white, Sepia, or Cyanotype, the White balance setting is fixed at Auto. If the self-timer is used when Continuous is set to Pre-shooting - Nikon COOLPIX S6500 | Reference Manual - Page 93
), it changes to On (single) if Blink proof is set to On. When Blink proof is set to On, it changes to Off if Smile timer is set to On (continuous) or On (BSS). When Quick effects is set to On, Image review is fixed at On. When Pre-shooting cache, Continuous H: 120 fps, Continuous - Nikon COOLPIX S6500 | Reference Manual - Page 94
) is selected, Motion detection is disabled. When a setting other than Single is selected, Blink warning is disabled. When Multi-shot 16 is selected, digital zoom cannot be used. When Subject tracking is selected, digital zoom cannot be used. When a setting other than Single is selected, the shutter - Nikon COOLPIX S6500 | Reference Manual - Page 95
around the face that the camera will focus on, and single borders are displayed around the other faces. 25m 0s 850 Shooting mode When AF area mode turned off) (A48) Smart portrait mode (A53) Number of faces that can be detected Focus area (double border) Up to 12 The face closest to the camera - Nikon COOLPIX S6500 | Reference Manual - Page 96
of factors, including the direction in which the faces are looking. • In some rare cases, such as those described in "Subjects Not Suitable for Autofocus" (A76), the subject may not be in focus even though the double border turns green. If the camera does not 74 focus, try focus lock shooting (A77). - Nikon COOLPIX S6500 | Reference Manual - Page 97
focus, the focus areas that are in focus (up to nine areas) light in green. Focus areas 1/250 F3.1 Focus areas Shooting Features B Notes About Target Finding AF • Depending on shooting conditions, the subject that the camera determines to be the main subject may vary. • When White balance is - Nikon COOLPIX S6500 | Reference Manual - Page 98
Shooting Features Subjects Not Suitable for Autofocus The camera may not focus as expected in the following situations. In some rare cases, the subject may not be in focus despite the fact that the focus area or the focus indicator glows green: • Subject is very dark • Objects of sharply differing - Nikon COOLPIX S6500 | Reference Manual - Page 99
Press the shutter-release button halfway. • Confirm that the focus area glows green. • Focus and exposure are locked. 3 Continue holding down the shutter- the image. • Be sure to maintain the same distance between the camera and the subject while the shutter-release button is pressed halfway. 4 - Nikon COOLPIX S6500 | Reference Manual - Page 100
78 - Nikon COOLPIX S6500 | Reference Manual - Page 101
, Calendar Display 81 Selecting Certain Types of Images for Playback 82 Features That Can Be Set with the d Button (Playback Menu 84 Connecting the Camera to a TV, Computer, or Printer 86 Using ViewNX 2 88 Installing ViewNX 2 ...88 Transferring Images to the Computer 91 Viewing Images...93 79 - Nikon COOLPIX S6500 | Reference Manual - Page 102
A32) zooms in on the center of the image displayed in the monitor. Displayed area guide g 15/05/2013 15:30 0004. JPG (i) 4/ 4 f (h) Image is , the camera zooms in on the face detected at the time of shooting (except when viewing an image captured in a series). If the camera detected multiple - Nikon COOLPIX S6500 | Reference Manual - Page 103
to select an image and then press the k button to display that image full-frame. • When 16 thumbnails are displayed, rotate the zoom control to f (h) to switch to calendar display (except when in Images captured when the camera's date is not set are treated as images captured on January 1, 2013. 81 - Nikon COOLPIX S6500 | Reference Manual - Page 104
mode according to the type of images you want to view. Available Playback Modes G Play A32 All images are played back. When you switch from shooting mode to playback mode, this mode is selected. h Favorite pictures E6 Play back images added to an album. You must add images to an album - Nikon COOLPIX S6500 | Reference Manual - Page 105
is displayed. • To return to the current playback mode without switching playback modes, press the c button. Auto sort 3 Select an album, category, or shooting date, and press the k button. • For h favorite pictures, see E6. • For F auto sort, see E10. • For C list by date, see E12. • Repeat from - Nikon COOLPIX S6500 | Reference Manual - Page 106
for use as e-mail attachments. E23 Voice memo2 Allows you to use the camera's microphone to record voice memos and attach them to images. You can also play back and E69 delete voice memos. Copy5 Allows you to copy images between the internal memory and a memory card. E71 Playback Features 84 - Nikon COOLPIX S6500 | Reference Manual - Page 107
Option Description A Sequence display options Allows you to select whether to display only the key picture for a sequence of images captured continuously or to display the E73 sequence as individual images. Choose key picture Allows you to change the key picture for images captured in - Nikon COOLPIX S6500 | Reference Manual - Page 108
your enjoyment of images and movies by connecting the camera to a TV, computer, or printer. • Before connecting the camera to an external device, make sure the remaining battery level is sufficient and turn the camera off. For information about the connection methods and subsequent operations - Nikon COOLPIX S6500 | Reference Manual - Page 109
the camera or memory card. Printing images without using a computer E30 If you connect the camera to a PictBridge-compatible printer, you can print images without using a computer. Connection method: Connect the camera directly to the printer's USB port with the included USB cable. Playback - Nikon COOLPIX S6500 | Reference Manual - Page 110
ViewNX 2 • An Internet connection is required. Compatible Operating Systems Windows Windows 8, Windows 7, Windows Vista, Windows XP Macintosh Mac OS X10.6, 10.7, 10.8 Refer to the Nikon website for details on system requirements, including the latest information on operating system compatibility. 88 - Nikon COOLPIX S6500 | Reference Manual - Page 111
window. 3 Start the installer. • We recommend clicking Installation Guide in the installation window to check the installation help information and 4 Download the software. • When the Software Download screen is displayed, click I agree - Begin download. • Follow the on-screen instructions to - Nikon COOLPIX S6500 | Reference Manual - Page 112
installation completion screen is displayed. • Windows: Click Yes. • Mac OS: Click OK. The following software is installed: • ViewNX 2 (consisting of the three modules below) - Nikon Transfer 2: For transferring images to the computer - ViewNX 2: For viewing, editing, and printing transferred images - Nikon COOLPIX S6500 | Reference Manual - Page 113
off and ensure that the memory card is inserted in the camera. Connect the camera to the computer using the included USB cable. The camera automatically turns on. To transfer images that are saved in the camera's internal memory, remove the memory card from the camera before connecting it to the - Nikon COOLPIX S6500 | Reference Manual - Page 114
click OK. 2 Double-click Import File. If the memory card contains a large number of images, it may take a while for Nikon Transfer 2 to start. Wait until Nikon Transfer 2 starts. B Connecting the USB Cable The connection may not be recognized if the camera is connected to the computer via a USB hub - Nikon COOLPIX S6500 | Reference Manual - Page 115
the computer, turn the camera off and disconnect the USB cable. If you are using a card reader or card slot, choose the appropriate option in the computer operating system to eject the removable disk corresponding to the memory card and then remove the card from the card reader or card slot. Viewing - Nikon COOLPIX S6500 | Reference Manual - Page 116
94 - Nikon COOLPIX S6500 | Reference Manual - Page 117
Recording and Playing Back Movies Recording and Playing Back Movies You can record movies by simply pressing the b (e movie-record) button. 25m 0s 850 14m30s Recording Movies 96 Features That Can Be Set with the d Button (Movie Menu 99 Playing Back Movies 100 95 - Nikon COOLPIX S6500 | Reference Manual - Page 118
Press the b (e movie-record) button to start movie recording. • The camera focuses on the subject in the center of the frame. Focus areas are aspect ratio of 16:9 with movie recording (the area indicated on the right is recorded). • C is displayed while saving to the internal memory. • Press the - Nikon COOLPIX S6500 | Reference Manual - Page 119
being saved. Do not open the battery-chamber/memory card slot cover or remove the battery or memory card while an indicator is flashing. Doing this could result in loss of data, or in damage to the camera or the memory card. B Notes About Movie Recording • Memory cards with an SD Speed Class rating - Nikon COOLPIX S6500 | Reference Manual - Page 120
camera stops recording (B10s) is displayed. After the camera stops recording, it turns itself off. Leave the camera off until the inside of the camera shooting camera focuses on the subject in the center of the frame and starts movie recording after the specified two or ten seconds. • The flash - Nikon COOLPIX S6500 | Reference Manual - Page 121
That Can Be Set with the d Button (Movie Menu) Enter shooting mode M d button M D menu icon M k button The to prevent the sound of the camera focusing from being recorded, select Single AF. • When an HS movie option is selected in Movie options, the setting is fixed at Single AF. E80 Set - Nikon COOLPIX S6500 | Reference Manual - Page 122
Recording and Playing Back Movies Playing Back Movies Press the c button to enter playback mode. Movies are indicated by the movie options icon (A99). Press the k button to play back movies. Movie options 15/05/2013 15:30 0010. MOV 10s Deleting movies To delete a movie, select the desired movie - Nikon COOLPIX S6500 | Reference Manual - Page 123
continuous rewinding. E D Press the k button to advance the movie one frame. Hold down the k button for continuous advancing. F Press the k button to resume playback. Playing Back Movies The COOLPIX S6500 is not able to play back movies recorded with another make or model of digital camera. 101 - Nikon COOLPIX S6500 | Reference Manual - Page 124
102 - Nikon COOLPIX S6500 | Reference Manual - Page 125
General Camera Setup General Camera Setup This chapter describes the various settings that can be adjusted in the z setup menu. Welcome screen Time zone and date Monitor settings Print date - Nikon COOLPIX S6500 | Reference Manual - Page 126
whether or not the welcome screen is displayed when the camera is turned on. E82 Time zone and date Allows you to set the camera clock. E83 Monitor settings Allows you to adjust photo information display, post-shooting image review, and monitor brightness settings. E86 Print date Allows you - Nikon COOLPIX S6500 | Reference Manual - Page 127
Option Format memory/ Format card Language TV settings Charge by computer Blink warning Wi-Fi options Eye-Fi upload Reset all Firmware version Description A Allows you to format the internal memory or the memory card. E96 Allows you to change the camera's display language. E98 Allows you to - Nikon COOLPIX S6500 | Reference Manual - Page 128
106 - Nikon COOLPIX S6500 | Reference Manual - Page 129
by remote control.* The pictures shot by remote control can be copied to your smart device. * Operations other than turning on and off the camera cannot be performed during remote control operation. View Photos You can copy the pictures saved in the camera's memory card to your smart device. 107 - Nikon COOLPIX S6500 | Reference Manual - Page 130
for further details. 2 Check the description and other information and install the software. • For more information about how to operate the software, download the user's manual from the website below. - Android OS: http://nikonimglib.com/ManDL/WMAU/ - iOS: http://nikonimglib.com/ManDL/WMAU-ios/ 108 - Nikon COOLPIX S6500 | Reference Manual - Page 131
Using the Wi-Fi (Wireless LAN) Feature Connecting the Smart Device to the Camera Press the d button M z menu icon M Wi-Fi options M k button 1 Press the multi selector to select the Wi-Fi network and press the k button. 2 Select On - Nikon COOLPIX S6500 | Reference Manual - Page 132
prohibited. • When a memory card is not inserted in the camera, the Wi-Fi feature cannot be used. When Eye-Fi card (E106) is inserted in the camera, the Wi-Fi feature cannot be used. • When Wi-Fi is connected, Auto off is disabled. • When the Wi-Fi network is set to On, the battery will drain - Nikon COOLPIX S6500 | Reference Manual - Page 133
the Camera to a Printer (Direct Print E29 Editing Movies ...E38 Menu The Shooting Menu (for A (Auto) Mode E40 The Smart Portrait Menu E57 The Playback Menu E60 The Movie Menu ...E74 The Setup Menu...E82 Additional Information File and Folder Names E111 Optional Accessories E113 Error Messages - Nikon COOLPIX S6500 | Reference Manual - Page 134
Normal (180°) or Wide (360°) as the shooting range and press the k button. Easy panorama • When the camera is readied in the horizontal position, the image • The zoom position is fixed at the maximum wide-angle position. • A grid is displayed in the monitor. • The camera focuses on the area in - Nikon COOLPIX S6500 | Reference Manual - Page 135
directions, and begin shooting. • When the camera detects which direction it is moving in, shooting begins. • A guide indicating the current shooting position is displayed. • When the shooting position guide reaches the edge, shooting ends. Example of camera movement Guide Reference Section • The - Nikon COOLPIX S6500 | Reference Manual - Page 136
is moved too quickly or shaken too much, or if the subject is too uniform (e.g. walls or darkness), an error may occur. • If shooting is stopped before the camera reaches the half-way point in the panorama range, a panorama image is not saved. • If more than half of the panorama range is captured - Nikon COOLPIX S6500 | Reference Manual - Page 137
in the direction that was used when shooting. 15/05/2013 15:30 0004. . Reference Section Function Rewind Advance Pause End Icon Description A COOLPIX S6500 may not be able to scroll the playback of, or zoom in on, easy panorama images captured with another make or model of digital camera - Nikon COOLPIX S6500 | Reference Manual - Page 138
Favorite Pictures Mode You can sort your images (except movies) into nine albums and add them as favorite pictures (added images are not copied or moved). After you add images to albums, you can choose to play back only the added images by using favorite pictures mode. • By creating albums for - Nikon COOLPIX S6500 | Reference Manual - Page 139
to select the desired album and press the k button. • The selected images are added and the camera switches to the playback menu. • To add the same image to multiple albums, repeat from step the corresponding image file will also be permanently deleted from the internal memory or the memory card. E7 - Nikon COOLPIX S6500 | Reference Manual - Page 140
Removing Images from Albums Enter h Favorite pictures mode M select the album containing the image you want to remove M k button M d button M Remove from favorites M k button 1 Press the multi selector J or K to choose an image and press H to hide L. • You can hide the L icons for multiple images. - Nikon COOLPIX S6500 | Reference Manual - Page 141
Back Reference Section B Notes About Album Icons • Set the album icons separately for the internal memory and for the memory card. • To change the album icons for the internal memory, first remove the memory card from the camera. • The default setting for the icon is the number icon (black). E9 - Nikon COOLPIX S6500 | Reference Manual - Page 142
Auto Sort Mode Images are automatically sorted into categories, such as portraits, landscapes, and movies. Press the c button (playback mode) M c button M F Auto sort M k button Use the multi selector to select a category and then press the k button to play back the images in the selected category - Nikon COOLPIX S6500 | Reference Manual - Page 143
normal playback mode (A32) or list by date mode (E12). • Images and movies copied from the internal memory to a memory card, or vice versa, cannot be played back in auto sort mode (E71). • Images or movies saved by a camera other than the COOLPIX S6500 cannot be played back in auto sort mode. E11 - Nikon COOLPIX S6500 | Reference Manual - Page 144
20/05/2013 3 displayed. 15/05/2013 2 • The following operations are available while the shooting date selection screen is displayed. 10/05/2013 1 - d button: You can select one of mode. • Images captured when the camera's date is not set are treated as images captured on January 1, 2013. E12 - Nikon COOLPIX S6500 | Reference Manual - Page 145
Each series of images captured using the following settings is saved in a sequence. • A (auto) mode (A38) - Continuous H - Continuous L - Pre-shooting cache - Continuous H: 120 fps - Continuous H: 60 fps • Scene mode (A40) - Sports - Pet portrait (when Continuous is selected) • Smart portrait - Nikon COOLPIX S6500 | Reference Manual - Page 146
all sequences to be displayed using their key pictures or to display them as individual images. • Images captured continuously with cameras other than the COOLPIX S6500 cannot be displayed as a sequence. C Changing Key Picture in Sequence A sequence's key picture can be changed using Choose key - Nikon COOLPIX S6500 | Reference Manual - Page 147
Deleting Images in a Sequence If Sequence display options (E73) in the playback menu is set to Key picture only, images to be deleted vary as described below. To display the screen for selecting the deletion method, press the l button. • If only key pictures are displayed for sequences when the l - Nikon COOLPIX S6500 | Reference Manual - Page 148
with COOLPIX S6500 may not be displayed properly on another make or model of digital camera. It may also be impossible to transfer them to a computer using another make or model of digital camera. • Editing functions are not available when there is not enough free space in the internal memory or - Nikon COOLPIX S6500 | Reference Manual - Page 149
or crop function can be used. The quick effects, quick retouch, D-Lighting, small picture, or crop function can be used. Another editing function with editing functions are deleted. • Edited copies are saved with the same shooting date and time as the original. • Print order (E60) and protect - Nikon COOLPIX S6500 | Reference Manual - Page 150
High key, Toy camera effect 1, Toy camera effect 2, Low key, Cross process (red), Cross process (yellow), Cross process (green), and Cross process of effects. Turns multicolor images into single color images. Selective color transforms all colors, except a specified color, to black and white. - Nikon COOLPIX S6500 | Reference Manual - Page 151
3 Select Yes and press the k button. • A new, edited copy is created. • Copies created with the quick effects function are indicated by the V icon displayed during playback (A10). E19 Reference Section - Nikon COOLPIX S6500 | Reference Manual - Page 152
are indicated by the s icon displayed during playback (A10). Quick retouch Normal Amount D-Lighting: Enhancing Brightness and Contrast Press the c button (playback mode) M select an image M d button M D-Lighting M k button Use the multi selector to select OK and press the k button. • The - Nikon COOLPIX S6500 | Reference Manual - Page 153
Glamour Retouch: Enhancing Human Faces with Eight Effects Press the c button (playback mode) M select an image M d button M Glamour retouch M k button 1 Press the multi selector H, I, J, or K to select the face that you want to retouch and press the k button. • When only one face is detected, - Nikon COOLPIX S6500 | Reference Manual - Page 154
• Depending upon the direction in which faces are looking, or the brightness of faces, the camera may be unable to accurately recognize faces, or the glamour retouch function may not perform as Continuous (E45) is set to Pre-shooting cache, Continuous H: 120 fps, Continuous H: 60 fps, or Multi-shot - Nikon COOLPIX S6500 | Reference Manual - Page 155
picture 640×480 320×240 160×120 2 Select Yes and press the k button. • A new, small copy is created (compression ratio of approximately 1:16). • Copies created with the small picture function are displayed at a smaller size with the C icon during playback (A11). Create small picture file? Yes - Nikon COOLPIX S6500 | Reference Manual - Page 156
Crop: Creating a Cropped Copy Create a copy containing only the portion visible in the monitor when u is displayed with playback zoom (A80) enabled. Cropped copies are saved as separate files. 1 Enlarge the image for cropping (A80). 2 Refine copy composition. • Rotate the zoom control to g (i) or f - Nikon COOLPIX S6500 | Reference Manual - Page 157
, rotate the cropped image back to "tall" orientation. The image displayed in "tall" orientation can be cropped by zooming in on the image until the black bars displayed on the both sides of the monitor disappear. The cropped image is displayed in landscape orientation. E25 Reference Section - Nikon COOLPIX S6500 | Reference Manual - Page 158
with an HDMI jack, a commercially available HDMI cable can be used to connect the camera to the TV. 1 Turn off the camera. 2 Connect the camera to the TV. When using the included audio/video cable Connect the yellow plug to the video-in jack and the white and red plugs to the audio-in jacks on the - Nikon COOLPIX S6500 | Reference Manual - Page 159
details. 4 Hold down the c button to turn on the camera. • The camera enters playback mode and images are displayed on the TV. • While connected to the TV, the camera monitor will remain off. B Notes About Connecting the HDMI Cable An HDMI cable is not included. Use a commercially available HDMI - Nikon COOLPIX S6500 | Reference Manual - Page 160
device control setting (E99) of TV settings to On (default setting) and then connect the camera and TV using an HDMI cable. • Aim the remote control at the TV when operating it. • Refer to the TV's operating instructions for information about the TV's HDMI-CEC compatibility. E28 Reference Section - Nikon COOLPIX S6500 | Reference Manual - Page 161
is complete, turn the camera off and disconnect the USB cable B Notes About Power Source • When connecting the camera to a printer, use a fully charged battery to prevent the camera from turning off unexpectedly. • If the AC Adapter EH-62G (available separately) is used, COOLPIX S6500 can be - Nikon COOLPIX S6500 | Reference Manual - Page 162
Connecting the Camera to a Printer 1 Turn off the camera. 2 Turn on the printer. • Check printer settings. 3 Connect the camera to the printer using the included USB cable. • Be sure that plugs are properly oriented. Do not attempt to insert plugs at an angle, and do not use force when connecting or - Nikon COOLPIX S6500 | Reference Manual - Page 163
B If the PictBridge Startup Screen Is not Displayed Turn the camera off and disconnect the USB cable. Set the Charge by computer option (E100) in the camera's setup menu to Off and reconnect the cable. C Printing Images Images saved on a memory card can be printed by transferring the images to - Nikon COOLPIX S6500 | Reference Manual - Page 164
Printing Individual Images After properly connecting the camera to the printer (E30), follow the procedures described below to print an image. 1 Use the multi selector to select the desired image and press the k - Nikon COOLPIX S6500 | Reference Manual - Page 165
4 Select Paper size and press the k button. 5 Select the desired paper size and press the k button. • To specify paper size using settings on the printer, select Default in the paper size option. 6 Select Start print and press the k button. 7 Printing begins. • Monitor display returns to the print - Nikon COOLPIX S6500 | Reference Manual - Page 166
Printing Multiple Images After properly connecting the camera to the printer (E30), follow the procedures described below to print multiple images. 1 When the Print selection screen is displayed, press the d button. 2 Use the - Nikon COOLPIX S6500 | Reference Manual - Page 167
4 Select Print selection, Print all images, or DPOF printing and press the k button. Print menu Print selection Print all images DPOF printing Paper size Print selection Select images (up to 99) and the number of copies (up to nine) of each. Print selection 10 • Press the multi selector J or K - Nikon COOLPIX S6500 | Reference Manual - Page 168
Print all images One copy each of all images saved in the internal memory, or on the memory card, is printed. • When the screen shown on the right is displayed, select Start print and press the k button to start print. Select Cancel and press - Nikon COOLPIX S6500 | Reference Manual - Page 169
2 / 10 Cancel Current number of copies/ total number of copies Reference Section C Paper Size The camera supports the following paper sizes: Default (the default paper size for the printer connected to the camera), 3.5×5 in., 5×7 in., 100×150 mm, 4×6 in., 8×10 in., Letter, A3, and A4. Only sizes - Nikon COOLPIX S6500 | Reference Manual - Page 170
Editing Movies The desired portions of a recorded movie can be saved as a separate file. 1 Play back the desired movie and pause at the start point of the portion that is to be extracted (A100). 2 Press the multi selector J or K to choose the I control, and then press the k button. • The movie - Nikon COOLPIX S6500 | Reference Manual - Page 171
charged battery to prevent the camera from turning off during editing. When the battery level points. Movies cannot be trimmed so that they are less than two seconds long. • Editing functions are not available when there is not enough free space in the internal memory or on the memory card - Nikon COOLPIX S6500 | Reference Manual - Page 172
Auto) Mode) Image Mode Settings (Image Size and Quality) Enter shooting mode M d button M Image mode M k button You and the number of pixels captured horizontally and vertically. Example: P 4608×3456 = approx. 16 megapixels, 4608 × 3456 pixels 2 Print size at an output resolution of 300 dpi. Print - Nikon COOLPIX S6500 | Reference Manual - Page 173
table lists the approximate number of images that can be saved on a 4 GB memory card. Note that due to JPEG compression, the number of images that can be saved that can be saved in the internal memory (approx. 25 MB), remove the memory card from the camera, and then check the number of remaining exposures - Nikon COOLPIX S6500 | Reference Manual - Page 174
varies with the color of the light source. The human brain is able to adapt to changes in the color of the light source, with the result that white objects appear white whether seen in the shade, direct sunlight, or under incandescent lighting. Digital cameras can mimic this adjustment by processing - Nikon COOLPIX S6500 | Reference Manual - Page 175
shooting. 2 Display the shooting menu (A6, 68), use the multi selector to select Preset manual in the White balance menu, and press the k button. • The camera zooms in to the position for measuring white balance. White balance Auto Preset manual Daylight Incandescent Fluorescent Cloudy Flash - Nikon COOLPIX S6500 | Reference Manual - Page 176
cannot be used with other functions (A70). • Set the flash to W (off) when white balance is set to any setting other than Auto and Flash (A57). B Notes About Preset Manual A value for flash lighting cannot be measured with Preset manual. When shooting using the flash, set White balance to Auto or - Nikon COOLPIX S6500 | Reference Manual - Page 177
or BSS (Best Shot Selector). Option U Single (default setting) k Continuous H m Continuous L q Pre-shooting cache n fixed at O (image size: 640 × 480 pixels). Each time the shutter-release button is pressed all the way, 25 frames are captured at a speed of about 1/60 s or faster. Image mode is fixed - Nikon COOLPIX S6500 | Reference Manual - Page 178
Option Description D BSS (Best Shot Selector) The "Best Shot Selector" is recommended when shooting with the flash off or the camera zoomed in, or in other situations in which inadvertent motion can result in blurred images. When BSS is on, the camera takes up to ten images while the shutter- - Nikon COOLPIX S6500 | Reference Manual - Page 179
image mode setting, the memory card used, or shooting condition. • When Continuous is set to Pre-shooting cache, Continuous H: 120 fps, Continuous H: 60 fps, or Multi-shot 16, banding or variance in brightness or hue may occur in images that were captured under lighting that flickers at high speeds - Nikon COOLPIX S6500 | Reference Manual - Page 180
is pressed all the way. Up to two images can be saved in the pre-shooting cache. The pre-shooting cache setting can be confirmed in the monitor when shooting (A9). The preshooting cache icon (Q) lights in green while the shutter-release button is pressed halfway. Press down halfway Press down all - Nikon COOLPIX S6500 | Reference Manual - Page 181
without the flash, shooting while using the zoom, etc., images may contain noise. Option Description a Auto (default setting) Sensitivity is ISO 125 when there is sufficient lighting; the camera compensates by raising sensitivity to a maximum of ISO 1600 when lighting is dim. I Fixed range auto - Nikon COOLPIX S6500 | Reference Manual - Page 182
natural color. Use to achieve a vivid, "photoprint" effect. Save images in black-and-white. Save images in sepia tones. Save images in cyan-blue monochrome. The current setting can be confirmed in the monitor when shooting (A9). When Standard color is selected, no icon is displayed. Color tones - Nikon COOLPIX S6500 | Reference Manual - Page 183
it focuses on that face. See "Using Face Detection" (A73) for more information. If more than one face is detected, the camera focuses on the face closest to the camera. 25m 0s 850 a Face priority When taking images of subjects other than people, or framing a subject with which no face is detected - Nikon COOLPIX S6500 | Reference Manual - Page 184
Manual subject is, and take an image. To cancel focus area selection and adjust flash, macro mode, self-timer, and exposure compensation settings, press the k button to the focus area selection screen, press the k button again. The camera focuses on the subject in the center of the frame. The focus - Nikon COOLPIX S6500 | Reference Manual - Page 185
Option Description When the camera detects the main subject, it focuses on that subject. See "Using Target Finding AF" (A75). M Target finding AF (default setting) 1/250 F3.1 Focus areas Reference Section B Notes About AF Area Mode • When digital zoom is in effect, focus will be on the center - Nikon COOLPIX S6500 | Reference Manual - Page 186
the camera focuses on the area in the center of the frame. B Notes About Subject Tracking 1/250 F3.1 • Adjust zoom position, flash mode, exposure compensation, and menu settings prior to registering the subject. • Subject tracking may not be possible in certain shooting conditions. • Digital zoom - Nikon COOLPIX S6500 | Reference Manual - Page 187
focuses continuously until the shutter-release button is pressed halfway. Use with moving subjects. The sound of lens drive movement will be heard while the camera focuses. Reference Section C Autofocus Mode for Movie Recording Autofocus mode for movie recording can be set with Autofocus mode - Nikon COOLPIX S6500 | Reference Manual - Page 188
effect selection screen and use the quick effects function (A39). Off Disables the quick effects function (during shooting). The current setting can be confirmed in the monitor when shooting (A9). No indicator is displayed when Off is selected. Reference Section B Notes About Quick Effects This - Nikon COOLPIX S6500 | Reference Manual - Page 189
Image mode. Skin Softening Enter shooting mode M A (shooting mode) M F Smart portrait M k button M d button M Skin softening M k button Enable skin softening. Option S High R Normal (default setting) Q Low Off Description When the shutter is released, the camera detects one or more human faces - Nikon COOLPIX S6500 | Reference Manual - Page 190
setting) Whenever a smile is detected, the camera captures up to 5 images continuously and saves the one that best captured the smile. The flash cannot be used. • Continuous shooting speed: Approx. 3.3 fps (when image mode is set to P 4608×3456) Off Turns the smile timer off. The current setting - Nikon COOLPIX S6500 | Reference Manual - Page 191
Option Description y On Enables blink warning. Flash cannot be used when On is selected. If the camera saved an image in Turns the blink warning off. The current setting can be confirmed in the monitor when shooting (A9). No icon is displayed when Off is selected. Reference Section C Camera - Nikon COOLPIX S6500 | Reference Manual - Page 192
"print orders" for printing on DPOF-compatible devices. • Inserting the memory card into a DPOF-compatible (F23) printer's card slot. • Taking the memory card to a digital photo lab. • Connecting the camera to a PictBridge-compatible (F23) printer (E29). A print order can also be created for images - Nikon COOLPIX S6500 | Reference Manual - Page 193
-thumbnail display. • Press the k button when setting is complete. 3 Select whether or not to print shooting date Print order and shooting information. • Select Date and press the k button to print the shooting Done date on all images in the print order. • Select Info and press the k button - Nikon COOLPIX S6500 | Reference Manual - Page 194
is displayed if images other than those in the selected album, category, or shooting date have been marked for printing. - If you select Yes, print order to images in the selected category or captured on the selected shooting date. Print order Print order Save print marking for other images - Nikon COOLPIX S6500 | Reference Manual - Page 195
printed on images when a DPOF-compatible (F23) printer that supports printing of shooting date and shooting information is used. • Shooting information cannot be printed when the camera is connected to a DPOF-compatible printer via the included USB cable (E36). • Note that Date and Info settings are - Nikon COOLPIX S6500 | Reference Manual - Page 196
Slide Show Press the c button (playback mode) M d button M Slide show M k button Play back images, saved in the internal memory or on a memory card, one by one in an automated "slide show." 1 Use the multi selector to select Start and press the k button. • To change the interval between images, - Nikon COOLPIX S6500 | Reference Manual - Page 197
images from the image selection screen. See "The Image Selection Screen" (E66) for more information. Note that formatting the camera's internal memory or the memory card will permanently delete protected files (E96). Protected images are indicated by the s icon during playback (A11). E65 Reference - Nikon COOLPIX S6500 | Reference Manual - Page 198
The Image Selection Screen When using one of the following features, a screen like that Protect shown on the right is displayed when selecting images. • Print order > Select images (E60) • Protect (E65) • Rotate image (E68) • Copy > Selected images (E71) • Choose key picture (E73) • - Nikon COOLPIX S6500 | Reference Manual - Page 199
3 Press the k button to apply image selection. • When Selected images is selected, a confirmation dialog is displayed. Follow the instructions displayed in the monitor. E67 Reference Section - Nikon COOLPIX S6500 | Reference Manual - Page 200
the image. Reference Section B Notes About Image Rotation • Images captured with another make or model of digital camera or captured with 3D photography (A49) cannot be rotated on the COOLPIX S6500. • Images captured in sequence cannot be rotated when only the key pictures are displayed for them - Nikon COOLPIX S6500 | Reference Manual - Page 201
image M d button M Voice memo M k button Use the camera's microphone to record voice memos for images. • The voice memo recording • Do not touch the microphone during recording. • During recording, o and p flash in the monitor. • When recording ends, the voice memo playback screen is displayed. - Nikon COOLPIX S6500 | Reference Manual - Page 202
to it. The current voice memo must be deleted before a new voice memo can be recorded. • The COOLPIX S6500 cannot record voice memos for images captured with another make or model of digital camera. • Voice memos cannot be recorded for images captured in sequence when only the key pictures are - Nikon COOLPIX S6500 | Reference Manual - Page 203
select a destination option to which images are copied and press the k button. • Camera to card: Copy images from internal memory to memory card. • Card to camera: Copy images from memory card to internal memory. 2 Select a copy option and press the k button. • Selected images: Copy images selected - Nikon COOLPIX S6500 | Reference Manual - Page 204
display images in a sequence as individual images, only Card to camera (memory card to internal memory) image copy is available. C If "Memory contains no images." Is Displayed If a memory card that contains no images is inserted into the camera, Memory contains no images. will be displayed when the - Nikon COOLPIX S6500 | Reference Manual - Page 205
mode (A32) and in thumbnail playback mode (A81). Settings are applied to all sequences, and the setting is saved in the camera's memory even if the camera is turned off. Option Q Individual pictures C Key picture only (default setting) Description Set all images in all sequences to be displayed - Nikon COOLPIX S6500 | Reference Manual - Page 206
* iFrame is a format supported by Apple Inc. Movies recorded with this option cannot be edited (E38). When recording movies to the internal memory, recording may stop unexpectedly in some shooting conditions. When recording movies of important events, recording to a memory card (Class 6 or higher - Nikon COOLPIX S6500 | Reference Manual - Page 207
16:9 2× speed fast motion movies are recorded. • Max. recording time*: 2 minutes (playback time: 1 minute) Reference Section * While recording movies, the camera Nostalgic sepia in special effects mode and then switch to another shooting mode and select h HS 480/4×, the movie options setting - Nikon COOLPIX S6500 | Reference Manual - Page 208
screen. Recording may end before either limit is reached if camera temperature becomes elevated. • To check the movie length of a movie that can be recorded in the internal memory (approx. 25 MB), remove the memory card from the camera, and then check the maximum recording time displayed in the - Nikon COOLPIX S6500 | Reference Manual - Page 209
Press H or I to select an HS movie option (E75) and press the k button. • After applying the option, press the d button to return to the shooting screen. 2 Press the b (e movie-record) button to start recording. • Movie recording starts in HS mode when the Open with HS footage checkbox in the movie - Nikon COOLPIX S6500 | Reference Manual - Page 210
the Open with HS footage checkbox in the movie menu is not checked. Press the k button to switch to HS movie recording at the point where the camera should record for slow motion or fast motion playback. 16m30s When recording normal speed movies • When an HS movie reaches the maximum length for - Nikon COOLPIX S6500 | Reference Manual - Page 211
40 s Slow motion playback (no sound) Portions recorded at j HS 1080/0.5×: A movie of up to two minutes in length is recorded when shooting for the purpose of high-speed playback. Playback is two times faster. Recording 2 min Playback 1 min Fast motion playback (no sound) Reference Section - Nikon COOLPIX S6500 | Reference Manual - Page 212
movies when movie recording begins. Press the k button to switch to HS movie recording at the point where the camera should record for slow motion or fast motion playback. Reference Section Autofocus Mode Enter shooting mode M d button M e menu icon M Autofocus mode M k button Select how the - Nikon COOLPIX S6500 | Reference Manual - Page 213
Wind Noise Reduction Enter shooting mode M d button M e menu icon M Wind noise reduction M k button Allows you noise reduction is not enabled. • The current setting can be confirmed in the monitor when shooting (A9). No icon is displayed when Off is selected. • When an HS movie option is selected - Nikon COOLPIX S6500 | Reference Manual - Page 214
screen that is displayed when you turn on the camera. Option None (default setting) COOLPIX Select an image Description The camera enters shooting or playback mode without displaying the welcome screen. The camera displays a welcome screen and enters shooting or playback mode. Displays an image - Nikon COOLPIX S6500 | Reference Manual - Page 215
Time Zone and Date Press the d button M z menu icon M Time zone and date M k button Set the camera clock. Option Date and time Date format Time zone Description Set camera clock to current date and time. Use the multi selector to set the date and time in the date screen. • Select an item: Press - Nikon COOLPIX S6500 | Reference Manual - Page 216
saving time function. W is displayed above the map and the camera clock is advanced one hour. Press I to disable the daylight saving time selected, the Z icon will be displayed in the monitor when the camera is in shooting mode. Time zone Home time zone Travel destination London, Casablanca 1 - Nikon COOLPIX S6500 | Reference Manual - Page 217
to set the home time zone. C Daylight Saving Time When daylight saving time starts or ends, turn the daylight saving time function on or off from the time zone selection screen displayed in step date option is enabled, images will be saved with shooting date imprinted on them. E85 Reference Section - Nikon COOLPIX S6500 | Reference Manual - Page 218
shooting and playback. Image review This setting determines whether or not the captured image is displayed immediately after shooting. info 25m 0s 850 4/ 4 Auto info (default setting) Current settings and operational guides are displayed as in Show info. If no operations are performed for a few - Nikon COOLPIX S6500 | Reference Manual - Page 219
movies. 4/ 4 The current settings or operation guide is displayed as in Auto info. Reference Section B Notes About Monitor Settings When Quick effects (E56) is set to On, Image review is fixed at On. C Battery Level When the battery level is low, B is always displayed regardless of the Photo - Nikon COOLPIX S6500 | Reference Manual - Page 220
Date and Time) Press the d button M z menu icon M Print date M k button The shooting date and time can be imprinted on the images when shooting, allowing the information to be printed even from printers that do not support date printing (E63). 15.05.2013 Option f Date S Date and time Off (default - Nikon COOLPIX S6500 | Reference Manual - Page 221
menu's Time zone and date item (A20, E83). C Print Date and Print Order When printing with a DPOF-compatible printer that can print the shooting date and shooting information, you can use the Print order option (E60) to print this information on images, even if the Print date function was set to Off - Nikon COOLPIX S6500 | Reference Manual - Page 222
). No icon is displayed when Off is selected. Reference Section B Notes About Vibration Reduction • After turning on the camera or after switching from playback mode to shooting mode, wait for the shooting mode screen to be displayed completely before taking images. • Due to characteristics of the - Nikon COOLPIX S6500 | Reference Manual - Page 223
detection is disabled. The current setting can be confirmed in the monitor when shooting (A9). When the camera detects camera shake or subject movement, it increases shutter speed and the motion detection icon turns green. No icon is displayed when Off is selected. B Notes About Motion Detection - Nikon COOLPIX S6500 | Reference Manual - Page 224
telephoto position. Note that for some scene modes (such as Museum (A45) and Pet portrait (A48)) or focus areas, the AF-assist illuminator may not light even when Auto is selected. AF-assist illuminator does not light. The camera may be unable to focus under dim - Nikon COOLPIX S6500 | Reference Manual - Page 225
not be activated. Reference Section B Notes About Digital Zoom • When digital zoom is in effect, the camera focuses on the area in the center of the frame. • Digital zoom cannot be used in the following situations. - When Continuous (E45) is set to Multi-shot 16 in A (auto) mode - When AF area - Nikon COOLPIX S6500 | Reference Manual - Page 226
acquires focus on the subject, and three times when an error is detected. Start-up sound will also play when the camera is turned on. Shutter sound Select On (default setting) or Off. The shutter sound is disabled when using a continuous shooting mode or setting, or when recording movies, even if - Nikon COOLPIX S6500 | Reference Manual - Page 227
-on lamp is flashing, pressing any of the following buttons will turn the monitor back on: Power switch, shutter-release button, A button, c button, or b (e movie-record) button C Notes About Auto Off • The time that passes before the camera enters standby mode is fixed in the following situations - Nikon COOLPIX S6500 | Reference Manual - Page 228
format the internal memory, remove the memory card from the camera. The Format memory option is displayed in the setup menu. Format memory All images will be deleted! OK? Formatting Memory Cards A memory card can be formatted when it is inserted in the camera. The Format card option is displayed - Nikon COOLPIX S6500 | Reference Manual - Page 229
(E9) are reset to their default settings (number icons) when the internal memory or memory card is formatted. • Do not turn the camera off or open the battery-chamber/memory card slot cover during formatting. • The first time you insert a memory card that has been used in another device into this - Nikon COOLPIX S6500 | Reference Manual - Page 230
Language Press the d button M z menu icon M Language M k button Select one of 34 languages for display of camera menus and messages. Czech Danish German (default setting) Spanish Greek French Indonesian Italian Hungarian Dutch Norwegian Polish Brazilian Portuguese European Portuguese Russian - Nikon COOLPIX S6500 | Reference Manual - Page 231
, or 1080i. When Auto is selected, the option best suited to the TV to which the camera is connected is automatically selected from 480p, 720p, or 1080i. HDMI device control Select whether or not the camera can receive signals from a TV that supports the HDMI-CEC standard when it is connected to - Nikon COOLPIX S6500 | Reference Manual - Page 232
been exhausted, the date and time must be reset before the battery can be charged or images can be transferred with connection to a computer. In this case, use the Charging AC Adapter EH-70P (A16) to charge the battery and then set the camera's date and time. • If the camera is turned off, charging - Nikon COOLPIX S6500 | Reference Manual - Page 233
cable. Set Charge by computer to Off and reconnect the camera to the printer. C The Charge Lamp The following chart explains charge lamp status when the camera is connected to a computer. Status Flashes slowly (green) Off Flashes quickly (green) Description Battery charging. Battery not charging - Nikon COOLPIX S6500 | Reference Manual - Page 234
Warning Press the d button M z menu icon M Blink warning M k button Select whether or not the camera detects human subjects that have blinked using face detection (A73) when shooting in the following modes: • A (auto) mode (when Face priority (E51) is selected for AF area mode option) • Scene auto - Nikon COOLPIX S6500 | Reference Manual - Page 235
operations described below are available. If no operations are performed within a few seconds, the camera automatically returns to shooting mode. Did someone blink? Exit Function Enlarge the detected face that blinked Switch to full-frame playback Select the face to be displayed Delete the image - Nikon COOLPIX S6500 | Reference Manual - Page 236
. Auth./encryp. Select whether or not to encrypt the communications between the camera and the connected smart device. Communications are not encrypted when Open (default selected. Password Set the password. Set a 8- to 16-character alphanumeric password. Channel Select the channel used for - Nikon COOLPIX S6500 | Reference Manual - Page 237
Wi-Fi network cannot be selected in the following situations: • When an HDMI, USB or audio/video cable is connected to the camera • When no memory card is inserted in the camera • When an Eye-Fi card is inserted in the camera • When the battery level indicator in the monitor indicates B E105 - Nikon COOLPIX S6500 | Reference Manual - Page 238
to the instruction manual of your Eye-Fi card for more information. In the event of malfunction, contact the card manufacturer. • The camera can be used to turn Eye-Fi cards on and off, but may not support other Eye-Fi functions. • The camera is not compatible with the endless memory function. When - Nikon COOLPIX S6500 | Reference Manual - Page 239
Reset All Press the d button M z menu icon M Reset all M k button When Reset is selected, the camera's settings will be restored to their default values. Basic Shooting Functions Option Flash mode (A57) Self-timer (A60) Macro mode (A62) Exposure compensation (A64) Auto Off Off 0.0 Default value - Nikon COOLPIX S6500 | Reference Manual - Page 240
release in pet portrait mode (A48) Special effects mode Option Special effects mode setting in the shooting mode selection menu (A51) Smart Portrait Menu Skin softening (E57) Smile timer (E58) Blink proof (E59) Option Movie Menu Option Movie options (E74) Open with HS footage (E80) Autofocus - Nikon COOLPIX S6500 | Reference Manual - Page 241
(E86) Image review (E86) Brightness (E86) Print date (E88) Vibration reduction (E90) Motion detection (E91) AF assist (E92) Digital zoom (E93) Button sound (E94) Shutter sound (E94) Auto off (E95) HDMI (E99) HDMI device control (E99) HDMI 3D output (E99) Charge by computer (E100) Blink warning (E102 - Nikon COOLPIX S6500 | Reference Manual - Page 242
memory or on the memory card (A34) before selecting Reset all. • The following menu settings will remain unaffected when menus are reset with Reset all. Shooting menu: Preset manual Firmware Version Press the d button M z menu icon M Firmware version M k button View the current camera firmware - Nikon COOLPIX S6500 | Reference Manual - Page 243
DSCN0001.JPG Identifier (not shown on camera monitor) Extension (indicates file format) in folders named with a folder number followed by "NIKON" (e.g. "100NIKON"). When the number of files within order starting from the largest file number in memory. Copy>All images copies all folders from the - Nikon COOLPIX S6500 | Reference Manual - Page 244
the current folder is numbered 999 and contains 200 images, or an image is numbered 9999, no further images can be captured until the internal memory or memory card is formatted (E96), or a new memory card is inserted. E112 Reference Section - Nikon COOLPIX S6500 | Reference Manual - Page 245
charger Battery Charger MH-66 (Charging time when no charge remains: Approx. 1 h 50 min) AC Adapter EH-62G (connect as shown) AC adapter Be sure that the power connector cord has been properly aligned in power connector and battery chamber grooves before closing the battery-chamber/memory card - Nikon COOLPIX S6500 | Reference Manual - Page 246
Battery exhausted. Battery temperature is elevated. The camera will turn off. The camera will turn off to prevent overheating. Q (● flashes red) Please wait for the camera to finish recording. Memory card is write protected. Cause/Solution Clock not set. Set date and time. Charge or replace battery - Nikon COOLPIX S6500 | Reference Manual - Page 247
used. This card cannot be read. Error accessing memory card. • Use approved card. • Check that terminals are clean. • Confirm that memory card is correctly inserted. 18, F22 Card is not formatted. Format card? Yes No Memory card has not been formatted for use in COOLPIX S6500. Formatting deletes - Nikon COOLPIX S6500 | Reference Manual - Page 248
this camera. One or more portrait subjects may have blinked when the image was taken. Check the image in playback mode. Cannot edit selected image. • Select images that support editing function. • Movies cannot be edited. Time out error while saving movie on the memory card. Select memory card with - Nikon COOLPIX S6500 | Reference Manual - Page 249
contains no images. No images in the internal memory or memory card. • Remove the memory card from the camera to play back images saved in the camera's internal memory. • To copy the images saved in the camera's internal memory to the memory card, press the d button to select Copy in the playback - Nikon COOLPIX S6500 | Reference Manual - Page 250
taken after the first shot. • Try shooting again. After taking the first shot, move the camera horizontally and frame the subject so that it is aligned with the guide. 49 • In some shooting conditions, such as when the subject is moving, dark, or low in contrast, the second shot may not - Nikon COOLPIX S6500 | Reference Manual - Page 251
battery level became low, or the connection was aborted due to poor connectivity. Disconnect the cable and establish the wireless connection again. 109, E104 Lens error. Turn camera off and then on again. If error persists, contact retailer or Nikon-authorized service 24 representative. Error - Nikon COOLPIX S6500 | Reference Manual - Page 252
Display Cause/Solution A Printer error: check printer status. Printer error. Check printer. After solving the problem, select Resume - and press the k button to resume printing.* Specified size of paper is not loaded in printer. Printer error: check paper Load the specified paper size, select - Nikon COOLPIX S6500 | Reference Manual - Page 253
Technical Notes and Index Maximizing Camera Life and Performance F2 The Camera...F2 The Battery...F3 Charging AC Adapter F4 Memory Cards...F5 Cleaning and Storage F6 Cleaning ...F6 Storage ...F6 Troubleshooting F7 Specifications F17 Approved Memory Cards F22 Supported Standards F23 Index F25 - Nikon COOLPIX S6500 | Reference Manual - Page 254
Maximizing Camera Life and Performance The Camera To ensure continued enjoyment of this Nikon product, observe the lens, lens cover, monitor, memory card slot, or battery chamber. These parts are easily damaged. Applying force to the lens cover could result in camera malfunction or damage to the lens - Nikon COOLPIX S6500 | Reference Manual - Page 255
an ambient temperature of 5°C to 35°C (41°F to 95°F) before use. • When charging the battery inserted into the COOLPIX S6500 using the Charging AC Adapter EH-70P or a computer, the battery is not charged at battery temperatures below 0°C (32°F) or above 45°C (113°F). F3 Technical Notes and Index - Nikon COOLPIX S6500 | Reference Manual - Page 256
, impair its performance, or prevent it from charging normally. • On cold days, the capacity of batteries tends to decrease. If an exhausted battery is used at a low temperature, the camera will not turn on. Be sure that the battery is fully charged before heading outside to take images in cold - Nikon COOLPIX S6500 | Reference Manual - Page 257
model of AC adapter other than Charging AC Adapter EH-70P or USB-AC adapter. Failure to observe this precaution could result in overheating or in damage to the camera. Memory Cards • Use only Secure Digital memory cards. See "Approved Memory Cards" (F22) for recommended memory cards. • Observe the - Nikon COOLPIX S6500 | Reference Manual - Page 258
the lens using a cloth lightly dampened with commercial lens camera out of storage at least once a month. Turn the camera on and release the shutter a few times before putting the camera away again. For storing the battery, follow the precautions in "The Battery" (F3) in "Maximizing Camera Life - Nikon COOLPIX S6500 | Reference Manual - Page 259
or Nikon-authorized service representative. Power, Display, Settings Issues Problem The camera is on but does not respond. Battery inserted in the camera cannot be charged. Camera cannot be turned on. Cause/Solution A Wait for recording to end. If the problem persists, turn the camera off - Nikon COOLPIX S6500 | Reference Manual - Page 260
performed for an extended period of time. • The camera or battery have become too cold and cannot operate properly. • The camera turns off if the Charging AC Adapter is connected while the camera is on. • The camera turns off if the USB cable connecting it to a computer or printer is disconnected - Nikon COOLPIX S6500 | Reference Manual - Page 261
date is enabled. • The current shooting mode is one that does not support Print date. • The date cannot be imprinted on movies. 104, E89 Screen for setting time zone and date is displayed when camera is turned on. Camera settings reset. Clock battery is exhausted; all settings were restored to - Nikon COOLPIX S6500 | Reference Manual - Page 262
-record) button. • When menus are displayed, press the d button. • Battery is exhausted. 6 24 • When flash lamp flashes, flash is charging. 57 Cannot take 3D images. In some shooting conditions, such as when the subject is moving, dark, or low in contrast, the second shot may not be taken or - Nikon COOLPIX S6500 | Reference Manual - Page 263
in images captured with flash. Flash does not fire. Digital zoom cannot be used. Cause/Solution A • Use flash. • Increase the ISO sensitivity value. • Enable vibration reduction or motion detection. • Use D (Best Shot Selector). • Use a tripod to stabilize the camera when shooting (using the self - Nikon COOLPIX S6500 | Reference Manual - Page 264
Problem Image mode not available. No sound when shutter is released. AF-assist illuminator does not light some shooting modes light depending on the position of the focus area or the current scene mode, even when Auto is selected. Lens is dirty. Clean lens the flash mode setting to X (fill flash). - Nikon COOLPIX S6500 | Reference Manual - Page 265
red-eye reduction) or fill flash with slow sync and red-eye reduction in Night portrait scene mode, In-Camera Red Eye Fix may be applied to areas not affected by red-eye in rare cases in the monitor or images. When shooting with backlighting or when a very strong light source (such as sunlight) is - Nikon COOLPIX S6500 | Reference Manual - Page 266
retouch, D-Lighting, glamour retouch, small picture, or crop. Cannot rotate image. Cause/Solution A • File or folder was overwritten or renamed by - computer or other make of camera. • The COOLPIX S6500 is not able to play back movies 101 recorded with another make or model of digital camera - Nikon COOLPIX S6500 | Reference Manual - Page 267
category other than the category currently displayed. • Images saved by a camera other than the COOLPIX S6500 and images copied using the Copy option cannot be displayed in auto sort mode. • Images saved in the internal memory or on the memory card may not be played back correctly if overwritten by - Nikon COOLPIX S6500 | Reference Manual - Page 268
Problem Cause/Solution A Nikon Transfer 2 does not start when camera is connected to a computer. • Camera is off. • Battery is exhausted. • USB cable is not correctly connected. • Camera is not recognized by the computer. • Confirm system requirements. • Computer is not set to start Nikon - Nikon COOLPIX S6500 | Reference Manual - Page 269
Nikon COOLPIX S6500 Digital Camera Type Number of effective pixels Image sensor Lens Focal length f/-number Construction Digital zoom magnification Vibration reduction Motion blur reduction Autofocus (AF) Focus range Focus-area selection Monitor Frame coverage (shooting lens) Face priority, manual - Nikon COOLPIX S6500 | Reference Manual - Page 270
Shutter Speed Aperture Range Self-timer Internal memory (approx. 25 MB), SD/SDHC/SDXC memory card DCF, Exif 2.3, DPOF, and [640 × 480] • 16:9 [4608 × 2592] • ISO 125-1600 • ISO 3200 (available when using Auto mode) Matrix, center-weighted (digital zoom less than 2×), spot (digital zoom 2× or more) - Nikon COOLPIX S6500 | Reference Manual - Page 271
when using Charging AC Adapter EH-70P and when no charge remains) Approx. 150 shots when using EN-EL19 Approx. 25 min when using EN-EL19 1/4 (ISO 1222) Approx. 95.4 × 58.3 × 26.3 mm (3.8 × 2.3 × 1.1 in.) (excluding projections) Approx. 153 g (5.4 oz) (including battery and SD memory card) Technical - Nikon COOLPIX S6500 | Reference Manual - Page 272
Infrastructure • Unless otherwise stated, all figures assume a fully-charged battery and an ambient temperature of 23 ±3°C (73.4 ±5.4°F) as specified by the Camera and Imaging Products Association (CIPA). 1 Figures based on the Camera and Imaging Products Association (CIPA) standards for measuring - Nikon COOLPIX S6500 | Reference Manual - Page 273
) Approx. 14.5 g (0.5 oz) (excluding battery case) Charging AC Adapter EH-70P Rated input Rated output Operating temperature Dimensions adapter) For Argentina and Korea: Approx. 72 g (2.6 oz) Technical Notes and Index B Specifications • Nikon will not be held liable for any errors this manual - Nikon COOLPIX S6500 | Reference Manual - Page 274
sure that the device supports SDHC. 3 SDXC compliant. If the memory card will be used with a card reader or similar device, make sure that the device supports SDXC. • Contact the manufacturer for details on the above cards. We cannot guarantee camera performance when using memory cards made by other - Nikon COOLPIX S6500 | Reference Manual - Page 275
Supported Standards • DCF: Design Rule for Camera File System is a standard widely used in the digital camera industry to ensure compatibility among different makes of camera. • DPOF: Digital memory cards. • Exif version 2.3: Exchangeable image file format (Exif) version 2.3 for digital still cameras - Nikon COOLPIX S6500 | Reference Manual - Page 276
and Google Play are trademarks or registered trademarks of Google, Inc. • All other trade names mentioned in this manual or the other documentation provided with your Nikon product are trademarks or registered trademarks of their respective holders. FreeType License (FreeType2) • Portions of this - Nikon COOLPIX S6500 | Reference Manual - Page 277
/video cable 87, E26 Audio/video-in jack 87, E26 Auto flash 58 Auto mode 26, 38 Auto off 25, 104, E95 Auto sort menu 84, E10 Auto sort mode 82, E10 Autofocus 63, 69, 99, E55, E80 Autofocus mode 69, 99, E55, E80 B Backlighting o 46 Battery 14, 16, 22 Battery chamber 5 Battery charger 17 - Nikon COOLPIX S6500 | Reference Manual - Page 278
Battery-chamber/memory card slot cover 5, 14, 18 Beach Z 43 Best Shot Selector 45, E46 Black and white copy n 46 Black-and-white 68, E50 Blink proof 69, E59 Blink warning 105, E102 Brightness 104, E86 BSS 45, E46 Button sound E94 C Charge by computer 105, E100 Charge lamp 5, 17 Charger - Nikon COOLPIX S6500 | Reference Manual - Page 279
show m 45 Firmware version 105, E110 Fixed range auto E49 Flash 3, 57 Flash lamp 5, 57 Flash mode 57, 58 Flash off 58 Focus 30, 68, E51 Focus area 30 Focus indicator 9 Focus lock 77 Folder name E111 Food u 45 Format internal memory ........ 105, E96 Format memory cards 19, 105 - Nikon COOLPIX S6500 | Reference Manual - Page 280
Low key H 51 M Macro mode 62 Memory capacity 24 Memory card 18 Memory card 16 E46 Museum l 45 N Night landscape j 44 Night portrait e 42 Nikon Transfer 2 90, 92 Nostalgic sepia E 51 Number of exposures remaining 24, E41 O Open with HS footage 99, E80 Optical zoom 29 Optional accessories - Nikon COOLPIX S6500 | Reference Manual - Page 281
E20 R Rechargeable Li-ion battery 14, 16 Recording movies 96, E74 Recording slow motion movies 99, E75, E77 Red-eye reduction 58 Remove from display options 85, E13, E73 Setup menu 104 Shooting 26, 28, 30 Shooting menu 68, E40 Shooting mode 26 Shutter sound E94 Shutter speed 31 Shutter- - Nikon COOLPIX S6500 | Reference Manual - Page 282
k 51 T Target finding AF 68, 75, E53 Time difference 104, E83 Time zone 22, E83 Toy camera effect 1 m 51 Toy camera effect 2 n 51 Tripod socket 5, F19 TV 87, E26 TV settings 105, E99 U USB cable 86, 91, E30 USB/audio/video output connector 86, 91, E26, E29 V Vibration reduction 104, E90 - Nikon COOLPIX S6500 | Reference Manual - Page 283
- Nikon COOLPIX S6500 | Reference Manual - Page 284
No reproduction in any form of this manual, in whole or in part (except for brief quotation in critical articles or reviews), may be made without written authorization from NIKON CORPORATION. YP2L03(11) 6MN09511-03
-
 1
1 -
 2
2 -
 3
3 -
 4
4 -
 5
5 -
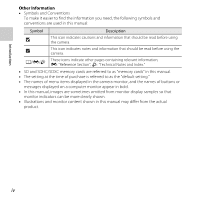 6
6 -
 7
7 -
8
-
9
-
10
-
11
-
12
-
13
-
14
-
15
-
16
-
17
-
18
-
19
-
20
-
21
-
22
-
23
-
24
-
25
-
26
-
27
-
28
-
29
-
30
-
31
-
32
-
33
-
34
-
35
-
36
-
37
-
38
-
39
-
40
-
41
-
42
-
43
-
44
-
45
-
46
-
47
-
48
-
49
-
50
-
51
-
52
-
53
-
54
-
55
-
56
-
57
-
58
-
59
-
60
-
61
-
62
-
63
-
64
-
65
-
66
-
67
-
68
-
69
-
70
-
71
-
72
-
73
-
74
-
75
-
76
-
77
-
78
-
79
-
80
-
81
-
82
-
83
-
84
-
85
-
86
-
87
-
88
-
89
-
90
-
91
-
92
-
93
-
94
-
95
-
96
-
97
-
98
-
99
-
100
-
101
-
102
-
103
-
104
-
105
-
106
-
107
-
108
-
109
-
110
-
111
-
112
-
113
-
114
-
115
-
116
-
117
-
118
-
119
-
120
-
121
-
122
-
123
-
124
-
125
-
126
-
127
-
128
-
129
-
130
-
131
-
132
-
133
-
134
-
135
-
136
-
137
-
138
-
139
-
140
-
141
-
142
-
143
-
144
-
145
-
146
-
147
-
148
-
149
-
150
-
151
-
152
-
153
-
154
-
155
-
156
-
157
-
158
-
159
-
160
-
161
-
162
-
163
-
164
-
165
-
166
-
167
-
168
-
169
-
170
-
171
-
172
-
173
-
174
-
175
-
176
-
177
-
178
-
179
-
180
-
181
-
182
-
183
-
184
-
185
-
186
-
187
-
188
-
189
-
190
-
191
-
192
-
193
-
194
-
195
-
196
-
197
-
198
-
199
-
200
-
201
-
202
-
203
-
204
-
205
-
206
-
207
-
208
-
209
-
210
-
211
-
212
-
213
-
214
-
215
-
216
-
217
-
218
-
219
-
220
-
221
-
222
-
223
-
224
-
225
-
226
-
227
-
228
-
229
-
230
-
231
-
232
-
233
-
234
-
235
-
236
-
237
-
238
-
239
-
240
-
241
-
242
-
243
-
244
-
245
-
246
-
247
-
248
-
249
-
250
-
251
-
252
-
253
-
254
-
255
-
256
-
257
-
258
-
259
-
260
-
261
-
262
-
263
-
264
-
265
-
266
-
267
-
268
-
269
-
270
-
271
-
272
-
273
-
274
-
275
-
276
-
277
-
278
-
279
-
280
-
281
-
282
-
283
-
284
 |
 |

DIGITAL CAMERA
Reference Manual
En