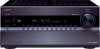
Onkyo TX-NR808 Owner Manual
Onkyo TX-NR808 Manual
 |
View all Onkyo TX-NR808 manuals
Add to My Manuals
Save this manual to your list of manuals |
Onkyo TX-NR808 manual content summary:
- Onkyo TX-NR808 | Owner Manual - Page 1
AV Receiver TX-NR808 Instruction Manual Thank you for purchasing an Onkyo AV Receiver. Please read this manual thoroughly before making connections and plugging in the unit. Following the instructions in this manual will enable you to obtain optimum performance and listening enjoyment from your new - Onkyo TX-NR808 | Owner Manual - Page 2
servicing) instructions in the literature accompanying the appliance. Important Safety Instructions 1. Read these instructions. 2. Keep these instructions. 3. Heed all warnings. 4. Follow all instructions the environmental issues and follow local of the shelf or board above the apparatus shall - Onkyo TX-NR808 | Owner Manual - Page 3
is not user-serviceable. If you cannot turn on the unit, contact your Onkyo dealer. 3. Hearing Loss Caution Excessive sound pressure from earphones and accordance with the instructions, may cause receiving antenna. • Increase the separation between the equipment and receiver. • Connect the - Onkyo TX-NR808 | Owner Manual - Page 4
Speaker cable labels (➔ 13) Speaker setup microphone (➔ 29) Remote controller and two batteries (AA/R6) (Note for China: The battery for the remote controller is not supplied for this unit.) * In catalogs and on packaging, the letter at the end of the product name indicates the color. Specifications - Onkyo TX-NR808 | Owner Manual - Page 5
Codes 82 Remote Control Codes for Onkyo Components Connected via V 82 Resetting REMOTE MODE Buttons 83 Resetting the Remote Controller 83 Controlling Other Components 83 Activities Setup 85 Learning Commands 86 Using Normal Macros 87 Others Troubleshooting 88 Specifications 93 About HDMI - Onkyo TX-NR808 | Owner Manual - Page 6
a trademark of Onkyo Corporation. • Banana Plug-Compatible Speaker Posts*8 *6 • Powered Zone 2 • Internet Radio* Connectivity (SIRIUS Internet Radio*9/ vTuner/Last.fm/Pandora/Rhapsody/Slacker/Mediafly/ Napster) * Services available may vary depending on the region. "HDMI, the HDMI Logo, and High - Onkyo TX-NR808 | Owner Manual - Page 7
receive HD Radio broadcasts, you must install an Onkyo UP-HT1 HD Radio tuner module (sold separately). *8 In Europe, using banana plugs to connect speakers to an audio has been designed to connect specifically to iPod or iPhone, service marks, or certification marks of the Digital Living Network - Onkyo TX-NR808 | Owner Manual - Page 8
Remote control sensor/transmitter (➔ 4) G Display (➔ 9) H DISPLAY button (➔ 25) I MASTER VOLUME control and indicator (➔ 25) J PURE AUDIO button (➔ 35) K HDMI THRU indicator (➔ 57) L Input selector buttons (BD/DVD, VCR/DVR, CBL/ SAT, GAME, PC, AUX, TUNER, TV - Onkyo TX-NR808 | Owner Manual - Page 9
BC D E FG H IJ For detailed information, see the pages in parentheses. B Speaker/channel indicators C Z2 (Powered Zone 2) indicator (➔ 72) D Listening mode and format indicators (➔ 35, 59) E NETWORK indicator (➔ 62) F Tuning indicators RDS indicator (excluding North American and Taiwan models - Onkyo TX-NR808 | Owner Manual - Page 10
, SURR L/R, SB/FH/FW L/R, SUBWOOFER, ZONE 2 L/R and ZONE 3 L/R) * SB···Surround Back, FH···Front High, FW···Front Wide T Speaker Terminals (FRONT L/R, CENTER, SURR L/R, SURR BACK L/R, FRONT HIGH L/R and FRONT WIDE/ZONE 2 L/R) See "Connecting the AV Receiver" for connection information (➔ 13 to 22). - Onkyo TX-NR808 | Owner Manual - Page 11
Controller Controlling the AV Receiver B C D E *1 F G B H I J C To control the AV receiver, press RECEIVER to select Receiver mode. You can also use the remote controller to control K Onkyo Blu-ray Disc/DVD player, CD player and other components. See "Entering Remote Control Codes" for more - Onkyo TX-NR808 | Owner Manual - Page 12
best position for your subwoofer, while playing a movie or some music with good bass, experiment by placing your subwoofer at various positions within the room, and choose the one that provides the most satisfying results. B C Front speakers (Left and Right) These output the overall sound. Their - Onkyo TX-NR808 | Owner Manual - Page 13
Connections Connecting the AV Receiver Connecting Your Speakers Speaker Configuration The following table indicates the channels you should use depending on the number of speakers that you have. For 7.1-channel surround-sound playback, you need 7 speakers and a powered subwoofer. Number of 2 3 4 - Onkyo TX-NR808 | Owner Manual - Page 14
the banana plug. • Do not insert the speaker code directly into the center hole of the speaker terminal. The following illustration shows which speaker should be connected to each pair of terminals. If you're using only one surround back speaker, connect it to the SURR BACK L terminals. Front - Onkyo TX-NR808 | Owner Manual - Page 15
speakers G Subwoofer(s) HI Surround back speakers JK Front high speakers LM Front wide speakers Dipole speakers J K G TV/screen G LBDCM Normal speakers J K G TV/screen G L BDCM E FE F H I H I Connecting a Powered Subwoofer Using a suitable cable, connect the AV receiver's SUBWOOFER - Onkyo TX-NR808 | Owner Manual - Page 16
and use the AV receiver as a preamp, connect it to the PRE OUT jacks, and connect all speakers and the subwoofer to the power amplifier. If you have a powered subwoofer, connect it to this AV receiver's SUBWOOFER PRE OUT jack. You can connect the powered subwoofer with two SUBWOOFER PRE OUT jacks - Onkyo TX-NR808 | Owner Manual - Page 17
a 7.1-channel analog audio output. Several standard analog audio cables can be used instead of a multichannel cable. * Available sampling rate for PCM input signal is 32/44.1/48/88.2/96 kHz. Even 176.4/192 kHz is effective in case of the HDMI connection. Note • The AV receiver does not support - Onkyo TX-NR808 | Owner Manual - Page 18
HDMI component connected to the AV receiver). If the TV power is off or the TV is set to another input source, this may result in no sound from the AV receiver or the sound may be cut off. • When the "Audio TV Out" setting is set to "On" (➔ 56) to hear from your TV's speakers, by controlling the AV - Onkyo TX-NR808 | Owner Manual - Page 19
Connect your components to the appropriate jacks. The default input assignments are shown below. ✔: Assignment can be changed (➔ 44). No. Jack Signal Components Assignable " AUX INPUT VIDEO Composite video Camcorder, etc AUDIO L/R Analog audio DIGITAL Digital audio PC IN Analog audio - Onkyo TX-NR808 | Owner Manual - Page 20
use the AV receiver's remote controller to control your other V-capable Onkyo components, pointing the remote controller at the AV receiver's remote control sensor instead of the component. You must enter the appropriate remote control code first (➔ 82). Note • Use only V cables for V connections - Onkyo TX-NR808 | Owner Manual - Page 21
antenna to achieve the best possible reception. • Keep the AM loop antenna as far away as possible from your AV receiver, TV, speaker cables, and power Connecting the Power Cord Note • Before connecting the power cord, connect all of your speakers and AV components. • Turning on the AV receiver - Onkyo TX-NR808 | Owner Manual - Page 22
sections as a guide. Video Connection Formats Video component can be connected by using any one of the following video connection formats: composite video, S-Video, PC IN (Analog RGB), component video or HDMI, the latter offering the best picture quality. The AV receiver can upconvert and - Onkyo TX-NR808 | Owner Manual - Page 23
IN AV receiver *1 *1*3 *1 *1 *3 Analog OUT HDMI HDMI *1 *2 TV, projector, etc. *1 Depends on the "Audio TV Out" setting (➔ 56). *2 This setting is available, when "Audio Return Channel" setting is set to "Auto" (➔ 57), you must select the TV/CD input selector and your TV must support ARC - Onkyo TX-NR808 | Owner Manual - Page 24
Press ON/STANDBY on the front panel. or Press RECEIVER followed by ON on the remote controller. The AV receiver comes on, the display lights, and the STANDBY indicator goes off. Pressing the remote controller's ON again will turn on any components connected via V. Turning Off Press ON/STANDBY on the - Onkyo TX-NR808 | Owner Manual - Page 25
using the remote controller unless otherwise specified. Selecting the Language Used for the Onscreen Setup Menus You can determine the language used for the onscreen setup menus. See "Language" in the "OSD Setup" (➔ 55). Playing the Connected Component ■ Operating on the AV receiver 1 Use the - Onkyo TX-NR808 | Owner Manual - Page 26
want to use. Press RECEIVER followed by SP LAYOUT repeatedly. `Speaker Layout:FH: The sound from front high speakers is output by priority. `Speaker Layout:FW: The sound from front wide speakers is output by priority. `Speaker Layout:SB: The sound from surround back speakers is output by priority - Onkyo TX-NR808 | Owner Manual - Page 27
listening mode, not all channels shown here output the sound. *4 When you have entered a custom name in "Name Edit" (➔ 52), the input source is displayed with that name. But even if not, the component name may be displayed if the AV receiver receives it via HDMI connection (➔ 18). *5 For the PORT - Onkyo TX-NR808 | Owner Manual - Page 28
Default Audyssey MultEQ® Room Correction and Speaker Setup With the supplied calibrated microphone, Audyssey MultEQ automatically determines the number of speakers connected, their size for purposes of bass management, optimum crossover frequencies to the subwoofer (if present), and distances from - Onkyo TX-NR808 | Owner Manual - Page 29
On the TV, select the input to which the AV receiver is connected. 2 Set the speaker setup microphone at the Main Listening Position B, and connect it to the SETUP MIC jack. SETUP MIC jack 4 If you use a powered subwoofer(s), adjust the subwoofer volume level to 75dB. Test tones are played through - Onkyo TX-NR808 | Owner Manual - Page 30
Room Correction and Speaker Setup again. Note that if the volume is set too high and the sound distorts, detection issues may occur, so use an appropriate volume level. If the subwoofer has a low-pass filter switch, set it to Off or Direct. Refer to your subwoofer's instruction manual for details - Onkyo TX-NR808 | Owner Manual - Page 31
the buttons repeatedly to change the frequency one step at a time. In manual tuning mode, FM stations will be in mono. Tuning into weak FM stereo AM and FM stations directly by entering the appropriate frequency. 1 On the remote controller, press TUNER repeatedly to select "AM" or "FM", followed by - Onkyo TX-NR808 | Owner Manual - Page 32
1 through 40. 4 Press MEMORY again to store the station or channel. The station or channel is stored and the preset number stops flashing. Repeat this procedure for news, sport, rock, etc.). The AV receiver supports four types of RDS information: ■ PS (Program Service) When tuned to an RDS station - Onkyo TX-NR808 | Owner Manual - Page 33
PRESET F/S to select the type of program you want. See the table shown later in this chapter. 3 To start the search, press ENTER. The AV receiver searches until it finds a station of the type you specified, at which point it stops briefly before continuing with the search. 4 When a station you want - Onkyo TX-NR808 | Owner Manual - Page 34
VCR to the recording VCR without going through the AV receiver, connect the TV/VCR's audio and video outputs directly to the recording VCR's audio and video inputs. See the manuals supplied with your TV and VCR for details. • Video signals connected to composite video inputs can be recorded only via - Onkyo TX-NR808 | Owner Manual - Page 35
• While a pair of headphones is connected, you can select the following listening modes: Pure Audio, Mono, Direct, and Stereo. • The listening modes cannot be used while you are listening to sound through your TV speakers coming from components connected to the AV receiver ("TV Sp On" appears on the - Onkyo TX-NR808 | Owner Manual - Page 36
is Dolby Digital EX surround sound. This provides a center back surround channel from 5.1-channel sources. ■ Speaker Layout The illustration shows which speakers are activated in each channel. See "Speaker Configuration" for the speaker setup (➔ 46). ; 9 $ / Press RECEIVER followed by SP LAYOUT - Onkyo TX-NR808 | Owner Manual - Page 37
are enabled, but much of the 4 % ' ( ) processing set via HOME is disabled. See "Advanced Setup" for more details (➔ 41). Stereo Sound is output by the front left and right speakers and subwoofer. " S t e r e o d i oPPoPP 4 Mono % Use this mode when watching an old movie with a mono - Onkyo TX-NR808 | Owner Manual - Page 38
soundtracks, which use a dis- ( crete surround back channel for true 6.1/7.1-channel playback. The seven totally separate audio channels provide better spatial imaging and 360degree sound localization, perfect for sounds that pan across the surround channels. Use it with DVDs that bear the DTS-ES - Onkyo TX-NR808 | Owner Manual - Page 39
They can be used with 2-channel matrixed and multichannel sources. Sur- round back speaker output depends on the source game audio sounds to produce the surround back channel out- put. • THX Select2 Music This mode is designed for use with music. It expands 5.1-channel sources for 7.1-channel - Onkyo TX-NR808 | Owner Manual - Page 40
*4 Front high and front wide speakers are not supported. *5 For the Blu-ray Discs, Dolby Digital is used in a 3.1/5.1-channel speaker system. *6 AV receiver can input the DSD signal from HDMI IN. Setting the output setting on the player side to PCM might obtain a better sound according to the player - Onkyo TX-NR808 | Owner Manual - Page 41
Setup (➔ 55) 2. Speaker Setup 1. Speaker Settings 2. Speaker Configuration 3. Speaker Distance 4. Level Calibration 5. Equalizer Settings 6. THX Audio Setup D Audio Adjust (➔ 49) 7. Hardware Setup 1. Remote ID 2. Multi Zone 3. Tuner 4. HDMI 5. Auto Power Down 6. Network 7. Firmware Update I Remote - Onkyo TX-NR808 | Owner Manual - Page 42
Speaker Setup C ■ Subwoofer D ` Yes: Select if a subwoofer is connected. ` No: Select if no subwoofer is connected. B Menu selection C Setting target D Setting options (default setting underlined) Input/Output Assign Main Menu Input/Output Assign Monitor Out If you connect your TV to HDMI - Onkyo TX-NR808 | Owner Manual - Page 43
setup menus are output by only the HDMI output. If you're not using the HDMI output and select settings by mistake and the menus disappear, press AV receiver connected to a priority output. Changing "Monitor Out" setting manually setting is fixed at "Auto". *1 PC IN (Analog RGB) input signal is - Onkyo TX-NR808 | Owner Manual - Page 44
on video signal flow and upconversion (➔ 22). • If no video component is connected to HDMI output (even if the HDMI input is assigned), the AV receiver selects the video source based on the setting of "Component Video Input". • When an HDMI IN is assigned to an input selector as explained here, the - Onkyo TX-NR808 | Owner Manual - Page 45
in 5 dB step. Note • This setting only affects signals connected to the AV receiver's multichannel input SUBWOOFER jack. • If you find that your subwoofer is too loud, try the 10 dB or 15 dB setting. Speaker Setup Main menu Speaker Setup Some of the settings in this section are set automatically - Onkyo TX-NR808 | Owner Manual - Page 46
is NOT set automatically by Audyssey MultEQ Room Correction and Speaker Setup function (➔ 28). With the Double Bass function, you can boost bass output by feeding bass sounds from the front left, right, and center channels to the subwoofer. ` On: Double Bass function on. ` Off(THX): Double Bass - Onkyo TX-NR808 | Owner Manual - Page 47
to 0.0dB to +12.0dB in 0.5 dB step. ■ Subwoofer*1 `-15.0dB to 0.0dB to +12.0dB in 0.5 dB step. Note • Speakers that you set to "No" or "None" in the "Speaker Configuration" cannot be selected (➔ 46). • The speakers cannot be calibrated while the AV receiver is muted. • The test tone is output at the - Onkyo TX-NR808 | Owner Manual - Page 48
Audio Setup With the "Surr Back Speaker Spacing" setting, you can specify the distance between your surround back speakers. If you're using a THX-certified subwoofer, set the "THX Ultra2/Select2 Subwoofer Select2 Plus™ Certified receivers. With THX Loudness that certain sound elements can be channel - Onkyo TX-NR808 | Owner Manual - Page 49
Dimension ` -3 to 0 to +3 With this setting, you can move the sound speaker, the center channel sound is output by only the center speaker. (If you're not using a center speaker, the center channel sound will be distributed to the front left and right speakers back speakers are connected. This - Onkyo TX-NR808 | Owner Manual - Page 50
"Front High" or "Front Wide" setting is enabled (➔ 46), this setting is fixed at "Manual". DTS ■ Neo:6 Music Center Image ` 0 to 2 to 5 The DTS Neo:6 Music listening mode creates 6-channel surround sound from 2-channel stereo sources. With this setting, you can specify by how much the front left and - Onkyo TX-NR808 | Owner Manual - Page 51
sounds to be of equal loudness. Note • Even if you have selected other than "Audyssey" in "Equalizer" setting after performing Audyssey MultEQ Room Correction and Speaker Setup the Dynamic Vol indicator will light (➔ 9). • If Pure Audio or Direct listening mode is selected, this setting cannot be - Onkyo TX-NR808 | Owner Manual - Page 52
and sound are out of sync. With the A/V Sync setting, you can correct this by applying a delay to the audio signal. To view the TV picture while setting the delay, press ENTER. To return to the previous screen, press RETURN. If HDMI Lip Sync is enabled (➔ 56) and your TV or display supports HDMI Lip - Onkyo TX-NR808 | Owner Manual - Page 53
when the picture source is movie film, etc. ` Game: Select to use in connecting a game console. With "Picture Mode", you can change the following settings to When the "Film Mode" setting is set to "Auto", the AV receiver automatically detects the picture source and in either "3:2" or "2:2". However - Onkyo TX-NR808 | Owner Manual - Page 54
on the remote controller by using the Home menu (➔ 26). *2 Press CLR if you want to reset to mode specified here will be resumed once the AV receiver has been set to Standby. Main menu audio signal is played (DVD, etc.). ■ 2ch Source With this setting, the default listening mode for 2-channel - Onkyo TX-NR808 | Owner Manual - Page 55
determines the language used for the onscreen setup menus. Hardware Setup Main menu Hardware Setup Remote ID ■ Remote ID ` 1, 2, or 3 When several Onkyo components are used in the same room, their remote ID codes may overlap. To differentiate the AV receiver from the other components, you can - Onkyo TX-NR808 | Owner Manual - Page 56
or "Both(Sub)" (➔ 42) and if your TV connected to a priority output cannot output the audio, the sound will be heard from AV receiver's speakers. ■ Lip Sync ` Disable: HDMI lip sync disabled. ` Enable: HDMI lip sync enabled. The AV receiver can be set to automatically correct any delay between the - Onkyo TX-NR808 | Owner Manual - Page 57
OUT MAIN (European, Australian and Asian models) of the AV receiver. To use this function, you must select the TV/CD input selector and your TV must support ARC function. Note • The "Audio Return Channel" setting can be set only when the "HDMI Control (RIHD)" setting is set to "On". • This setting - Onkyo TX-NR808 | Owner Manual - Page 58
via USB: You can update the firmware from a USB mass storage device. You can update the Onkyo dock's firmware. Do not shutdown the power of the AV receiver while update. Note • This update shall not be performed when no dock is connected to UNIVERSAL PORT jack. Lock Setup With this preference, you - Onkyo TX-NR808 | Owner Manual - Page 59
-HD High Resolution Audio, DTS-HD Master Audio, DTS Express, DSD, Dolby EX, Dolby Pro Logic IIz Height, Dolby PLIIx Movie, Neo:6 Cinema and 5.1-channel source + Neo when the AV receiver is turned off, it will return to "On". Music Optimizer The Music Optimizer function enhances the sound quality of - Onkyo TX-NR808 | Owner Manual - Page 60
Mode. Pressing ENTER again allows you to return to the "Audio Selector" setting. Normally, the AV receiver detects the signal format automatically. However, if you experience either of the following issues when playing PCM or DTS material, you can manually set the signal format to PCM or DTS. • If - Onkyo TX-NR808 | Owner Manual - Page 61
. Consult your ISP if you have any problems with your Internet connection. • The AV receiver uses DHCP to configure its network settings automatically. If you want to configure these settings manually, see "Network Settings" (➔ 67). • The AV receiver does not support PPPoE settings, so if you have - Onkyo TX-NR808 | Owner Manual - Page 62
Settings" (➔ 67). DISPLAY NET/USB Note • When the NETWORK indicator flashes, confirm that the Ethernet cable is firmly connected to the AV receiver. • Services available may vary depending on the region. See the separate instructions for more information. *1 MENU: When menu operations are enabled - Onkyo TX-NR808 | Owner Manual - Page 63
• The search function does not work with media servers which do not support this function. • Depending on the sharing settings in the media server, the AV receiver may not able to access the content. Refer to the instruction manual of the media server. 4 Use R/X to select an item, and then press - Onkyo TX-NR808 | Owner Manual - Page 64
can be retrieved from the server. In this case, check your En server, network, and AV receiver connections. 64 Windows Media Player 11 Setup This section explains how to configure Windows Media Player 11 so that the AV receiver can play the music files stored on your computer. 1 Start Windows Media - Onkyo TX-NR808 | Owner Manual - Page 65
: 8 bit, 16 bit, 24 bit • Number of channels: 2 Server Requirements The AV receiver can play digital music files stored on a computer or media server and supports the following technologies: • Windows Media Player 11 • Windows Media Connect 2.0 • DLNA-certified media server If the operating system - Onkyo TX-NR808 | Owner Manual - Page 66
the maximum volume value from the Web Setup in your browser. The volume value of the remote window and the volume value of the AV receiver may not always match. Adjustments you make to the volume in the AV receiver will not be reflected in the "Remote playback" window. Windows and the Windows logo - Onkyo TX-NR808 | Owner Manual - Page 67
then press ENTER. The "Hardware Setup" menu appears. 7. Hardware Setup 1. Remote ID 2. Multi Zone 3. Tuner 4. HDMI 5. Auto Power Down 6. Network 7. Firmware Update 3 Use R/X to select "Network", and then press ENTER. The "Network" screen appears. 7-6. Network MAC Address DHCP IP Address Subnet - Onkyo TX-NR808 | Owner Manual - Page 68
for control over the network. Note • Set the port number between from "49152" to "65535". About USB USB can be used to play music files stored on USB mass storage devices (e.g., USB flash drives and MP3 players), which can be plugged into the AV receiver's USB port. Supported Audio File Formats For - Onkyo TX-NR808 | Owner Manual - Page 69
again. Random playback supports up to 20,000 instruction manual for details. • Protected WMA music files on an MP3 player cannot be played. • Onkyo accepts no responsibility whatsoever for the loss or dam- age to data stored on a USB mass storage device when that device is used with the AV receiver - Onkyo TX-NR808 | Owner Manual - Page 70
in your main room. Connecting Your Zone 2 Speakers to an Amp in Zone 2 This setup allows 7.1-channel playback in your main listening room and 2-channel stereo playback in Zone 2, with a different source in each room. Hookup • Use an RCA audio cable to connect the AV receiver's ZONE 2 PRE OUT - Onkyo TX-NR808 | Owner Manual - Page 71
Your Zone 3 Speakers to an Amp in Zone 3 This setup allows 7.1-channel playback in your main listening room and 2-channel stereo playback in Zone 3, with a different source in each room. Hookup • Use an RCA audio cable to connect the AV receiver's ZONE 3 PRE OUT L/R jacks to an analog audio input on - Onkyo TX-NR808 | Owner Manual - Page 72
. The "Hardware Setup" menu appears. 7. Hardware Setup 1. Remote ID 2. Multi Zone 3. Tuner 4. HDMI 5. Auto Power Down 6. Network 7. Firmware Update 3 Use R/X to select "Multi Zone", and then press ENTER. The "Multi Zone" menu appears. To use the same volume level as when the AV receiver was last - Onkyo TX-NR808 | Owner Manual - Page 73
repeatedly, then point the remote controller at the AV receiver and press ON. sound is heard when an input source is selected, check if it's connected connect Zone 2 speakers directly to the AV receiver, listening modes that require surround back speakers or front high speakers or front wide speakers - Onkyo TX-NR808 | Owner Manual - Page 74
and feeds them to the AV receiver located in the cabinet via the connecting block. Connecting block IR receiver IR IN Inside cabinet Signal flow Remote controller Using a Multiroom Kit with Other Components In this setup, an IR emitter is connected to the AV receiver's IR OUT jack and placed - Onkyo TX-NR808 | Owner Manual - Page 75
iPod/iPhone. • The USB indicator flashes if the AV receiver cannot read the iPod/iPhone. Standard Mode control The content information is not displayed onscreen, but can be manipulated using the iPod/iPhone or the Remote Control (NET/USB). Note • The audio of video content can be played back but no - Onkyo TX-NR808 | Owner Manual - Page 76
the V cable, otherwise a malfunction may occur. • See the RI Dock's instruction manual for more 78 information. *1 To use V (Remote Interactive), you must make an analog audio connection (RCA) between the AV receiver and the RI Dock. V cable*1 Models sold are different depending on the region - Onkyo TX-NR808 | Owner Manual - Page 77
web site. For supported iPod models, see the instruction manual of the Onkyo Dock. UP-A1 Dock With the UP-A1 Dock, you can easily play the music, photo, or movie stored on your Apple iPod through the AV receiver and enjoy great sound. You can use the AV receiver's remote controller to operate your - Onkyo TX-NR808 | Owner Manual - Page 78
of your sofa. You can even use the AV receiver's remote controller to operate your iPod. Note • Enter the appropriate remote control code before using the AV receiver's remote controller for the first time (➔ 82). • Connect the RI Dock to the AV receiver with an V cable (➔ 76). • Set the RI Dock - Onkyo TX-NR808 | Owner Manual - Page 79
please refer to the instruction manual of RI Dock. *1 This button does not turn the Onkyo DS-A2 or DS- it will remain off when the remote controller transmits an Off command. mode (see *2), the playback will be continued even if the AV receiver is turned off. • In Extended mode (see *2), you cannot - Onkyo TX-NR808 | Owner Manual - Page 80
7 When you have a network connection, use S to appropriate external input is selected on your TV. select "Search DB", and then press ENTER. 2 Use R/X to select "Remote Controller Setup", and then press ENTER. The "Remote Controller Setup" menu appears. The AV receiver accesses and searches the - Onkyo TX-NR808 | Owner Manual - Page 81
ENTER. When you do NOT have a network connection, use R/X to select the brand name, and then press ENTER. The following screen appears. 8-1. Remote Mode Setup Category Brand Model TV TV Sonic (Option) Skip Search by model number( via network ) 9 The AV receiver accesses and searches the database - Onkyo TX-NR808 | Owner Manual - Page 82
are correct at the time of printing, but are subject to change. Remote Control Codes for Onkyo Components Connected via V Onkyo components that are connected via V are controlled by pointing the remote controller at the AV receiver, not the component. This allows you to control components that are - Onkyo TX-NR808 | Owner Manual - Page 83
is preprogrammed with the remote control code for controlling a component that supports the Q*1 (limited to some models). The component must be able to receive remote control commands via Q and be connected to the AV receiver via HDMI. *1 The Q supported by the AV receiver is the CEC system control - Onkyo TX-NR808 | Owner Manual - Page 84
+10 ✔*1 ✔*1 ✔✔ ✔ F N J DISPLAY K MUTING L CH +/- ✔✔ ✔✔ DISC +/- ✔ ✔ M PREV CH MENU ✔ ✔ ✔✔ G N RETURN O CLR *1 The Q function is not supported. The Q sup- H ported by the AV receiver is the CEC system control function of the HDMI standard. *2 These buttons function - Onkyo TX-NR808 | Owner Manual - Page 85
the Easy macro mode (➔ 27). 1 Press RECEIVER followed by SETUP. The main menu appears onscreen. Tip • Remote Controller Setup", and then press ENTER. The "Remote Controller Setup" menu appears. 8. Remote Controller Setup 1. Remote Mode Setup 2. Activities Setup 3 Use R/X to select "Activities Setup - Onkyo TX-NR808 | Owner Manual - Page 86
will appear. 8-2. Activities Setup My Movie Now we are ready to transfer data to the remote. Please hold the remote so that it is facing the receiver. Use ENTER button of your remote to activate "OK". Ready? OK To use the remote controller, point it at the AV receiver's remote control sensor, as - Onkyo TX-NR808 | Owner Manual - Page 87
Onkyo CD players, cassette decks, and DVD players. However, they can learn new commands, and you can restore the preprogrammed commands at any time by resetting the remote actions: 1. Press RECEIVER to select the Receiver remote con- troller mode. 2. Press ON to turn on the AV receiver. 3. Press TV/ - Onkyo TX-NR808 | Owner Manual - Page 88
MUTING to unmute the AV receiver. While a pair of headphones is connected to the 27 PHONES jack, no sound is output by the speakers. If there's no sound from a DVD player connected to - an HDMI IN, check the DVD player's output settings, and be sure to select a supported audio format. Check the - Onkyo TX-NR808 | Owner Manual - Page 89
information in the LFE channel, the subwoofer produces no sound. Make sure the speakers are configured correctly. 46 ■ There's no sound with a certain signal format Check the digital audio output setting on the con- - nected device. On some game consoles, such as those that support DVD, the default - Onkyo TX-NR808 | Owner Manual - Page 90
you've entered the correct remote control 82 code. Make sure to set the same ID on both the AV receiver 55 and remote controller. ■ Can't control other components If it's an Onkyo component, make sure that the V 20 cable and analog audio cable are connected properly. Connecting only an V cable won - Onkyo TX-NR808 | Owner Manual - Page 91
" is set to "Enable" in the "Network" setting. 3. "HDMI Control (RIHD)" setting is set to "On". (Depending on the TV status, the AV receiver will enter Standby mode as usual.) ■ The sound changes when I connect my headphones When a pair of headphones is connected, the listen- - ing mode is set - Onkyo TX-NR808 | Owner Manual - Page 92
component and AV receiver, even if they are connected digitally. ■ The functions System On/Auto Power On and Direct Change don't work for components connected via V These functions don't work when Zone 2/3 is turned 20 on. ■ When performing "Audyssey MultEQ® Room Correction and Speaker Setup", the - Onkyo TX-NR808 | Owner Manual - Page 93
.4 kg (40.6 lbs.) ■ HDMI Input Output Video Resolution Audio Format Supported IN 1, IN 2, IN 3, IN 4, IN 5, IN 6, AUX INPUT (North American and Taiwan) OUT (European, Australian and Asian) OUT MAIN, OUT SUB 1080p Dolby TrueHD, DTS Master Audio, DVD-Audio, DSD 3D, Audio Return Channel, Deep Color - Onkyo TX-NR808 | Owner Manual - Page 94
Outputs 7 Subwoofer Pre Outputs 2 Speaker Outputs Main (L, R, C, SL, SR, SBL, SBR, FHL, FHR) + ZONE2/Front Wide (L, R) Phones 1 (6.3 ø) ■ Others SETUP MIC 1 RS232 1 Ethernet 1 IR Input 1 IR Output 1 12 V Trigger Out 2 USB 1 Universal Port 1 RI 1 Specifications and features - Onkyo TX-NR808 | Owner Manual - Page 95
from a PC are not supported. • The HDMI audio signal (sampling rate, bit length, etc.) may be restricted by the connected source component. If the picture is poor or there's no sound from a component connected via HDMI, check its setup. Refer to the connected component's instruction manual for - Onkyo TX-NR808 | Owner Manual - Page 96
to output the video/audio from the antenna or from the input jack of the TV from the speakers connected to the AV receiver. (A connection such as optical digital cable or similar is required above the HDMI cable.) • Input to the AV receiver can be selected with the remote controller of the TV - Onkyo TX-NR808 | Owner Manual - Page 97
to connect and setup 1 Confirm the connecting and setting. 1. Connect the HDMI OUT or HDMI OUT MAIN jack to the HDMI input jack of the TV. Blu-ray Disc/DVD player, etc. HDMI connection AV receiver DIGITAL AUDIO connection (OPTICAL) HDMI connection TV, projector, etc. 2. Connect the audio output - Onkyo TX-NR808 | Owner Manual - Page 98
different resolutions are output by the AV receiver. NTSC/PAL ✔: Output Input Output HDMI 1080p 1080i 720p HDMI 1080p ✔ 1080i ✔ ✔ ✔ limited to 480p/576p for an effective signal in the effect of Macrovision. *3 PC IN (Analog RGB) input signal is output at 720p resolution when you select - Onkyo TX-NR808 | Owner Manual - Page 99
Memo En 99 - Onkyo TX-NR808 | Owner Manual - Page 100
, Marlow, Buckinghamshire, SL7 1AB, UK Tel: +44-(0)1628-473-350 Fax: +44-(0)1628-401-700 ONKYO CHINA LIMITED Unit 1 & 12, 9/F, Ever Gain Plaza Tower 1, 88, Container Port Road, Kwai Chung, N.T., Hong Kong. Tel: 852-2429-3118 Fax: 852-2428-9039 http://www.ch.onkyo.com/ SN 29400329 (C) Copyright 2010
-
 1
1 -
 2
2 -
 3
3 -
 4
4 -
 5
5 -
 6
6 -
 7
7 -
8
-
9
-
10
-
11
-
12
-
13
-
14
-
15
-
16
-
17
-
18
-
19
-
20
-
21
-
22
-
23
-
24
-
25
-
26
-
27
-
28
-
29
-
30
-
31
-
32
-
33
-
34
-
35
-
36
-
37
-
38
-
39
-
40
-
41
-
42
-
43
-
44
-
45
-
46
-
47
-
48
-
49
-
50
-
51
-
52
-
53
-
54
-
55
-
56
-
57
-
58
-
59
-
60
-
61
-
62
-
63
-
64
-
65
-
66
-
67
-
68
-
69
-
70
-
71
-
72
-
73
-
74
-
75
-
76
-
77
-
78
-
79
-
80
-
81
-
82
-
83
-
84
-
85
-
86
-
87
-
88
-
89
-
90
-
91
-
92
-
93
-
94
-
95
-
96
-
97
-
98
-
99
-
100
 |
 |

AV Receiver
TX-NR808
Instruction Manual
Thank you for purchasing an Onkyo AV Receiver.
Please read this manual thoroughly before making
connections and plugging in the unit.
Following the instructions in this manual will enable
you to obtain optimum performance and listening
enjoyment from your new AV Receiver.
Please retain this manual for future reference.
Contents
Introduction
...................................
2
Connections
.................................
13
Turning On & Basic Operations
......
24
Advanced Operations
.................
41
Controlling iPod & Other
Components
............................
75
Others
...........................................
88
E
n