Optoma INTELLIGO-S1 IntelliGo S1 User Manual - Page 18
USING THE PROJECTOR, Powering on / off the projector, Selecting an input source
 |
View all Optoma INTELLIGO-S1 manuals
Add to My Manuals
Save this manual to your list of manuals |
Page 18 highlights
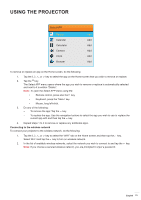
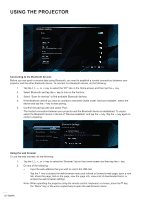
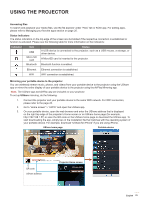
USING THE PROJECTOR Powering on / off the projector or OK OK Powering on 1. Connect one end of the power lead to the AC adapter and the AC adapter to the DC IN connector on the projector. 2. Connect the other end of the power lead to the electrical outlet. When connected, the On/Standby LED will turn red. 3. Connect the signal/source cable. 4. Turn on the projector by pressing the " " button either on the projector or the remote control. 5. A start up screen will display in approximately 5 seconds and the On/Standby LED will turn solid blue. Note: During start up, the touch control panel LED will be flashing blue. Powering off 1. Turn off the projector by pressing the " " button either on the projector or the remote control. 2. The following message will be displayed: Power off? PowerKey: OFF No operation: Cancel 3. Press the " " button again to confirm, otherwise the message will disappear after 5 seconds. When you press the " " button for the second time, the projector will shut down. 4. The cooling fans will continue to operate for about 5 seconds for the cooling cycle. During the cooling cycle, the On/Standby LED is solid red. If you wish to turn the projector back on, you must wait until the cooling cycle has finished and then simply press the " " button again to turn on the projector. 5. Disconnect the AC adapter from the projector and the power lead from the electrical outlet. Selecting an input source The projector enables you to connect various input sources using cable connections, wireless network, Bluetooth, or simply plugging in a SD card. For connecting sources to the projector, please refer to page 14. 18 English
-
 1
1 -
2
-
3
-
4
-
5
-
6
-
7
-
8
-
9
-
10
-
11
-
12
-
 13
13 -
 14
14 -
 15
15 -
 16
16 -
 17
17 -
 18
18 -
 19
19 -
 20
20 -
 21
21 -
 22
22 -
 23
23 -
24
-
25
-
26
-
27
-
28
-
29
-
30
-
31
-
32
-
33
-
34
-
35
-
36
-
37
-
38
-
39
-
40
-
41
-
42
-
43
-
44
-
45
-
46
-
47
-
48
-
49
-
50
-
51
-
52
-
53
 |
 |
