Panasonic 55 Professional Display for Entry-Level Digital Signage Operating In - Page 38
Picture Adjustments
 |
View all Panasonic 55 Professional Display for Entry-Level Digital Signage manuals
Add to My Manuals
Save this manual to your list of manuals |
Page 38 highlights
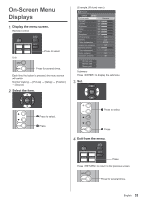
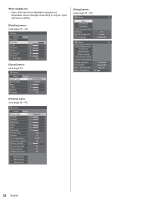
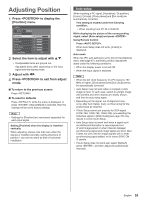
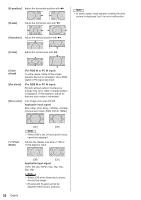
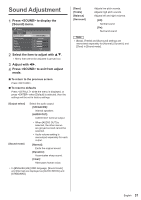
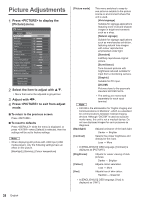
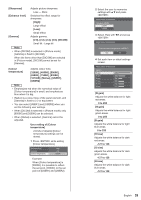
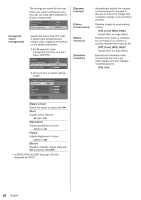
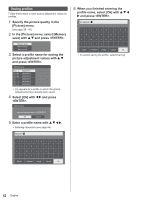
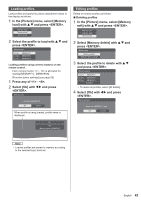
Picture Adjustments 1 Press to display the [Picture] menu. Picture Default Default Picture mode Backlight 50 Contrast 50 Brightness 50 Colour 50 Hue 50 Sharpness 50 Enhance level Gamma Colour temperature 6-segment colour management Dynamic contrast 5 Colour enhancement Refine enhancer Gradation smoother Standard High 2.2 6500K Off Off Off Off Memory save Memory load Memory edit 2 Select the item to adjust with . ● Menu that cannot be adjusted is greyed out. 3 Adjust with . 4 Press to exit from adjust mode. ■■To return to the previous screen Press . ■■To reset to defaults Press while the menu is displayed, or press when [Default] is selected, then the settings will be set to factory settings. Note ● When displaying still picture with USB input (USB media player), only the following settings have an effect on the picture. [Backlight], [Gamma], [Colour temperature] [Picture mode] This menu switches to easy-tosee pictures suitable to the picture source or environment where this unit is used. [Vivid signage] Suitable for signage applications featuring more vivid and sharper images in bright environments such as a shop. [Natural signage] Suitable for signage applications such as merchandise exhibition, featuring natural tone images with colour reproduction emphasized under light. [Standard] Faithfully reproduces original picture. [Surveillance] Tone-focused pictures with brightness reduced suitable for input from a monitoring camera. [Graphic] Suitable for PC input. [DICOM] Pictures close to the grayscale standard DICOM Part14. ● The setting are memorised separately for each input terminal. Note ● DICOM is the abbreviation for "Digital Imaging and Communications in Medicine", which is a standard for communications between medical imaging devices. Although "DICOM" is used as a picture mode name, this unit is not a medical device. Do not use displayed images for such purposes as diagnosis. [Backlight] Adjusts luminance of the back light. Darker ↔ Brighter [Contrast] Selects the proper brightness and density for the room. Less ↔ More ● In [ENGLISH(US)] OSD language, [Contrast] is displayed as [PICTURE]. [Brightness] [Colour] [Hue] Adjusts for easier viewing of dark pictures. Darker ↔ Brighter Adjusts colour saturation. Less ↔ More Adjusts hue of skin colour. Reddish ↔ Greenish ● In [ENGLISH(US)] OSD language, [Hue] is displayed as [TINT]. 38 English
-
 1
1 -
2
-
3
-
4
-
5
-
6
-
7
-
8
-
9
-
10
-
11
-
12
-
13
-
14
-
15
-
16
-
17
-
18
-
19
-
20
-
21
-
22
-
23
-
24
-
25
-
26
-
27
-
28
-
29
-
30
-
31
-
32
-
 33
33 -
 34
34 -
 35
35 -
 36
36 -
 37
37 -
 38
38 -
 39
39 -
 40
40 -
 41
41 -
 42
42 -
 43
43 -
44
-
45
-
46
-
47
-
48
-
49
-
50
-
51
-
52
-
53
-
54
-
55
-
56
-
57
-
58
-
59
-
60
-
61
-
62
-
63
-
64
-
65
-
66
-
67
-
68
-
69
-
70
-
71
-
72
-
73
-
74
-
75
-
76
-
77
-
78
-
79
-
80
-
81
-
82
-
83
-
84
-
85
-
86
-
87
-
88
-
89
-
90
-
91
-
92
-
93
-
94
-
95
-
96
-
97
-
98
-
99
-
100
-
101
-
102
-
103
-
104
-
105
-
106
-
107
-
108
 |
 |
