Panasonic AG-AC160A Operating Instructions Advanced - Page 57
Adding shot marks to clips, Selecting the memory card slot for playback - camcorder
 |
View all Panasonic AG-AC160A manuals
Add to My Manuals
Save this manual to your list of manuals |
Page 57 highlights
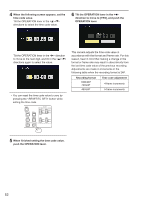
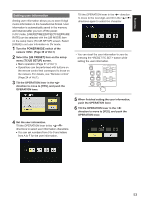
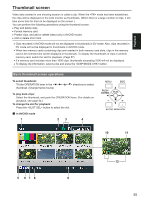
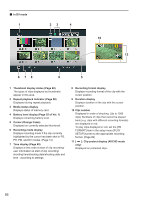
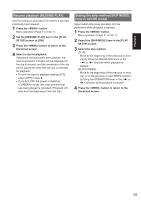
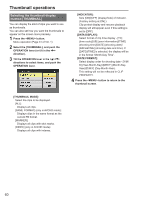
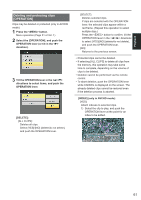
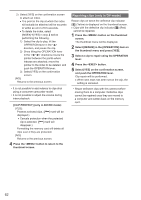
Playback 12 Indicators ••In AVCHD mode [ ]: Shot mark This indicates that a clip has a shot mark. (Page 57) [ ]: Index This indicates that indexes have been added. (Page 61) [ ]: Resume playback display Displayed on clips on which resume playback setting has been applied. ••In DV mode [ ]: Shot mark This indicates that a clip has a shot mark. (Page 57) [ W ]: Wide Displayed on clips recorded in 16:9 angular field. [ ]: Resume playback display Displayed on clips on which resume playback setting has been applied. [ X ] (Yellow): Defective clip (repairable clip) Displayed on defective clips resulted from turning off the power during recording, etc. These may be repaired. (Page 62) [ X ] (Red): Defective clip (unrepairable clip) Displayed on defective clips resulted from turning off the power during recording, etc. Delete these clips because they are not repairable. If you cannot delete these clips, format the memory card with this camera. (Page 13) [ ? ]: Defective clip (clip with unknown content) Displayed on clips with unknown content because the content is incompatible with this camera. [ ! ]: Incomplete clip When the recording capacity of one clip exceeds 4 GB (recording time is approximately 16 minutes), the clip is automatically split and saved as another clip. This is displayed on clips that were not saved successfully as associated clips due to power being switched off during recording, etc. ••To display CLIP PROPERTY on the thumbnail screen, move the cursor using the OPERATION lever to the clip you want to display properties for, and press the button. For details on display, see "Clip information screen" (Page 64). Press the button while displaying the properties to return to the thumbnail screen. Adding shot marks to clips Adding shot marks [ ] will make it easier to find the clips you are looking for. 1 Tilt the OPERATION lever in the directions to move the cursor to the clip for which a shot mark is to be added. 2 Press the USER button to which the shot mark function has been allocated. (Page 87) To release a shot mark, repeat the preceding steps. ••It is not possible to add shot marks to clips shot using a consumer camcorder model. Selecting the memory card slot for playback You can switch the memory card slot for playback. 1 Press the button when the thumbnail screen is displayed in the mode. 57
-
 1
1 -
2
-
3
-
4
-
5
-
6
-
7
-
8
-
9
-
10
-
11
-
12
-
13
-
14
-
15
-
16
-
17
-
18
-
19
-
20
-
21
-
22
-
23
-
24
-
25
-
26
-
27
-
28
-
29
-
30
-
31
-
32
-
33
-
34
-
35
-
36
-
37
-
38
-
39
-
40
-
41
-
42
-
43
-
44
-
45
-
46
-
47
-
48
-
49
-
50
-
51
-
 52
52 -
 53
53 -
 54
54 -
 55
55 -
 56
56 -
 57
57 -
 58
58 -
 59
59 -
 60
60 -
 61
61 -
 62
62 -
63
-
64
-
65
-
66
-
67
-
68
-
69
-
70
-
71
-
72
-
73
-
74
-
75
-
76
-
77
-
78
-
79
-
80
-
81
-
82
-
83
-
84
-
85
-
86
-
87
-
88
-
89
-
90
-
91
-
92
-
93
-
94
-
95
-
96
-
97
-
98
-
99
-
100
-
101
-
102
-
103
-
104
-
105
-
106
-
107
-
108
-
109
-
110
 |
 |