Panasonic CF-19KDRAGCM Reference Manual - Page 47
To change the display settings, Click [OK].
 |
UPC - 092281895840
View all Panasonic CF-19KDRAGCM manuals
Add to My Manuals
Save this manual to your list of manuals |
Page 47 highlights
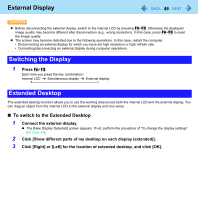
External Display 47 „ To change the display settings 1 Right-click the desktop, and click [Graphics Properties]. 2 Click [Extended Desktop], and select the settings for [Primary Device] and [Secondary Device]. 3 Click [Display Settings] and set the display color and resolution etc. 4 Click [OK]. NOTE z It may not be possible to use the extended desktop with some software applications. z When you click the maximize button, the window is displayed on one of the displays. You cannot move the maximized window to the other display. z You cannot switch the display by pressing Fn+F3. z Do not use the display rotation in the extended desktop. z To switch left (primary device) and right (secondary device), once return the display to "notebook only". Follow the steps below. A Right-click the desktop and click [Graphics Options]. B Click [Output To] - [Notebook]. C Right-click the desktop and click [Graphics Options]. D Click [Output To] - [Extended Desktop], and click [Monitor + Notebook] (the external display will be set to primary device) or [Notebook + Monitor] (the internal LCD will be set to primary device). z To switch to the Extended Desktop, be sure to use the [Intel(R) GMA Driver for Mobile] screen or the [New Display Detected] screen. If you use other methods (e.g. display setting, etc.), the screen may not be displayed correctly. z The pop-up icon displayed by Fn key combination appears only on the primary device. z Set the internal LCD to the primary device when using the touchscreen (only for model with touchscreen) or digitizer (only for model with digitizer). The cursor will move on the primary device when you touch the internal LCD.
-
 1
1 -
2
-
3
-
4
-
5
-
6
-
7
-
8
-
9
-
10
-
11
-
12
-
13
-
14
-
15
-
16
-
17
-
18
-
19
-
20
-
21
-
22
-
23
-
24
-
25
-
26
-
27
-
28
-
29
-
30
-
31
-
32
-
33
-
34
-
35
-
36
-
37
-
38
-
39
-
40
-
41
-
 42
42 -
 43
43 -
 44
44 -
 45
45 -
 46
46 -
 47
47 -
 48
48 -
 49
49 -
 50
50 -
 51
51 -
 52
52 -
53
-
54
-
55
-
56
-
57
-
58
-
59
-
60
-
61
-
62
-
63
-
64
-
65
-
66
-
67
-
68
-
69
-
70
-
71
-
72
-
73
-
74
-
75
-
76
-
77
-
78
-
79
-
80
-
81
-
82
-
83
-
84
-
85
-
86
-
87
-
88
-
89
-
90
-
91
 |
 |
