Panasonic HC-V180K Advanced Operating Manual - Page 88
Dividing a scene to partially delete (MP4/iFrame), Protecting scenes/still pictures
 |
View all Panasonic HC-V180K manuals
Add to My Manuals
Save this manual to your list of manuals |
Page 88 highlights
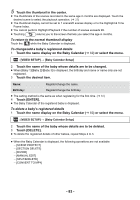
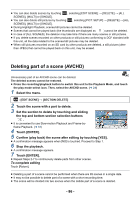
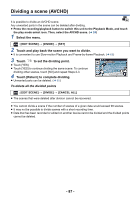
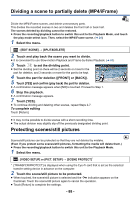
Dividing a scene to partially delete (MP4/iFrame) Divide the MP4/iFrame scenes, and delete unnecessary parts. This divides the recorded scenes in two and deletes the front half or back half. The scenes deleted by dividing cannot be restored. ≥ Press the recording/playback button to switch this unit to the Playback Mode, and touch the play mode select icon. Then, select the MP4/iFrame scene. (l 24) 1 Select the menu. MENU : [EDIT SCENE] # [SPLIT&DELETE] 2 Touch and play back the scene you want to divide. ≥ It is convenient to use Slow-motion Playback and Frame-by-frame Playback. (l 68) 3 Touch to set the dividing point. ≥ Set the dividing point so there will be 2 seconds or more for the 0h01m30s part for deletion, and 3 seconds or more for the part to be kept. 4 Touch the part for deletion ([FRONT] or [BACK]). 5 Touch [YES] and confirm (play back) the part for deletion. ≥ A confirmation message appears when [NO] is touched. Proceed to Step 7. 6 Stop the playback. ≥ A confirmation message appears. 7 Touch [YES]. ≥ To continue dividing and deleting other scenes, repeat Steps 2-7. To complete editing Touch [Return]. ≥ It may not be possible to divide scenes with a short recording time. ≥ The actual division may slightly slip off the previously designated dividing point. Protecting scenes/still pictures Scenes/still pictures can be protected so that they are not deleted by mistake. (Even if you protect some scenes/still pictures, formatting the media will delete them.) ≥ Press the recording/playback button to switch this unit to the Playback Mode. 1 Select the menu. MENU : [VIDEO SETUP] or [PICT. SETUP] # [SCENE PROTECT]* * [TRANSFER/PROTECT] is displayed when using the Eye-Fi card that is set as the selected transfer setting device in advance on the computer. 2 Touch the scene/still picture to be protected. ≥ When touched, the scene/still picture is selected and the indication appears on the thumbnail. Touch the scene/still picture again to cancel the operation. ≥ Touch [Return] to complete the settings. - 88 -
-
 1
1 -
2
-
3
-
4
-
5
-
6
-
7
-
8
-
9
-
10
-
11
-
12
-
13
-
14
-
15
-
16
-
17
-
18
-
19
-
20
-
21
-
22
-
23
-
24
-
25
-
26
-
27
-
28
-
29
-
30
-
31
-
32
-
33
-
34
-
35
-
36
-
37
-
38
-
39
-
40
-
41
-
42
-
43
-
44
-
45
-
46
-
47
-
48
-
49
-
50
-
51
-
52
-
53
-
54
-
55
-
56
-
57
-
58
-
59
-
60
-
61
-
62
-
63
-
64
-
65
-
66
-
67
-
68
-
69
-
70
-
71
-
72
-
73
-
74
-
75
-
76
-
77
-
78
-
79
-
80
-
81
-
82
-
 83
83 -
 84
84 -
 85
85 -
 86
86 -
 87
87 -
 88
88 -
 89
89 -
 90
90 -
 91
91 -
 92
92 -
 93
93 -
94
-
95
-
96
-
97
-
98
-
99
-
100
-
101
-
102
-
103
-
104
-
105
-
106
-
107
-
108
-
109
-
110
-
111
-
112
-
113
-
114
-
115
-
116
-
117
-
118
-
119
-
120
-
121
-
122
-
123
-
124
-
125
-
126
-
127
-
128
-
129
-
130
-
131
-
132
-
133
-
134
-
135
-
136
-
137
-
138
-
139
-
140
 |
 |
