Panasonic KX-THA11 Telephone Equipments - Page 9
PREPARATION, SETTING UP THE HANDSET, BATTERY CHARGE, Connecting the AC adaptor, Battery installation
 |
UPC - 037988476282
View all Panasonic KX-THA11 manuals
Add to My Manuals
Save this manual to your list of manuals |
Page 9 highlights
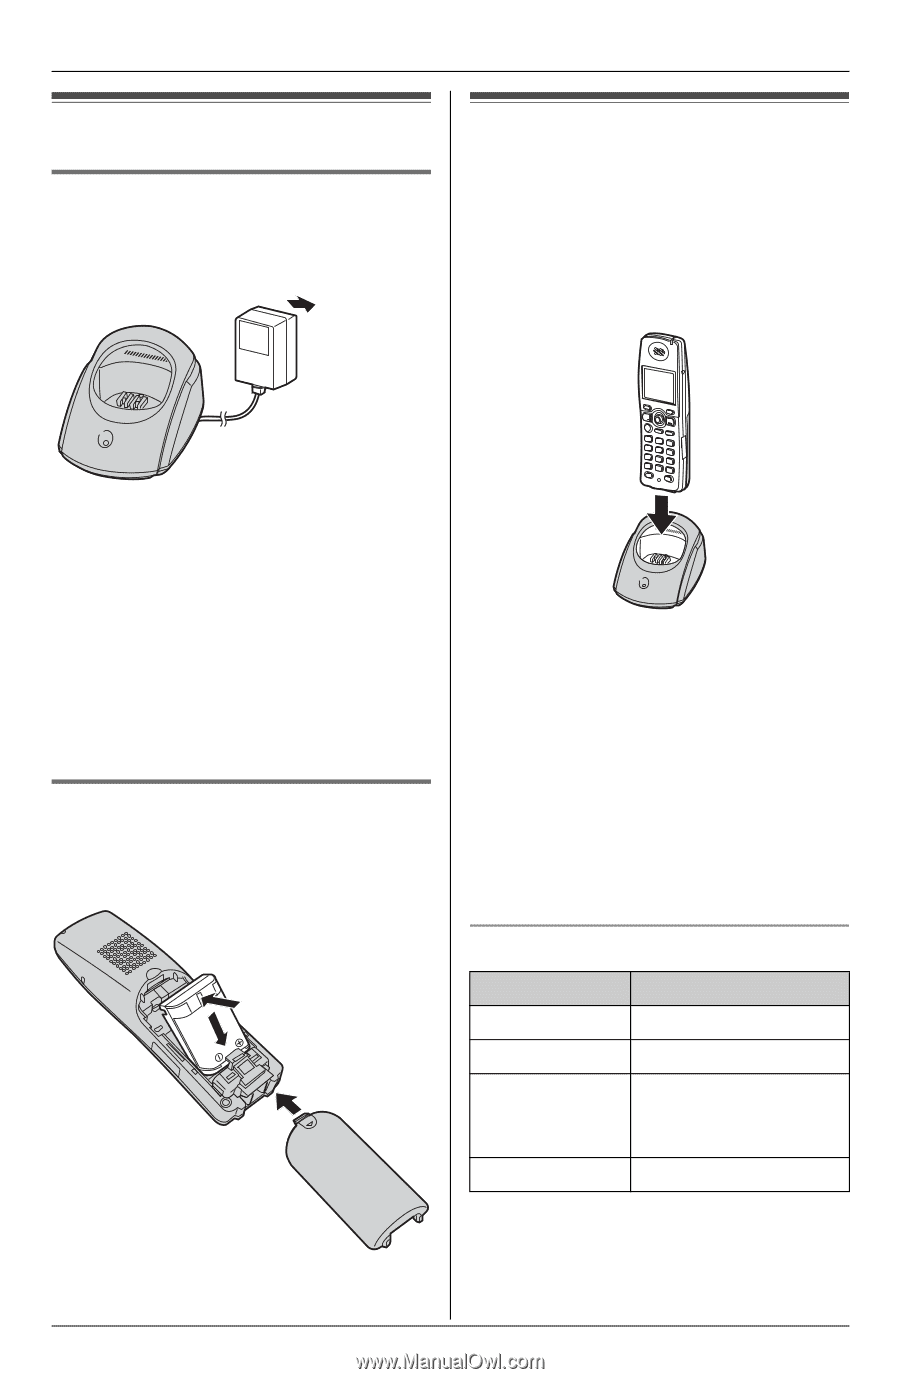
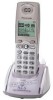
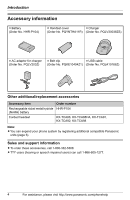
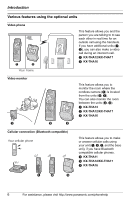
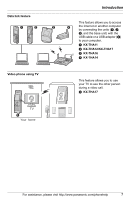
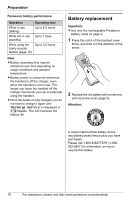
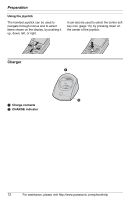
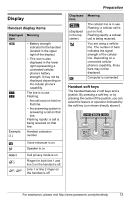
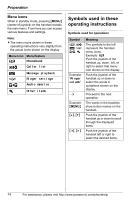
Preparation Setting up the handset Connecting the AC adaptor L Use only the included Panasonic AC adaptor PQLV203. (120 V AC, 60 Hz) Battery charge Place the handset on the charger for 4 hours before initial use. While charging, the CHARGE indicator on the charger lights. When the battery is fully charged, "Charge completed" is displayed. Note: L The AC adaptor must remain connected at all times. (It is normal for the adaptor to feel warm during use.) L The AC adaptor should be connected to a vertically oriented or floor-mounted AC outlet. Do not connect the AC adaptor to a ceiling-mounted AC outlet, as the weight of the adaptor may cause it to become disconnected. Battery installation Insert the battery (A), and press it down until it snaps into the compartment (B). Then close the handset cover. Note: L If you want to use the handset immediately, charge the battery for at least 15 minutes. L To ensure that the battery charges properly, clean the charge contacts of the handset and charger with a soft, dry cloth once a month. Clean more often if the unit is subject to grease, dust, or high humidity. Battery strength B A Battery icon 1 2 3 4 Battery strength Fully charged or high Medium Low Flashing: needs to be recharged. Discharged Note: L When the battery needs to be charged, the handset beeps intermittently while it is in use. For assistance, please visit http://www.panasonic.com/phonehelp 9
-
 1
1 -
2
-
3
-
 4
4 -
 5
5 -
 6
6 -
 7
7 -
 8
8 -
 9
9 -
 10
10 -
 11
11 -
 12
12 -
 13
13 -
 14
14 -
15
-
16
-
17
-
18
-
19
-
20
-
21
-
22
-
23
-
24
-
25
-
26
-
27
-
28
-
29
-
30
-
31
-
32
-
33
-
34
-
35
-
36
-
37
-
38
-
39
-
40
-
41
-
42
-
43
-
44
-
45
-
46
-
47
-
48
-
49
-
50
-
51
-
52
-
53
-
54
-
55
-
56
-
57
-
58
-
59
-
60
-
61
-
62
-
63
-
64
 |
 |