Panasonic KXP1121E Operating Instructions - Page 23
Single Sheets and Envelopes (Friction Mode), Raise the paper support
 |
View all Panasonic KXP1121E manuals
Add to My Manuals
Save this manual to your list of manuals |
Page 23 highlights
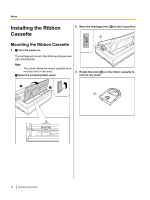
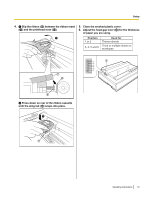
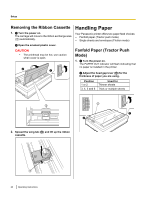
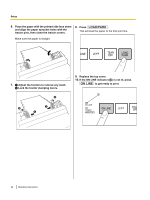
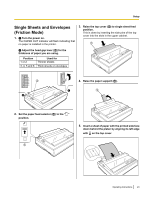
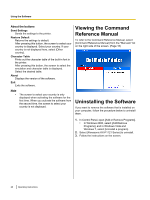
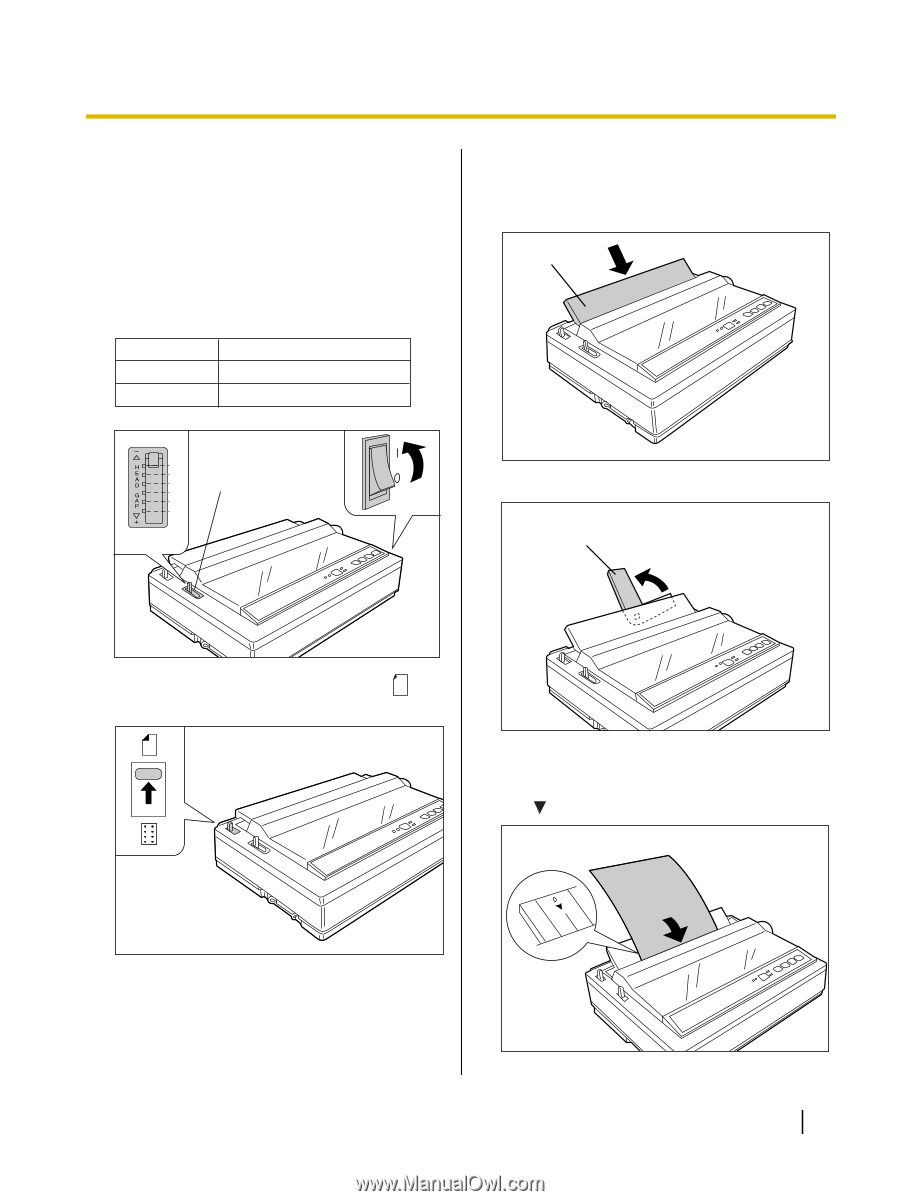
Setup Single Sheets and Envelopes (Friction Mode) 1. A Turn the power on. The PAPER OUT indicator will flash indicating that no paper is installed in the printer. 3. Raise the top cover (A) to single sheet feed position. This is done by inserting the side pins of the top cover into the slots in the upper cabinet. A B Adjust the head gap lever (A) for the thickness of paper you are using. Position 1 or 2 3, 4, 5 and 6 Used for Thinner sheets Thick sheets or envelopes 1 2 3 A 4 5 6 B 4. Raise the paper support (A). A A 2. Set the paper feed selector (A) to the " " position. 5. Insert a sheet of paper with the printed side face down behind the platen by aligning its left edge with 0 on the top cover. A Operating Instructions 23
-
 1
1 -
2
-
3
-
4
-
5
-
6
-
7
-
8
-
9
-
10
-
11
-
12
-
13
-
14
-
15
-
16
-
17
-
 18
18 -
 19
19 -
 20
20 -
 21
21 -
 22
22 -
 23
23 -
 24
24 -
 25
25 -
 26
26 -
 27
27 -
 28
28 -
29
-
30
-
31
-
32
-
33
-
34
-
35
-
36
-
37
-
38
-
39
-
40
-
41
-
42
-
43
 |
 |
Single Sheets and Envelopes
(Friction Mode)
1.
A
Turn the power on.
The PAPER OUT indicator will flash indicating that
no paper is installed in the printer.
B
Adjust the head gap lever (
A
) for the
thickness of paper you are using.
Position
Used for
1 or 2
Thinner sheets
3, 4, 5 and 6
Thick sheets or envelopes
1
2
3
4
5
6
A
B
A
2.
Set the paper feed selector (
A
) to the "
"
position.
A
3.
Raise the top cover (
A
) to single sheet feed
position.
This is done by inserting the side pins of the top
cover into the slots in the upper cabinet.
A
4.
Raise the paper support (
A
).
A
5.
Insert a sheet of paper with the printed side face
down behind the platen by aligning its left edge
with
0
on the top cover.
Operating Instructions
23
Setup