Pfaff 139 Owner's Manual - Page 12
Knopf
 |
View all Pfaff 139 manuals
Add to My Manuals
Save this manual to your list of manuals |
Page 12 highlights
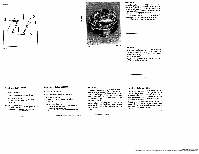
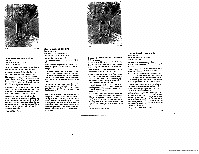
O Nadel In Hochstellung bringen, Nllhtult anhe ben, Niihgut nach hintem herausnehmen urid NShfSden abschnoiden. Gas Knopfloch (zweckmallig mit einom Ploiltren ner) zwischen don Reopen autschneiden. Durch MitfUhren elnes Einlauffadens wird des Knopiloch etwas plastischer gestaltet. O Amener l'slguille var Ia pied, sorlir en position superieure, Ia pièce vera l'ardère et rolecoo per lea Ills S coudre. Ouvrir Ia boutonniere de preference so Découvit. L'inserfion dun SI de passe dane las lSvres per met daugmenter le relief de Ia boutonniere. Knopfloch nähen Schraube B (Fig. 20) läsen, an Grill G Oberstich breile von etwa 1,5 mm oinstellen (' Raupen breite) und Schraube B wiederfestdrehen. Such lagenhebel H in Stellungt bringan, An Stichsleller mutter S (Fig. 15> Stichlänge VOfl Ca. 0,5mm (= 1 Teitstrich) einstellen. Knoptlochlänge out Nahgul markieren und Knopfloch nach folgendem Schema ntihen (FIg. 21>: o Nähen der ersten Knoptlochraupe his an Mar kianing und Nadel rechts der Raupe im Stoff stecken lassen. O Nähfull anhebon, urn drehen unct NShgut urn Full wieder 180° rochtsher senken. Einon NShstich nach links euslühren. o Grill G out 4 mm statIon, 4 - 6 Riegolaliche aShen; den Sued dabei etwsS einhalton, damit der Riegel nicht zu lang wird. O Grill G wlederaut 1,5mm stellon und die zweite Ftaupe nShen bis co. 1 mm vor Schlull. O Grill G erneut aut 4 mm stellen und SchiuB riegel nahen his beide Raupen (ibordeckt sind. Stolf dabei wieder etwas einhalten. o Grill G und Stichstollermutter Saul "0" statIon und 3 - 4 Heflsliche nhhen. Sewing buttonholes Loosen screw B (Fig. 20), turn knob G to a stitch (or buttonhole seam) width of abt. 1.5 mm, and tighten screw 8. Move needle position lever H to position I. Turn teed regulator thumb nut S (Fig. 15> to a stitch length of abt. 0.5mm ("' 1 gradua tion mark). Mark the length of the buttonhole on the fabric and sew the buttonhole as follows (Fig. 21): o Sew the first buttonhole seam up to the mark, leaving the needle in the fabric on the right side of its throw. o Raise the presser foot, turn the fabric dodewise through 180° end lower the presser fool again. Let the needle take one stitch to the left. O Turn knob Gto 4mm, and sow4to6bsrtacking stitches, slightly closing together the button hole end to reduce the length of the bartack. o Again turn knob Gto 1.5mm and sew the second buttonhole seam, stopping sbt. 1 mm from its end. o Turn knob G 104mm again and sew the second bartsck, closing together the tabric so that both sesm ends are properly covered. o Turn both knob G and thumb nutS to "0' and make 3 to 4 tying stitches. 0 Raise needle and sewing foot, remove the work by pulling it toward the rear, and trim the threads. Cut the buttonhole open between the seams (pre ferably using a seam ripper for that purpose), If you preter a more prominent buttonhole, insert a tiller thread in the buttonhole seam. fl.21 Couture de boutonnières Dessorrer Ia via B (fig. 20), régler one jetée d'ai guille do 1,5 mm any. au moyen do bouton G (=' targour do lèvres) at resserrer Ia via B. Placer Is levier H du deport de laigoilla en position I. A l'écrou regIs-point S (fig. 15), regler on point de 0,5 mm any. do tong (= 1 crsn de graduation>. Marquer Is longusur de boutonniere sur Ia pièce at coudre celle-ci comma suit (fig. 21): a Coudre Ia premiere lèvre jusqu'au repère et laissor l'aiguille en jetèe droite dana l'Ctotfe. 9 Lever le pied presseur, toumer Ia pièce de 180° vera Ia droite et abaisser S nouveau Ia pied. Faire un point vera Is gauche. 9 Régler d'arrét le boulon G en relenant sur 4 at coudre 456 points quetque p00 Is pièce pour qua l'arrèt ne devienne pas trop long. o Ramener Ia boston G sur 1,5 mm at coudre Ia seconds lèvre jusqu'ã 1,5mm environ du bord avant dela boutonniere. o Placer a nouveau le boulon G sur 4 at coudre l'arrèt avant jusqu'S ce que les daux lèvres soient recouvertus. Ce taisant, retenir S nou veau modérément tétoffe. o Regler le boston G et lécrou S sur .'O" et coudre 3 ou 4 points de nonage. Costura do ojales Al loje at tornillo B (fig. 20), ajuste en al botân Gun ancho de zigzag do 1,5mm (= ancho del lablo del ojal) y apriete cia nuevo ol lornillo B. Ponga laps Ian pars posiciân do puntada H aol. Girando Ia tuerca S (fig. 15). ajuste on fargo do puntsda do 0,5mm aprox. (= 1 rays divisonia). Marque Ia lar gura del ojal en Ia lola y hsga el ojal dais siguiento forma (fig. 21): o Cosa el primer ohio det ojal hasta Ia marco y deja Ia aguja ala cteracha clavada en Ia lola. O Levanto el prensatelas, gire a tela Is derecha y baje el prensatolss. 180° hacla Haga una puntada hacie Is izquierda. o Coloque el botSn G en4mm, y haga do 4a6 pontadas de presitla retenienclo un poco Ia piozs do costura pars qua Ia presilta no resulte demasiado larga. o Vuelva a poner et botOn G en 1.5 mm y ol segundo labio del ojal hasta Ilegar a I mm sprox. del final. O Vuelva presltla a poner el botön G on 4 final hasta quo ambos mm y labios cosa Is del o)aI quedon recubiertos. Tamblén aqul habrS quo raloner on poco Ia plaza do costura. o Pongs el botSn G y Ia tuerca Spare ol lsrgo rIo punlads en "0" y haga do 3 a 4 puntadas do remote. o Elove Ia aguja y el prensatelss, retire Is plaza do costura hacia atrSs y corte los bibs. Abra el ojal con el cortador do ojalas. Insertando on hito do alma, adquiere el ojal mSs relieve y plasticidad. 23
-
 1
1 -
2
-
3
-
4
-
5
-
6
-
 7
7 -
 8
8 -
 9
9 -
 10
10 -
 11
11 -
 12
12 -
 13
13 -
 14
14 -
 15
15 -
 16
16 -
 17
17 -
18
-
19
-
20
-
21
 |
 |
