Pfaff 139 Owner's Manual - Page 13
Sewing, eyelet-end, buttonholes, Couture, boutonnlères, ceillet, passe, Costura, ojales, sastre,
 |
View all Pfaff 139 manuals
Add to My Manuals
Save this manual to your list of manuals |
Page 13 highlights
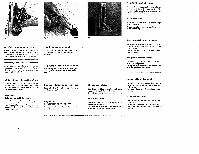
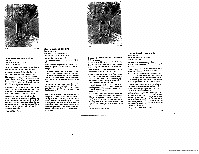
Augen- oder Gimpenknopfloch nähen (FoB Best,-Nr. 91-041 420-05, Lineal 91-041 427-91) Ntitrfuit durda Knopflochfult mit Glmpenfuhrung ersetzen und Lineal anschrauben (Fig. 22). Vorm Hochstelten der Stoffdriickerstange Lineal irnmer durch Rochtsdreher, ausschwenken, Oberfadenspannung stark und Unterfadenspan flung schwach einstelten. lJberstlchbreite auf 2 - 3 mm steilen und Stichlitnge möglichst klein wählen. FOhrungslineal so einstellen, dalI die Nadel die Ftihrungshilfe nicht streift. Gimpenfaden Ca. 5cm durch die Bohrung rn Full ziehen und nach hinten tegen. Knopfloch aus schneiden unit das Arbeitastück mit dam Knopt lochauge zur Nitheriri, unter den Full logeri. Am Ende der Umrrithung NithiuB anheben urid Arbeitsstück etwas nach hintan ziehen. Ftiden auf 4 cm abschneiden, nach union durch des Knopf loch zieheri unit zusammendrehen. Uberstich auf Ca. 4mm staten und Fitden Uberstechen. Arbaita attick urn 90° drehen unit Faden mit Ca. 1,5 mm Oberatich verriegein. FBden dictfl am Riegel absclineiden. Sewing eyelet-end or gimp buttonholes (Part Nos, of foot 91-041 420-05, and of edge guide: 91 -041 427-91) Replace the presser toot by the buttonhole foot with gimp guide and screw on the edge guide (Fig. 22). Before your raise the presser bar, make sure you swing the edge guide out of action by turning it to the right. Increase the needle thread tenalon and reduce the bobbin thread tension. Set the stitch width at 2-3 mm, and regulate the stitch length so that the stitches are packed closely together. Adjust the edge guide so that the needle will not hit the guide sleeve. Pull ebt. 5 cm of gimp thread through the hole in the fool and lay it toward the back, Cut Out the buttonhole and place the fabric under the foot so that the eyelet-end of the buttonhole faces toward you. Aftersowing, raise the buttonhole foot and pull the workplace backwards a little. Trim the threads, leaving ends abt. 4 cm long. Pull the threads through the buttonhole to the wrong side and twist them together. Turn the stitch width control to 4 end stitch the thread ends down. Turn the workpiece through 90° and bartack the threads with stitches 1.5mm wide. Cut the threads off close to the bartack. Couture de boutonnlères a ceillet ou a til de passe (Pied n° 91-041 420-05, guide n° 91-041 427-91) Remplacar to pied normal par Ia pied it bouton niitres avec guide-cords etvisserle guide (fig. 22). Avant de relever Ia barTe presse-tissu, toujours escamoter Is guide per rotation it droite. Rentorcer a tension supitrieure at ritduire Is ten sion inférleure. Régier Ia jetho daiguille sur 2 ou 3mm at choisir une tongueur do point ausi petite quo possible. Ritgier Ia guide prair qua raiguilie n'en frBio pea Ia come do guidage. 'firer Is fit do passe do 5 cm environ par ie trou clans le pied at le coucher en arriitre, Ditcouper Ia boutonniere et piecer Ia pièce sons te pied, fcailiet toumit vera is mitcanicienne. Contoumer Ia boutonniere, relever le pied at firer Is pièce queique peu en arrière, Couper lee fits sur 4 cm, ies faire passer it lenvers, par is bouton nièra, at las nouer. Régier Is jetéa d'aiguiile cur 4 at surpiguor los fits. Toumer ia pièce do 90° et brider las Ills par une jetée daiguilie do 1,5 mm environ. Couper los fits au ras de lerrét. Costura de ojales sastre y de cordoncillo (Pie, N° do pedido 91-041 420-05; guts 91-041 427-91) Sustituya el pie prensatetas normal porei pie pare ojales con guia para cOrdoncitlo y aiomille Ia gula (11g. 22). Antea do eievar Ia barra del prensetelas, retire siempre Ia giiia giritrrdola hacia Ia derecha. Ajuste Ia tension del hilo superior mits fuorte do to normal y Ia del hilo inferior mita fioja. Ponge et ancho do zigzag de 2 a 3mm y ehia una iongitud de puntada muy pequeha. Ajuste Ia guta do forms quo is aguja no roce at casquillo do diche gula. inIroduzca at cordoncillo unos 5cm porel egujero del piay itchaio hacia atrits. Crate el ojai ycoloque Ia piezsde costuredebajo del pie, do forms quo at 010 dat ojat señaie hecia Ia operarle. Al final dots costura eteve at pie para ojales y tire do Ia pieze un poco hacia atlas. Corto los hilos, dejando un cabo de unos 4 cm, y tire do ellos tiscia abajo por al ojal. Prasilie los hiios con un sneho do zigzag de 4mm apr05. Gire Ia plaza do costura 90° y remato os hilos con un ancho do zigzag do 1,5 mm. sprox. Corte ioa hiios a rae do is prosilla. 25
-
 1
1 -
2
-
3
-
4
-
5
-
6
-
7
-
 8
8 -
 9
9 -
 10
10 -
 11
11 -
 12
12 -
 13
13 -
 14
14 -
 15
15 -
 16
16 -
 17
17 -
 18
18 -
19
-
20
-
21
 |
 |
