Pfaff creative 2170 Owner's Manual - Page 111
Embroidery hoop, Remove the hoop, Remove the embroidery unit
 |
View all Pfaff creative 2170 manuals
Add to My Manuals
Save this manual to your list of manuals |
Page 111 highlights
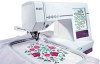
Embroidery D C E G Embroidery hoop There are three embroidery hoops supplied with your Pfaff creative 2170. One rectangular hoop with the embroidery surface (C) 225 x 140 F mm, a round hoop for embroideries up to 120 x 115 mm and a square hoop 80x80 with a hoop adapter. C: Snap-in pin D: Guide pins for retaining the hoop. E: Embroidery surface F: Retaining screw for the fabric Attach the hoop to the embroidery unit Slide the hoop underneath the presser foot by raising the presser foot lift as far as possible. The retaining screw (F) of the hoop must be facing you and the guide pins (D) must be pointing to the right. Slide the hoop with the guide pins (D) into the metal guide until the snap in pin (C) engages behind the release lever (G) of the embroidery unit. Remove the hoop To remove the hoop, push down the release lever (G) of the embroidery unit and pull the hoop towards you and away. Remove the embroidery unit Switch off the main switch. Raise the embroidery arm in the area of the recessed grip and turn it to the left, until it locks in the storage position. Note: Before the embroidery arm is turned, make sure that the hoop holder doesn't protrude from the front arm edge. If it does, go to the Context menu, touch Move hoop icon and the Park position icon. H Press the release button (H) on the left side of the embroidery unit and remove it. 5:13
-
 1
1 -
2
-
3
-
4
-
5
-
6
-
7
-
8
-
9
-
10
-
11
-
12
-
13
-
14
-
15
-
16
-
17
-
18
-
19
-
20
-
21
-
22
-
23
-
24
-
25
-
26
-
27
-
28
-
29
-
30
-
31
-
32
-
33
-
34
-
35
-
36
-
37
-
38
-
39
-
40
-
41
-
42
-
43
-
44
-
45
-
46
-
47
-
48
-
49
-
50
-
51
-
52
-
53
-
54
-
55
-
56
-
57
-
58
-
59
-
60
-
61
-
62
-
63
-
64
-
65
-
66
-
67
-
68
-
69
-
70
-
71
-
72
-
73
-
74
-
75
-
76
-
77
-
78
-
79
-
80
-
81
-
82
-
83
-
84
-
85
-
86
-
87
-
88
-
89
-
90
-
91
-
92
-
93
-
94
-
95
-
96
-
97
-
98
-
99
-
100
-
101
-
102
-
103
-
104
-
105
-
 106
106 -
 107
107 -
 108
108 -
 109
109 -
 110
110 -
 111
111 -
 112
112 -
 113
113 -
 114
114 -
 115
115 -
 116
116 -
117
-
118
-
119
-
120
-
121
-
122
-
123
-
124
-
125
-
126
-
127
-
128
-
129
-
130
-
131
-
132
-
133
-
134
-
135
-
136
-
137
-
138
-
139
-
140
-
141
-
142
-
143
-
144
-
145
-
146
-
147
-
148
-
149
-
150
-
151
-
152
-
153
-
154
-
155
-
156
-
157
-
158
-
159
-
160
-
161
-
162
-
163
-
164
-
165
-
166
-
167
-
168
-
169
-
170
-
171
-
172
-
173
-
174
-
175
-
176
-
177
-
178
-
179
-
180
 |
 |
