Pfaff creative 2170 Owner's Manual - Page 122
Working steps
 |
View all Pfaff creative 2170 manuals
Add to My Manuals
Save this manual to your list of manuals |
Page 122 highlights
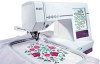
Embroidery Working steps In the example below we want to connect two designs to each other (see picture). This is a design that is included in your creative 2170. 1. While the machine is turned off, attach the embroidery unit and the embroidery foot. 2. Turn on your machine and go to the Main menu. Touch the Embroidery icon. 3. Hoop your 225x140 hoop and attach it to the embroidery unit. Choose your first design by touching the Mini Main menu icon. Touch Card/Machine icon and choose Machine. Go to the PALETTE folder and then choose the MEDIUM folder. In the MEDIUM folder choose design number M04. Touch OK to bring the design into the embroidery area. 4. Touch the Move icon (A) and a pop-up appears. 5. Calibrate the hoop by pressing the reverse button on your machine. 6. Place your first design where you want and embroider. 7. Move your fabric to the next desired position and rehoop. Part of the just embroidered design must be within the embroidery field. 8. Touch the reverse button to calibrate the hoop. 9. Touch the More options icon (B), and then touch the Precise position icon (C). A new window appears and the Cross-hair icon (G) is activated. A B C 10. Place the cross-hair where you want the connecting point to be in your embroidery. Move the cross-hair by using your stylus to move D it around on your screen. Use the Zoom in icon (F) to be able to make an exact connecting point. Use the arrows (D) for fine tuning. E 11. Lock the connecting point by touching the Padlock icon (E). 12. Zoom out so you can see the entire embroidery area. F G 5:24
-
 1
1 -
2
-
3
-
4
-
5
-
6
-
7
-
8
-
9
-
10
-
11
-
12
-
13
-
14
-
15
-
16
-
17
-
18
-
19
-
20
-
21
-
22
-
23
-
24
-
25
-
26
-
27
-
28
-
29
-
30
-
31
-
32
-
33
-
34
-
35
-
36
-
37
-
38
-
39
-
40
-
41
-
42
-
43
-
44
-
45
-
46
-
47
-
48
-
49
-
50
-
51
-
52
-
53
-
54
-
55
-
56
-
57
-
58
-
59
-
60
-
61
-
62
-
63
-
64
-
65
-
66
-
67
-
68
-
69
-
70
-
71
-
72
-
73
-
74
-
75
-
76
-
77
-
78
-
79
-
80
-
81
-
82
-
83
-
84
-
85
-
86
-
87
-
88
-
89
-
90
-
91
-
92
-
93
-
94
-
95
-
96
-
97
-
98
-
99
-
100
-
101
-
102
-
103
-
104
-
105
-
106
-
107
-
108
-
109
-
110
-
111
-
112
-
113
-
114
-
115
-
116
-
 117
117 -
 118
118 -
 119
119 -
 120
120 -
 121
121 -
 122
122 -
 123
123 -
 124
124 -
 125
125 -
 126
126 -
 127
127 -
128
-
129
-
130
-
131
-
132
-
133
-
134
-
135
-
136
-
137
-
138
-
139
-
140
-
141
-
142
-
143
-
144
-
145
-
146
-
147
-
148
-
149
-
150
-
151
-
152
-
153
-
154
-
155
-
156
-
157
-
158
-
159
-
160
-
161
-
162
-
163
-
164
-
165
-
166
-
167
-
168
-
169
-
170
-
171
-
172
-
173
-
174
-
175
-
176
-
177
-
178
-
179
-
180
 |
 |
