Pfaff creative 2170 Owner's Manual - Page 140
How to use the, embroidery, template, Putting the embroidery in the, right place
 |
View all Pfaff creative 2170 manuals
Add to My Manuals
Save this manual to your list of manuals |
Page 140 highlights
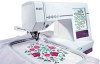
Embroidery How to use the embroidery template An embroidery template comes with your 2170 which helps you to draw marking lines, to make it easier to position designs on the fabric. When you use the template you must ensure that the text Pfaff can be read at the top right, and the two grip depressions are situated on the left. The template has a scale in mm and inches at the sides. The embroidery field is shown with slits. Putting the embroidery in the right place Before hooping the fabric, select the embroidery design and the correct hoop. Place the template in the hoop. Slide the hoop onto the embroidery arm. Touch the More options icon and the Precise positioning icon. Touch the Corner indicator and mark the corners of the embroidery with an erasable pencil. Take your template and position the template on the project or garment to be embroidered. When the template is positioned, mark the hooping placement lines on the project with a fabric marking pen. Then when hooping the fabric, match the marked line with the guide marks on the hoop. How to sew several embroideries after one another 1. If you want to sew several embroideries after one another, your Pfaff template will be a great help. Sew out your first embroidery design and remove the hoop from the embroidery unit. Put the template into the hoop and draw the outlines of the design. 5:42
-
 1
1 -
2
-
3
-
4
-
5
-
6
-
7
-
8
-
9
-
10
-
11
-
12
-
13
-
14
-
15
-
16
-
17
-
18
-
19
-
20
-
21
-
22
-
23
-
24
-
25
-
26
-
27
-
28
-
29
-
30
-
31
-
32
-
33
-
34
-
35
-
36
-
37
-
38
-
39
-
40
-
41
-
42
-
43
-
44
-
45
-
46
-
47
-
48
-
49
-
50
-
51
-
52
-
53
-
54
-
55
-
56
-
57
-
58
-
59
-
60
-
61
-
62
-
63
-
64
-
65
-
66
-
67
-
68
-
69
-
70
-
71
-
72
-
73
-
74
-
75
-
76
-
77
-
78
-
79
-
80
-
81
-
82
-
83
-
84
-
85
-
86
-
87
-
88
-
89
-
90
-
91
-
92
-
93
-
94
-
95
-
96
-
97
-
98
-
99
-
100
-
101
-
102
-
103
-
104
-
105
-
106
-
107
-
108
-
109
-
110
-
111
-
112
-
113
-
114
-
115
-
116
-
117
-
118
-
119
-
120
-
121
-
122
-
123
-
124
-
125
-
126
-
127
-
128
-
129
-
130
-
131
-
132
-
133
-
134
-
 135
135 -
 136
136 -
 137
137 -
 138
138 -
 139
139 -
 140
140 -
 141
141 -
 142
142 -
 143
143 -
 144
144 -
 145
145 -
146
-
147
-
148
-
149
-
150
-
151
-
152
-
153
-
154
-
155
-
156
-
157
-
158
-
159
-
160
-
161
-
162
-
163
-
164
-
165
-
166
-
167
-
168
-
169
-
170
-
171
-
172
-
173
-
174
-
175
-
176
-
177
-
178
-
179
-
180
 |
 |
