Pfaff creative 2170 Owner's Manual - Page 112
Get started to embroider
 |
View all Pfaff creative 2170 manuals
Add to My Manuals
Save this manual to your list of manuals |
Page 112 highlights
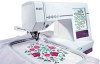
Get started to embroider 1. Attach the embroidery foot and thread the machine. 2. Attach the embroidery unit and lift the presser foot. Turn on your machine. 3. Touch the Main menu icon and touch the Embroidery icon. 4. Insert your 300 creative card. 5. Touch the Mini Main menu (A) and touch Card/Machine icon. A pop-up window will then appear so that you can choose if you want a design that is on a card or in the machine. 6. Choose the card and select one of the designs that appears by touching the picture of it. Touch OK to confirm. The design now appears on the screen in the hoop. 7. Attach the hoop with the hooped fabric to the embroidery unit. If the hoop on the window does not match the hoop you have inserted, your machine will not embroider. Touch the More options icon (B) and the Hoop selection icon (C) to change the hoop. 5. Thread your machine with color no. 1. (Check your embroidery booklet for more info on the colors). 6. Press the Reverse sewing button for a few seconds to start your embroidery. The machine will now start to calibrate the hoop to make sure that the correct hoop is inserted. Press the reverse button again and the machine will begin to sew (or press your foot control). After a few stitches the machine will stop in order for you D to cut the thread tail. The cut symbol will flash on your window. Cut the thread tails and press the reverse button to continue embroidering. 7. When the machine has sewn the first color it will stop and the machine will tell you to insert color no. 2. Change the top thread to no. 2 and continue to embroider. Repeat this for all the colors. 8. When you have finished the last color the machine will return to the beginning of the design. A message will appear and ask if you want to place the hoop in the Park position. Touch OK and the hoop will move to the Park position. Touch ESC to leave the design on the screen. 9. Remove the hoop from the embroidery unit and cut the thread ends. Note: Go to you Context menu (D) and touch the Move hoop icon. Touch the Park position icon and turn off the machine. Put the embroidery arm in the packing position and remove the embroidery unit. A B C Embroidery 5:14
-
 1
1 -
2
-
3
-
4
-
5
-
6
-
7
-
8
-
9
-
10
-
11
-
12
-
13
-
14
-
15
-
16
-
17
-
18
-
19
-
20
-
21
-
22
-
23
-
24
-
25
-
26
-
27
-
28
-
29
-
30
-
31
-
32
-
33
-
34
-
35
-
36
-
37
-
38
-
39
-
40
-
41
-
42
-
43
-
44
-
45
-
46
-
47
-
48
-
49
-
50
-
51
-
52
-
53
-
54
-
55
-
56
-
57
-
58
-
59
-
60
-
61
-
62
-
63
-
64
-
65
-
66
-
67
-
68
-
69
-
70
-
71
-
72
-
73
-
74
-
75
-
76
-
77
-
78
-
79
-
80
-
81
-
82
-
83
-
84
-
85
-
86
-
87
-
88
-
89
-
90
-
91
-
92
-
93
-
94
-
95
-
96
-
97
-
98
-
99
-
100
-
101
-
102
-
103
-
104
-
105
-
106
-
 107
107 -
 108
108 -
 109
109 -
 110
110 -
 111
111 -
 112
112 -
 113
113 -
 114
114 -
 115
115 -
 116
116 -
 117
117 -
118
-
119
-
120
-
121
-
122
-
123
-
124
-
125
-
126
-
127
-
128
-
129
-
130
-
131
-
132
-
133
-
134
-
135
-
136
-
137
-
138
-
139
-
140
-
141
-
142
-
143
-
144
-
145
-
146
-
147
-
148
-
149
-
150
-
151
-
152
-
153
-
154
-
155
-
156
-
157
-
158
-
159
-
160
-
161
-
162
-
163
-
164
-
165
-
166
-
167
-
168
-
169
-
170
-
171
-
172
-
173
-
174
-
175
-
176
-
177
-
178
-
179
-
180
 |
 |
