Pfaff creative vision 5.0 Technique Book - Page 87
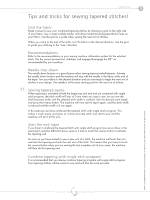
Tips and tricks for sewing tapered stitches
 |
View all Pfaff creative vision 5.0 manuals
Add to My Manuals
Save this manual to your list of manuals |
Page 87 highlights
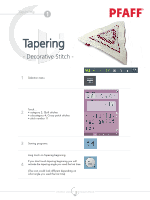
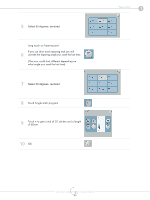
Tapering 1 Tips and tricks for sewing tapered stitches! Grid the fabric Make it easier to sew your combined tapering stitches by drawing a grid on the right side of your fabric. Use a water soluble marker and draw horizontal and perpendicular lines on your fabric. Use the grid as a guide when sewing the next unit of stitches. When you come to the end of the stitch, turn the fabric in the desired direction. Use the grid to guide your stitching in the "new" direction. Recommendations Refer to the recommendations in your sewing machine information system for the selected stitch. Use the correct presser foot, stabilizer and engage/disengage the IDT™ as recommended by your machine. Needle stop down The needle down function is a great feature when sewing tapered embellishments. Activate the needle down function and the machine will stop with the needle in the fabric at the end of the taper. Turn your fabric to the desired direction and you are ready to begin the next unit of stitches in your design. The needle is at the exact starting point for the next unit of stitches. 11 Sewing tapered seams When tapering is activated at both the beginning and end and not combined with single stitch program, the stitch width will start at 0 mm when you start to sew. As you sew the stitch becomes wider until the selected stitch width is reached. Sew the desired seam length and press the reverse button. The machine will now start to taper again, and the stitch width is reduced until the width is 0 mm again. In this exercise we have combined the tapered stitch with single stitch program. This makes it much easier and gives us a more accurate stitch. Just start to sew and the machine will do it all for you. Start the end taper If you haven't combined the tapered stitch with single stitch program (as we've done in this exercise) it could be difficult to know when is it time to touch the reverse button to activate the tapering end. As soon as you have started to sew a new unit of a stitch, the machine will finish that unit and start the tapering end with the next unit of the stitch. This means that you have to touch the reverse button when you are sewing the last complete unit of your seam, the machine will then do the tapering end. Combine tapering with single sitch program! It is recommended that you always combine tapering program with single stitch program. Your tapering stitches will be easier to sew and will also be more accurate. PFAFF® and CREATIVE VISION™ are exclusive trademarks of VSM Group AB. ©2009 VSM Group AB. All rights reserved. creative vision™ Techniques Book 87
-
 1
1 -
2
-
3
-
4
-
5
-
6
-
7
-
8
-
9
-
10
-
11
-
12
-
13
-
14
-
15
-
16
-
17
-
18
-
19
-
20
-
21
-
22
-
23
-
24
-
25
-
26
-
27
-
28
-
29
-
30
-
31
-
32
-
33
-
34
-
35
-
36
-
37
-
38
-
39
-
40
-
41
-
42
-
43
-
44
-
45
-
46
-
47
-
48
-
49
-
50
-
51
-
52
-
53
-
54
-
55
-
56
-
57
-
58
-
59
-
60
-
61
-
62
-
63
-
64
-
65
-
66
-
67
-
68
-
69
-
70
-
71
-
72
-
73
-
74
-
75
-
76
-
77
-
78
-
79
-
80
-
81
-
 82
82 -
 83
83 -
 84
84 -
 85
85 -
 86
86 -
 87
87 -
 88
88 -
 89
89 -
 90
90 -
 91
91 -
 92
92 -
93
-
94
-
95
-
96
-
97
-
98
-
99
-
100
-
101
-
102
-
103
-
104
-
105
-
106
-
107
-
108
-
109
-
110
-
111
-
112
-
113
-
114
-
115
-
116
-
117
-
118
-
119
-
120
-
121
-
122
-
123
-
124
-
125
-
126
-
127
-
128
-
129
-
130
-
131
-
132
-
133
-
134
-
135
-
136
-
137
-
138
-
139
-
140
-
141
-
142
-
143
-
144
-
145
-
146
-
147
-
148
-
149
-
150
-
151
-
152
-
153
-
154
-
155
-
156
-
157
-
158
-
159
-
160
-
161
-
162
-
163
-
164
-
165
-
166
-
167
-
168
-
169
-
170
-
171
-
172
-
173
-
174
-
175
-
176
-
177
-
178
-
179
 |
 |