Pfaff creative vision 5.0 Technique Book - Page 91
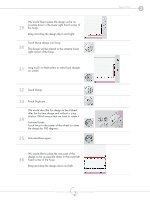
Activate Move again.
 |
View all Pfaff creative vision 5.0 manuals
Add to My Manuals
Save this manual to your list of manuals |
Page 91 highlights
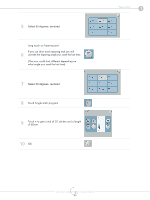
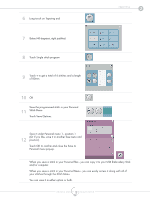
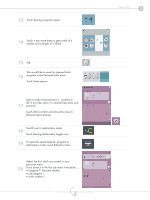
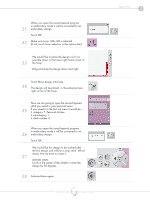
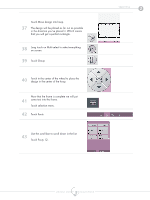
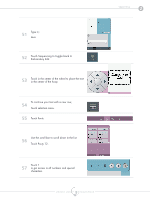
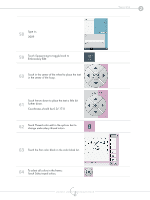
When you open the saved tapered program in embroidery mode it will be converted to an 21 embroidery design. Touch OK. 22 Make sure hoop 120x120 is selected. (If not; touch hoop selection in the options bar) We would like to place the design as far as possible down in the lower right hand corner of 23 the hoop. Drag and drop the design down and right. Touch Move design into hoop. 24 The design will be placed in the extreme lower right corner of the hoop. Now we are going to open the second tapered stitch you saved in your personal menu. 25 If you saved it in the first sub menu it would be.... • category 7; Personal stitches • subcategory 1 • stitch number 2 When you open the saved tapered program in embroidery mode it will be converted to an 26 embroidery design. Touch OK. 27 We would like this design to be stitched after the first design and without a jump stitch. Which means that we have to rotate it. Activate rotate. Touch in the center of the wheel to rotate the design by 90 degrees. 28 Activate Move again. creative vision™ Techniques Book 91 Tapering 2
-
 1
1 -
2
-
3
-
4
-
5
-
6
-
7
-
8
-
9
-
10
-
11
-
12
-
13
-
14
-
15
-
16
-
17
-
18
-
19
-
20
-
21
-
22
-
23
-
24
-
25
-
26
-
27
-
28
-
29
-
30
-
31
-
32
-
33
-
34
-
35
-
36
-
37
-
38
-
39
-
40
-
41
-
42
-
43
-
44
-
45
-
46
-
47
-
48
-
49
-
50
-
51
-
52
-
53
-
54
-
55
-
56
-
57
-
58
-
59
-
60
-
61
-
62
-
63
-
64
-
65
-
66
-
67
-
68
-
69
-
70
-
71
-
72
-
73
-
74
-
75
-
76
-
77
-
78
-
79
-
80
-
81
-
82
-
83
-
84
-
85
-
 86
86 -
 87
87 -
 88
88 -
 89
89 -
 90
90 -
 91
91 -
 92
92 -
 93
93 -
 94
94 -
 95
95 -
 96
96 -
97
-
98
-
99
-
100
-
101
-
102
-
103
-
104
-
105
-
106
-
107
-
108
-
109
-
110
-
111
-
112
-
113
-
114
-
115
-
116
-
117
-
118
-
119
-
120
-
121
-
122
-
123
-
124
-
125
-
126
-
127
-
128
-
129
-
130
-
131
-
132
-
133
-
134
-
135
-
136
-
137
-
138
-
139
-
140
-
141
-
142
-
143
-
144
-
145
-
146
-
147
-
148
-
149
-
150
-
151
-
152
-
153
-
154
-
155
-
156
-
157
-
158
-
159
-
160
-
161
-
162
-
163
-
164
-
165
-
166
-
167
-
168
-
169
-
170
-
171
-
172
-
173
-
174
-
175
-
176
-
177
-
178
-
179
 |
 |
