Pioneer DEH-P8400BH Owner's Manual - Page 16
Other functions, Operating this unit - owners manual
 |
View all Pioneer DEH-P8400BH manuals
Add to My Manuals
Save this manual to your list of manuals |
Page 16 highlights
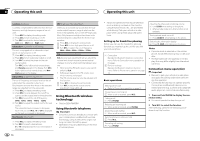
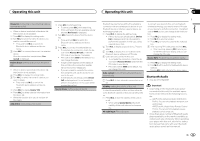
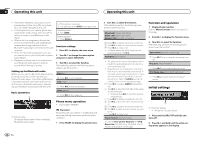
Section 02 Operating this unit Operating this unit ! This function is not available for DEH-P8400BH. To connect your cellular phone to this unit via Bluetooth wireless technology, you need to enter a PIN code on your phone to verify the connection. The default code is 0000, but you can change it with this function. With some Bluetooth audio players, you may be required to enter the Bluetooth audio player PIN code in advance to set this unit for a connection. ! You can only operate this function when Bluetooth adapter (e.g. CD-BTB200) is connected to this unit. 1 Turn M.C. to select a number. 2 Press M.C. to move the cursor to the previous or next position. 3 After entering the PIN code (up to eight digits), press and hold down M.C. The PIN code can be stored in the memory. ! Pressing M.C. again on the same display returns you to the PIN code input display to allow you to change the PIN code. BT Version info. (Bluetooth version display) ! This function is available on the DEH-P7400HD only when a Bluetooth adapter (e.g. CD-BTB200) is connected to the device. You can display the system versions of this unit and of Bluetooth module. 1 Press M.C. to display the information. ! Turning M.C. or LEVER cycles between the system version of this unit and that of the Bluetooth module. S/W UPDATE (updating the software) ! This function is not available for DEH-P7400HD. This function is used to update this unit with the latest software. For information on the software and updating, refer to our website. ! Never turn the unit off while the software is being updated. 1 Press M.C. to display the data transfer mode. Follow the on-screen instructions to finish updating the software. Other functions Using an AUX source Up to two auxiliary devices such as VCR or portable devices (sold separately) can be connected to this unit. When connected, auxiliary devices are automatically read as AUX sources and assigned to AUX1 or AUX2. The relationship between AUX1 and AUX2 sources is explained below. About AUX1 and AUX2 There are two methods to connect auxiliary devices to this unit. AUX1 source: When connecting auxiliary device using a stereo mini plug cable % Insert the stereo mini plug into the AUX input jack. For more details, refer to the installation manual. This auxiliary device is automatically set to AUX1. 16 En AUX2 source: When connecting an auxiliary device using an IPBUS-RCA Interconnector (sold separately) % Use an IP-BUS-RCA Interconnector such as the CD-RB20/CD-RB10 (sold separately) to connect this unit to an auxiliary device featuring RCA output. For more details, refer to the IP-BUS-RCA Interconnector owner's manual. This auxiliary device is automatically set to AUX2. # This type of connection can only be made if the auxiliary device has RCA outputs. Basic operations The functions allocated to the following operations will differ depending on the connected external unit. For details concerning these functions, refer to the owner's manual for the connected external unit. % Press BAND/ . % Press and hold BAND/ . % Turn LEVER. % Turn and hold down LEVER. Selecting AUX as the source % Press or . % Press SRC/OFF to select AUX as the source. # AUX cannot be selected unless the auxiliary setting is turned on. For more details, refer to AUX1/ AUX2 (auxiliary input setting) on the previous page. Using an external unit An external unit refers to a Pioneer product, such as those which will be available in the future. Although incompatible as a source, the basic functions of up to two external units can be controlled with this unit. When two external units are connected, the external units are automatically allocated to external unit 1 or external unit 2. The basic operations of the external unit are explained below. The allocated functions will differ depending on the connected external unit. For details concerning these functions, refer to the owner's manual for the external unit. Using the functions allocated to 1 to 6 keys 1 Press (list). 2 Use M.C. to select Key 1 to Key 6. Turn to change Key 1 to Key 6 and press. Advanced operations 1 Press M.C. to display the main menu. 2 Use M.C. to select FUNCTION. Turn to change the menu option. Press to select. 3 Turn M.C. to select the function. Function1 (function 1)-Function2 (function 2) -Function3 (function 3)-Function4 (function 4)-Auto/Manual (auto/manual) 4 Press M.C. to select the desired setting. Selecting the external unit as the source % Press SRC/OFF to select EXT as the source. Using different entertainment displays You can enjoy entertainment displays while listening to each sound source.
-
 1
1 -
2
-
3
-
4
-
5
-
6
-
7
-
8
-
9
-
10
-
 11
11 -
 12
12 -
 13
13 -
 14
14 -
 15
15 -
 16
16 -
 17
17 -
 18
18 -
 19
19 -
 20
20 -
 21
21 -
22
-
23
-
24
-
25
-
26
-
27
-
28
-
29
-
30
-
31
-
32
-
33
-
34
-
35
-
36
-
37
-
38
-
39
-
40
-
41
-
42
-
43
-
44
-
45
-
46
-
47
-
48
-
49
-
50
-
51
-
52
-
53
-
54
-
55
-
56
-
57
-
58
-
59
-
60
-
61
-
62
-
63
-
64
-
65
-
66
-
67
-
68
-
69
-
70
-
71
-
72
-
73
-
74
-
75
-
76
-
77
-
78
-
79
-
80
-
81
-
82
-
83
-
84
-
85
-
86
-
87
-
88
-
89
-
90
-
91
-
92
-
93
-
94
-
95
-
96
-
97
-
98
-
99
-
100
-
101
-
102
-
103
-
104
-
105
-
106
-
107
-
108
-
109
-
110
-
111
-
112
 |
 |
