Pioneer DEQ 9200 Owners Manual - Page 21
Parts, Identification, Adjusting, Network
 |
UPC - 012562290973
View all Pioneer DEQ 9200 manuals
Add to My Manuals
Save this manual to your list of manuals |
Page 21 highlights
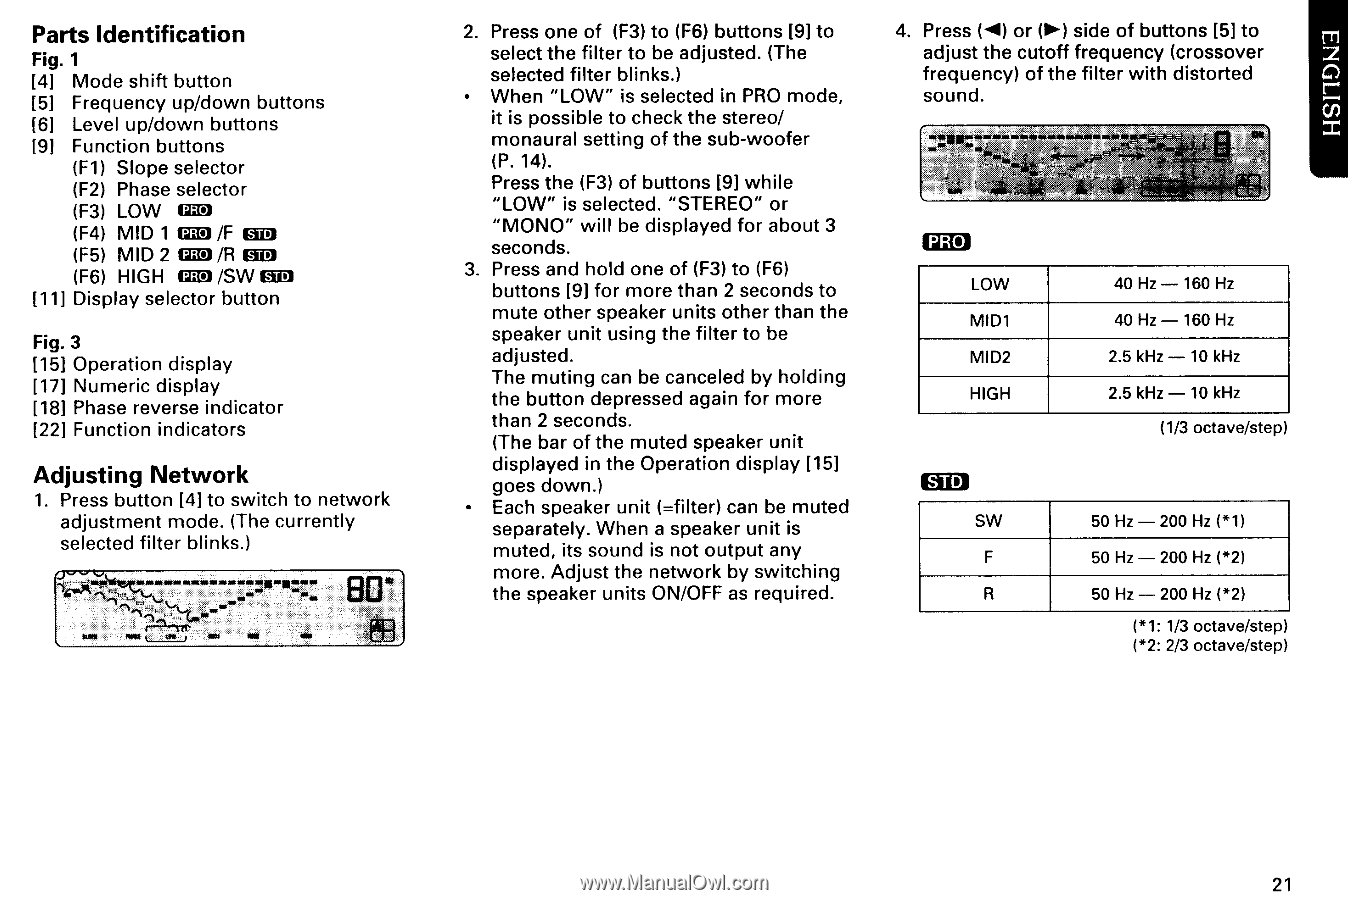
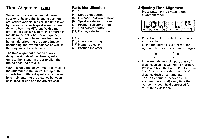
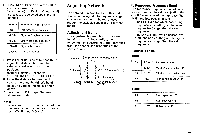
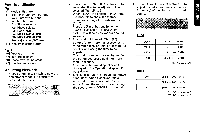
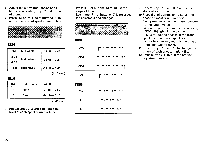
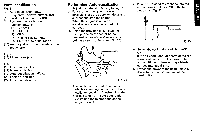
Parts Identification Fig. 1 [4] Mode shift button [5] Frequency up/down buttons [6] Level up/down buttons [9] Function buttons (F1) Slope selector (F2) Phase selector (F3) LOW PRO (F4) MID 1 PRO /F EED (F5) MID 2 PRO /R (F6) HIGH PRO /SW Eirl [11] Display selector button Fig. 3 [15] Operation display [17] Numeric display [18] Phase reverse indicator [22] Function indicators Adjusting Network 1. Press button [4] to switch to network adjustment mode. (The currently selected filter blinks.) WS 2. Press one of (F3) to (F6) buttons [9] to select the filter to be adjusted. (The selected filter blinks.) • When "LOW" is selected in PRO mode, it is possible to check the stereo/ monaural setting of the sub-woofer (P. 14). Press the (F3) of buttons [9] while "LOW" is selected. "STEREO" or "MONO" will be displayed for about 3 seconds. 3. Press and hold one of (F3) to (F6) buttons [9] for more than 2 seconds to mute other speaker units other than the speaker unit using the filter to be adjusted. The muting can be canceled by holding the button depressed again for more than 2 seconds. (The bar of the muted speaker unit displayed in the Operation display [15] goes down.) • Each speaker unit (=filter) can be muted separately. When a speaker unit is muted, its sound is not output any more. Adjust the network by switching the speaker units ON/OFF as required. 4. Press (41) or (►) side of buttons [5] to adjust the cutoff frequency (crossover frequency) of the filter with distorted sound. PRO LOW MIDI MID2 HIGH STD SW F R 40 Hz - 160 Hz 40 Hz - 160 Hz 2.5 kHz - 10 kHz 2.5 kHz - 10 kHz (1/3 octave/step) 50 Hz - 200 Hz (*1) 50 Hz - 200 Hz (*2) 50 Hz - 200 Hz (*2) (*1: 1/3 octave/step) (*2: 2/3 octave/step) 21
-
 1
1 -
2
-
3
-
4
-
5
-
6
-
7
-
8
-
9
-
10
-
11
-
12
-
13
-
14
-
15
-
 16
16 -
 17
17 -
 18
18 -
 19
19 -
 20
20 -
 21
21 -
 22
22 -
 23
23 -
 24
24 -
 25
25 -
 26
26 -
27
-
28
-
29
-
30
-
31
-
32
-
33
-
34
-
35
-
36
-
37
-
38
 |
 |