RCA l26wd26d User Guide & Warranty - Page 9
Connecting the Device with Component Video Advanced, Connecting the Device with Video Basic, Viewing - remote control
 |
UPC - 846042060417
View all RCA l26wd26d manuals
Add to My Manuals
Save this manual to your list of manuals |
Page 9 highlights
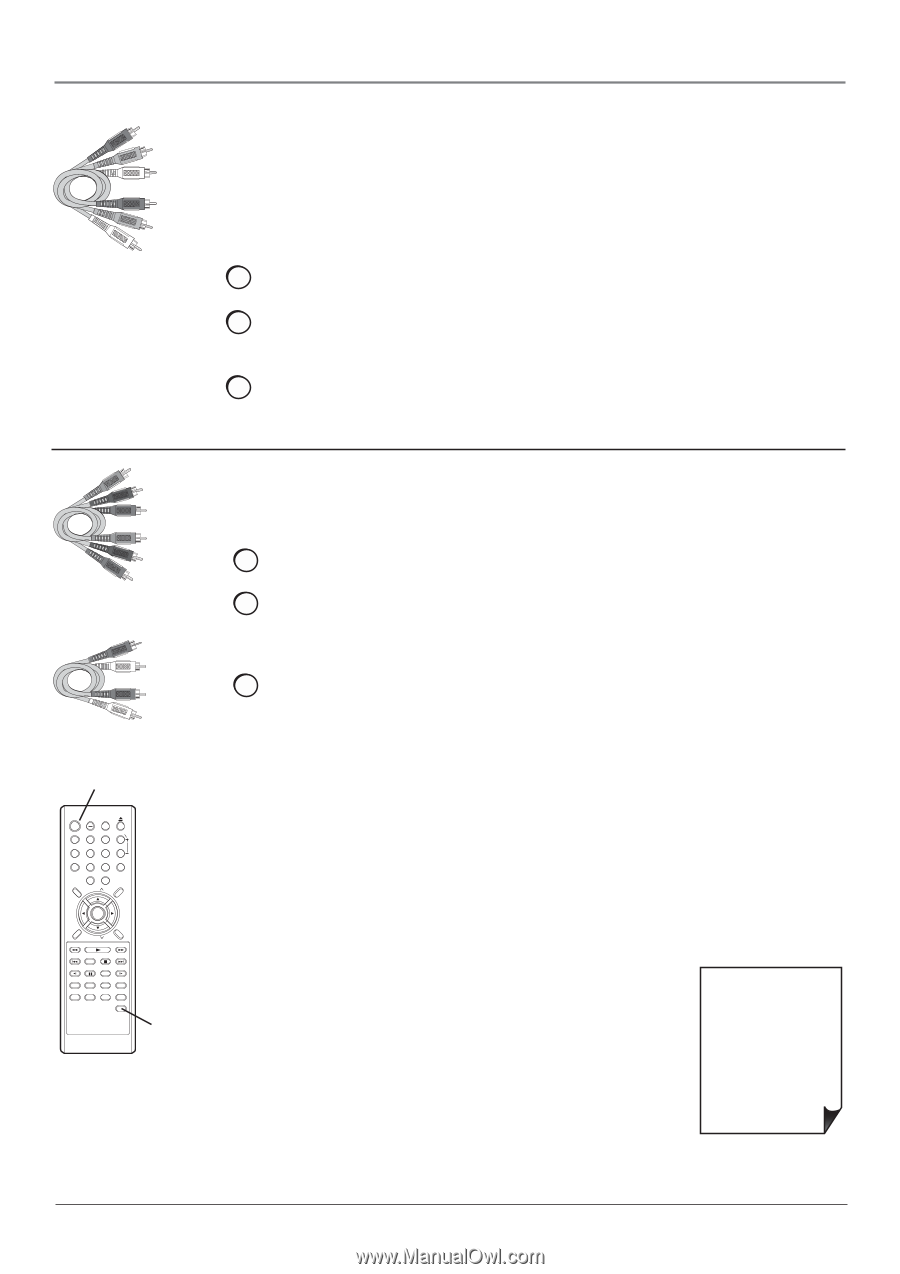
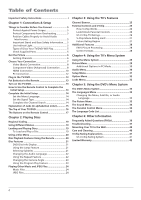
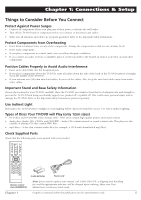
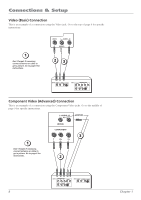
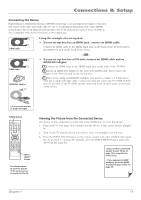
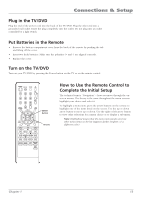
Connections & Setup Red Yellow White Composite cables are color coded- Yellow= video; Red= right audio; white= left audio Green Blue Red Component Video cables (Y Pb Pr) are color codedGreen, Blue and Red Red White Audio cables are color coded- Red= right audio; white= left audio POWER button POWER DISPLAY TV/DVD VOL 1 23 4 7 SETUP/ TV MENU 56 89 SLEEP 0 CH MUTE DVD MENU EXIT/ CANCEL SEARCH ENTER CH PLAY TOP MENU SEARCH SKIP SUBTITLE STOP SKIP SLOW PAUSE/STILL PLAY MODE SLOW AUDIO RETURN REPEAT A-B ANGLE SCREEN SIZE MARKER JUMP QUICK VIEW/ ZOOM INPUT SELECT INPUT SELECT button Use these buttons to view the picture of the device you've connected to the TV. Connecting the Device with Video (Basic) This connection allows you to connect a device that has a Video Out jack, for example, a satellite receiver. Note: If the device you're connecting also has Component Video jacks and you have component video cables, we recommend you use the Component Video (Advanced) Connection instead. See instructions below. Using the example of a satellite receiver: 1. If necessary, connect your cable and/or off-air antenna as described on page 6. 2. Connect your yellow video cable. Connect a video cable to the VIDEO INPUT 1 jack on the back of the TV/DVD and to the Video Output jack on the satellite receiver. 3. Connect your red and white audio cables. Connect the audio (red and white) cables to the AUDIO INPUT 1 R and L jacks on the back of the TV/DVD and to the Audio Output jacks on the satellite receiver. Connecting the Device with Component Video (Advanced) This connection allows you to connect a device that has Y Pb Pr jacks, for example, a satellite receiver. Using the example of a satellite receiver: 1. If necessary, connect your cable and/or off-air antenna as described on page 6. 2. Connect your Y Pb Pr component video cables. Connect three video cables or special Y Pb Pr cables to the COMPONENT (INPUT 3) Y Pb Pr jacks on the back of the TV/DVD and to the Y Pb Pr outputs on the satellite receiver. 3. Connect your red and white audio cables. Connect the audio (red and white) cables to the INPUT 3 AUDIO R and L jacks on the back of the TV/DVD and to the Audio Output jacks on the satellite receiver. Viewing the Picture from the Connected Device 1. Plug in the TV/DVD (see page 13 for details) and the device, if they aren't already plugged in. 2. Turn on the TV and the device you want to view, for example a satellite receiver. 3. Press the INPUT SELECT button on the remote control and select VIDEO1 from the input list (if connected to the VIDEO INPUT 1 jack) or COMPONENT (if connected to the COMPONENT jacks). To go back to viewing TV channels, press the INPUT SELECT button and select ANT from the input list. • If you're done connecting devices to your TV, go to page 14 to complete the Initial Setup. • To continue connecting devices, go to the next page. Chapter 1 9
-
 1
1 -
2
-
3
-
 4
4 -
 5
5 -
 6
6 -
 7
7 -
 8
8 -
 9
9 -
 10
10 -
 11
11 -
 12
12 -
 13
13 -
 14
14 -
15
-
16
-
17
-
18
-
19
-
20
-
21
-
22
-
23
-
24
-
25
-
26
-
27
-
28
-
29
-
30
-
31
-
32
-
33
-
34
-
35
-
36
-
37
-
38
-
39
-
40
-
41
-
42
-
43
-
44
 |
 |