Ricoh Aficio MP 2352SP Administration Guide - Page 15
Overview, SafeCom Go Ricoh hardware installation
 |
View all Ricoh Aficio MP 2352SP manuals
Add to My Manuals
Save this manual to your list of manuals |
Page 15 highlights
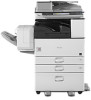
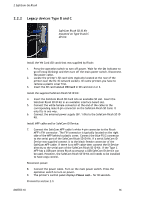
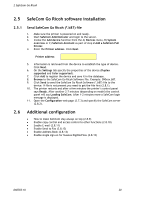
2 SafeCom Go Ricoh 2 SafeCom Go Ricoh 2.1 Overview Make sure the SafeCom G3 Server software installation has been completed as described in theSafeCom Smart Printing Administrator's Quick Guide D10600. 1. SafeCom Go Ricoh hardware installation: Newer devices Type F, H, I, J, K, L, N and O (2.2.1). Legacy devices Type B and C (2.2.2). 2. Increase heap and stack sizes on Ricoh device (2.3). 3. Ricoh Java software installation: Newer devices Type C, F, H, I, J, K, L, N and O (2.4.1). Legacy device Type B (2.4.2). 4. SafeCom Go Ricoh software installation (2.5). 5. Additional configuration (2.6). 2.2 SafeCom Go Ricoh hardware installation Refer to the appropriate section: If the device has Java embedded connect the USB SafeCom ID Device to the device's USB port and proceed to section 2.5. Newer devices Type F, H, I, J, K, L and O (2.2.1). Legacy devices Type B and C (2.2.2). 2.2.1 Newer devices type C, F, H, I, J, K, L, N and O Install the VM Card (SD card) that was supplied by Ricoh: 1. Press the operation switch to turn off power. Wait for the On indicator to go off (stop blinking) and then turn off the main power switch. Disconnect the power cable. 2. Locate the printer's SD card slots (typically located at the rear of the printer near the RJ-45 network socket). On some printers you have to remove a plastic cover first. 3. Insert the SD card labeled VM Card in SD card slot 2 or 3. Install SafeCom ID Device: 4. Connect the USB SafeCom ID Device to the device's USB port. Reconnect power: 5. Connect the power cable. Turn on the main power switch. Press the operation switch to turn on power. 6. The printer's control panel displays Please wait... for 30 seconds. Proceed to section 2.3. D60703-16 15
-
 1
1 -
2
-
3
-
4
-
5
-
6
-
7
-
8
-
9
-
 10
10 -
 11
11 -
 12
12 -
 13
13 -
 14
14 -
 15
15 -
 16
16 -
 17
17 -
 18
18 -
 19
19 -
 20
20 -
21
-
22
-
23
-
24
-
25
-
26
-
27
-
28
-
29
-
30
-
31
-
32
-
33
-
34
-
35
-
36
-
37
-
38
-
39
-
40
-
41
-
42
-
43
-
44
-
45
-
46
-
47
-
48
-
49
-
50
-
51
-
52
-
53
-
54
-
55
-
56
-
57
-
58
-
59
-
60
-
61
 |
 |