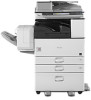
Ricoh Aficio MP 2352SP Administration Guide - Page 20
SafeCom Go Ricoh software installation, Additional configuration
 |
View all Ricoh Aficio MP 2352SP manuals
Add to My Manuals
Save this manual to your list of manuals |
Page 20 highlights
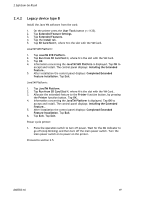
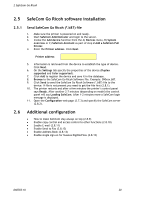
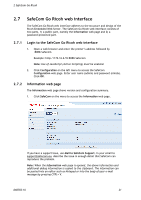
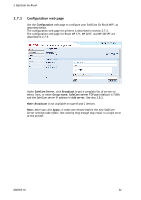
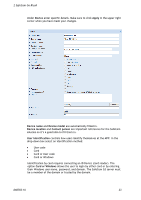
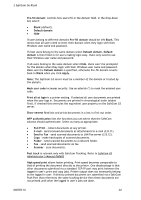
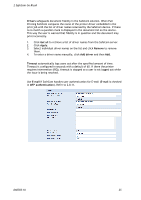
2 SafeCom Go Ricoh 2.5 SafeCom Go Ricoh software installation 2.5.1 Send SafeCom Go Ricoh (*.b87) file 1. Make sure the printer is powered on and ready. 2. Start SafeCom Administrator and login to the server. 3. Invoke the Add device function from the A) Devices menu, B) System overview or C) SafeCom Assistant as part of step 2 Add a SafeCom Pull Printer. 4. Enter the Printer address. Click Next. Printer address: 5. Information is retrieved from the device to establish the type of device. Click Next. 6. On the Settings tab specify the properties of the device (Duplex supported and Color supported). 7. Click Add to register the device and save it in the database. 8. Browse to the SafeCom Go Ricoh Software file. Example: 090xxx.b87. 9. Click Send to send the SafeCom Go Ricoh Software (*.b87) file to the device. If file is not present you need to get the file first (2.8.1). 10. The printer restarts and after a few minutes the printer's control panel says Ready. After another 2-7 minutes (depending on model) the control panel will say Loading SafeCom. After 1-2 minutes more a SafeCom login message is displayed. 11. Open the Configuration web page (2.7.3) and specify the SafeCom server (2.8.2). 2.6 Additional configuration How to make SafeCom stay always on top (2.8.9) Enable copy control and access control to other functions (2.8.10) Enable E-mail (2.8.11) Enable Send to Fax (2.8.12) Enable Address Book (2.8.13) Enable single sign-on for Nuance DigiDocFlow (2.8.15) D60703-16 20
-
 1
1 -
2
-
3
-
4
-
5
-
6
-
7
-
8
-
9
-
10
-
11
-
12
-
13
-
14
-
 15
15 -
 16
16 -
 17
17 -
 18
18 -
 19
19 -
 20
20 -
 21
21 -
 22
22 -
 23
23 -
 24
24 -
 25
25 -
26
-
27
-
28
-
29
-
30
-
31
-
32
-
33
-
34
-
35
-
36
-
37
-
38
-
39
-
40
-
41
-
42
-
43
-
44
-
45
-
46
-
47
-
48
-
49
-
50
-
51
-
52
-
53
-
54
-
55
-
56
-
57
-
58
-
59
-
60
-
61
 |
 |