Ricoh Aficio SP 1200SF Quick Installation Guide - Page 24
Selecting a receive mode, Setting the phone line type (For EU model), Manual, Fax Only, Fax/Tel
 |
View all Ricoh Aficio SP 1200SF manuals
Add to My Manuals
Save this manual to your list of manuals |
Page 24 highlights
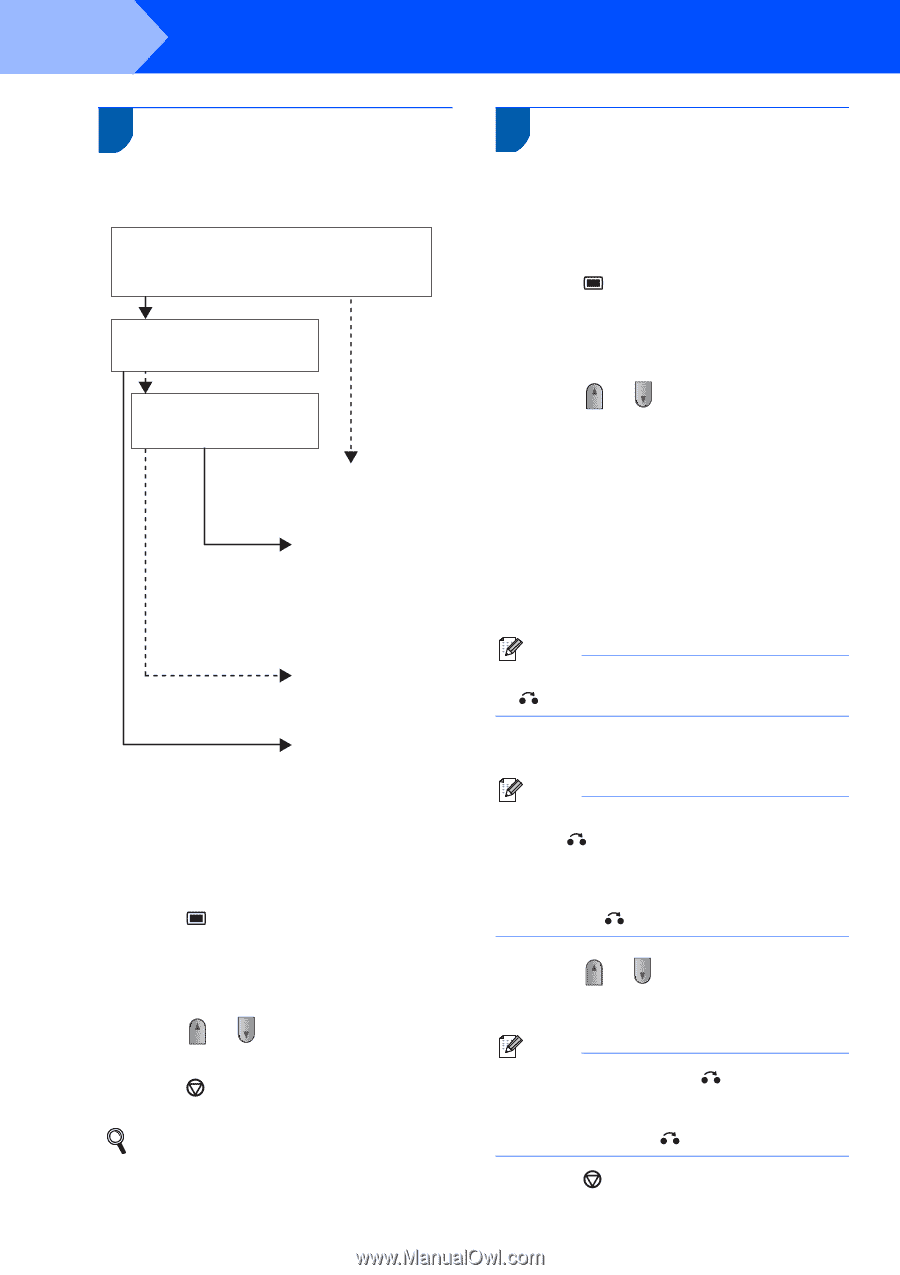
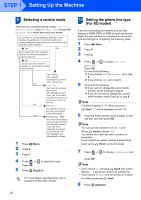
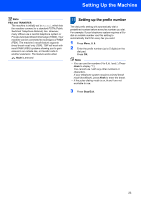
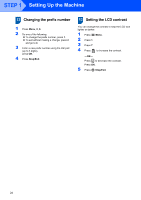
STEP 1 Setting Up the Machine 9 Selecting a receive mode There are four possible receive modes: Fax Only, Fax/Tel, Manual and External TAD. Choose the Receive Mode which best suits your needs. Do you want to use the telephone features of your machine (if available) or an external telephone or external telephone answering device connected on the same line as the machine? Yes No Are you using the voice message function of an external telephone answering device? No Do you want the machine to answer fax and telephone calls automatically? Fax Only Your machine automatically answers every call as a fax. Yes Fax/Tel Your machine controls the line and automatically answers every call. If the call is not a fax, the phone will ring for you to pick up the call. No Manual You control the phone line and must answer every call yourself. Yes External TAD Your external telephone answering device (TAD) automatically answers every call. Voice messages are stored on the external TAD. Fax messages are automatically printed. 1 Press Menu. 2 Press 0. 3 Press 1. 4 Press or to select the mode. Press OK. 5 Press Stop/Exit. For more details, see Receiving a fax in Chapter 6 of the User's Guide. 22 10 Setting the phone line type (For EU model) If you are connecting the machine to a line that features a PABX (PBX) or ISDN to send and receive faxes, it is also necessary to change the phone line type accordingly by completing the following steps. 1 Press Menu. 2 Press 0. 3 Press 6. 4 Press or to choose PBX, ISDN or Normal. Press OK. Do one of the following: If you choose ISDN or Normal, go to step 8. If you choose PBX, go to step 5. 5 Do one of the following: If you want to change the current prefix number, press 1 and go to step 6. If you do not want to change the current prefix number, press 2 and go to step 8. Note The default setting is "!". When you press Hook, "!" will be displayed on the LCD. 6 Enter the Prefix number (up to 5 digits) on the dial pad, and then press OK. Note You can use the number 0 to 9 , # , l and !. (Press Hook to display "!".) You cannot use ! with any other numbers or characters. If your telephone system requires a timed break recall, press Hook to enter the break. 7 Press or to choose On or Always and press OK. Note • If you choose On, pressing Hook (the screen displays "!") will let you access an outside line. • If you choose Always, you can access an outside line without pressing Hook. 8 Press Stop/Exit.
-
 1
1 -
2
-
3
-
4
-
5
-
6
-
7
-
8
-
9
-
10
-
11
-
12
-
13
-
14
-
15
-
16
-
17
-
18
-
 19
19 -
 20
20 -
 21
21 -
 22
22 -
 23
23 -
 24
24 -
 25
25 -
 26
26 -
 27
27 -
 28
28 -
 29
29 -
30
-
31
-
32
-
33
-
34
-
35
-
36
 |
 |